Exercise 2: Creating a Basic Web App Using the Azure Portal
In this exercise, you will create a basic web app using the Azure portal. This will give you a good overview of all the steps and elements needed for this process:
- Navigate to Create a resource in the portal and select Web App or directly use this URL: https://portal.azure.com/#create/Microsoft.WebSite.
- Make sure you have the correct subscription and resource group selected (or create a new one). Enter a globally unique web app name and select the Code radio button next to Publish.
- Select .NET 6.0 (LTS) for Runtime stack and Linux for the Operating System option and select the appropriate region from the Region dropdown.
Notice that the Linux App Service plan has already been selected for you in the Linux Plan field and that you can’t select the Windows one, despite it being in the same subscription and region (the resource group doesn’t matter).
Although we’re using pre-created App Service plans, notice that you can create a new one at this point. If you were to use the az webapp up (don’t do it right now) CLI command, it would automatically create a new resource group, App Service plan, and web app.
- Progress to the Deployment screen and notice the settings available. At the time of writing, the only option available on this screen is GitHub Actions, but you do get more options within the Deployment Center area of the app once created.
- Continue through the wizard and create the web app. Once completed, go to the resource.
- From the Overview blade, notice that App Service Plan is listed under the Essentials section.
- Navigate to the Deployment Center area and view the Continuous Deployment (CI/CD) options that are available in addition to GitHub under the Source dropdown.
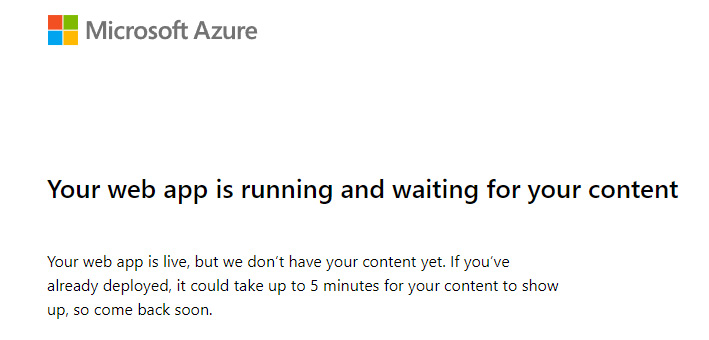
- Back to the Overview blade, select Browse to open the web app in your browser. You will be presented with the generic starter page:

Figure 2.7: Web app starter page content
- Create a Windows web app with the following CLI command:
az webapp create -n "<globally unique name>" -g "<resource group>" --plan "<name of the Windows App Service plan previously created>"
Alternatively, use the following PowerShell command:
New-AzWebApp -Name "<globally unique app name>" -ResourceGroupName "<resource group>" -AppServicePlan "<name of the Windows App Service plan previously created>"
A location isn’t required here since it will inherit from the App Service plan (App Service plans will only be available within the same subscription and region).
With that, you’ve created some App Service plans and web apps. Now, you can deploy some very basic code to one of your web apps.
- If you haven’t already cloned the code repository for this book, do so now from an appropriate directory by using the following command:
git clone https: //github. com/PacktPublishing/Developing-Solutions-for-Microsoft-Azure-AZ-204-Exam-Guide-2nd-Edition
Feel free to either work from the
Chapter02\01-hello-worlddirectory or create a new folder and copy the contents to it. - Change the terminal directory to the correct directory.
- Deploy this basic static HTML application to the Windows web app and launch it in the default browser using the following CLI command:
az webapp up -n "<name of the Windows web app>" --html -b
Here, you added the
-b(the short version of--launch-browser) argument to open the app in the default browser after launching, but you don’t need to. It just saves time because you should browse to it now anyway. Using the--htmlargument ignores any app detection and just deploys the code as a static HTML app. - Make an arbitrary change to some of the contents of the
index.htmlfile and run the same CLI command to update and browse to your updated application. - Optionally, to save on costs and keep things simple, go to the Azure portal and delete the Windows App Service and the Windows App Service plan with it.
You will only be using the Linux App Service for the rest of this chapter, so the Windows one is no longer required unless you want to compare the experience between Windows and Linux apps as you go along.
That was about as simple as it gets. We’re not going to run through every different type of deployment (using a Git repository, for example), but feel free to check out the Microsoft documentation on that.
At the moment, anybody with a browser and an internet connection could access your web app if they had the URL. Now, let’s explore how authentication and authorization work with App Service so that you can require users to authenticate before being able to view our new web app.
Authentication and Authorization
Many web frameworks have authentication (signing users in) and authorization (providing access to those who should have access) features bundled with them, which could be used to handle our application’s authentication and authorization. You could even write tools to handle them if you’d like the most control. As you may imagine, the more you handle yourself, the more management you need to do. You should keep your security solution up to date with the latest updates, for example.
With App Service, you can make use of its built-in authentication and authorization capabilities so that users can sign in and use your app by writing minimal code (or none at all if the out-of-the-box features give you what you need). App Service uses federated identity, which means that a third-party identity provider (Google, for example) manages the user accounts and authentication flow, and App Service gets the resulting token for authorization. This built-in no-code authentication is often referred to as easy auth.
Rest assured that more detail and context on authentication and authorization will be covered in Chapter 7, Implementing User Authentication and Authorization. This chapter only scratches the surface of the topic in the context of App Service.
Authentication and Authorization Module
Once you enable the authentication and authorization module (which you will shortly), all incoming HTTP requests will pass through it before being handled by your application. The module does several things for you:
- Authenticates users with the identity provider
- Validates, stores, and refreshes the tokens
- Manages the authenticated sessions
- Injects identity information into the request headers
On Windows App Service apps, the module runs as a native IIS module in the same sandbox as your application code. On Linux and container apps, the module runs in a separate container, isolated from your code. Because the module doesn’t run in-process, there’s no direct integration with specific language frameworks, although the relevant information your app may need is passed through using request headers. This is a good time for the authentication flow to be explained.
Authentication Flow
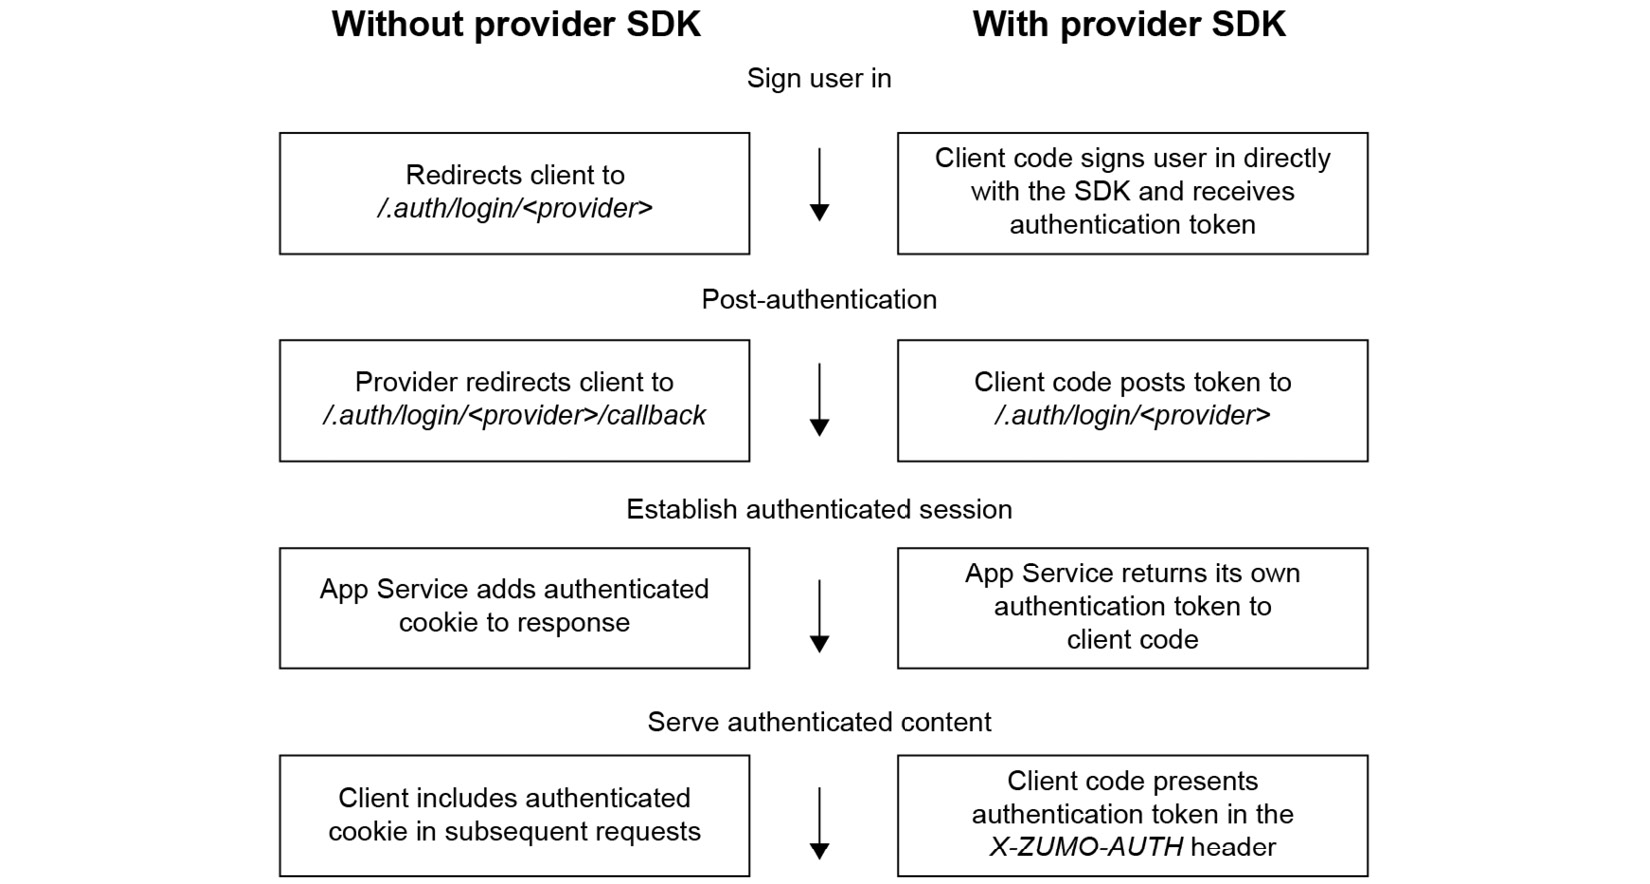
It’s useful to understand, at least to some extent, what the authentication flow looks like with App Service, which is the same regardless of the identity provider, although this may be different depending on whether or not you sign in with the identity provider’s SDK. With the provider’s SDK, the code handles the sign-in process and is often referred to as client flow; without the identity provider’s SDK, App Service handles the sign-in process and is often referred to as server flow. We’ll discuss some of the theory first, before checking it out in practice.
The first thing to note is that the different identity providers will have different sign-in endpoints. The format of those endpoints is as follows: <AppServiceURL>/.auth/login/<provider>. Here are a few examples of some identity providers:
- Microsoft identity platform:
<AppServiceURL>/.auth/login/aad - Facebook:
<AppServiceURL>/.auth/login/facebook - Google:
<AppServiceURL>/.auth/login/google
The following diagram illustrates the different steps of the authentication flow, both using and not using the provider SDKs:

Figure 2.8: Authentication flow steps
To summaries this flow, once the identity provider successfully authenticates you, it will redirect your browser session to what is called the redirect URI (also referred to as the callback address). When the provider redirects your browser to the redirect URI, it will also send any relevant tokens so that your app can obtain information about your identity.
Once your browser session has been redirected with the token as a payload, App Service will provide you with an authenticated cookie, which your browser will then use in any subsequent requests to the app (we’ll look at this step by step shortly).
You can configure the behavior of App Service when incoming requests aren’t authenticated. If you allow unauthenticated requests, unauthenticated traffic gets deferred to your application, and authenticated traffic gets passed along by App Service with the authentication information in the HTTP headers. If you set App Service to require authentication, any unauthenticated traffic gets rejected without being passed to your application. The rejection can be a redirect to /.auth/login/<provider> for whichever provider you choose. You can also select the rejection response for all requests. For web apps, that will often be a 302 Found redirect.


