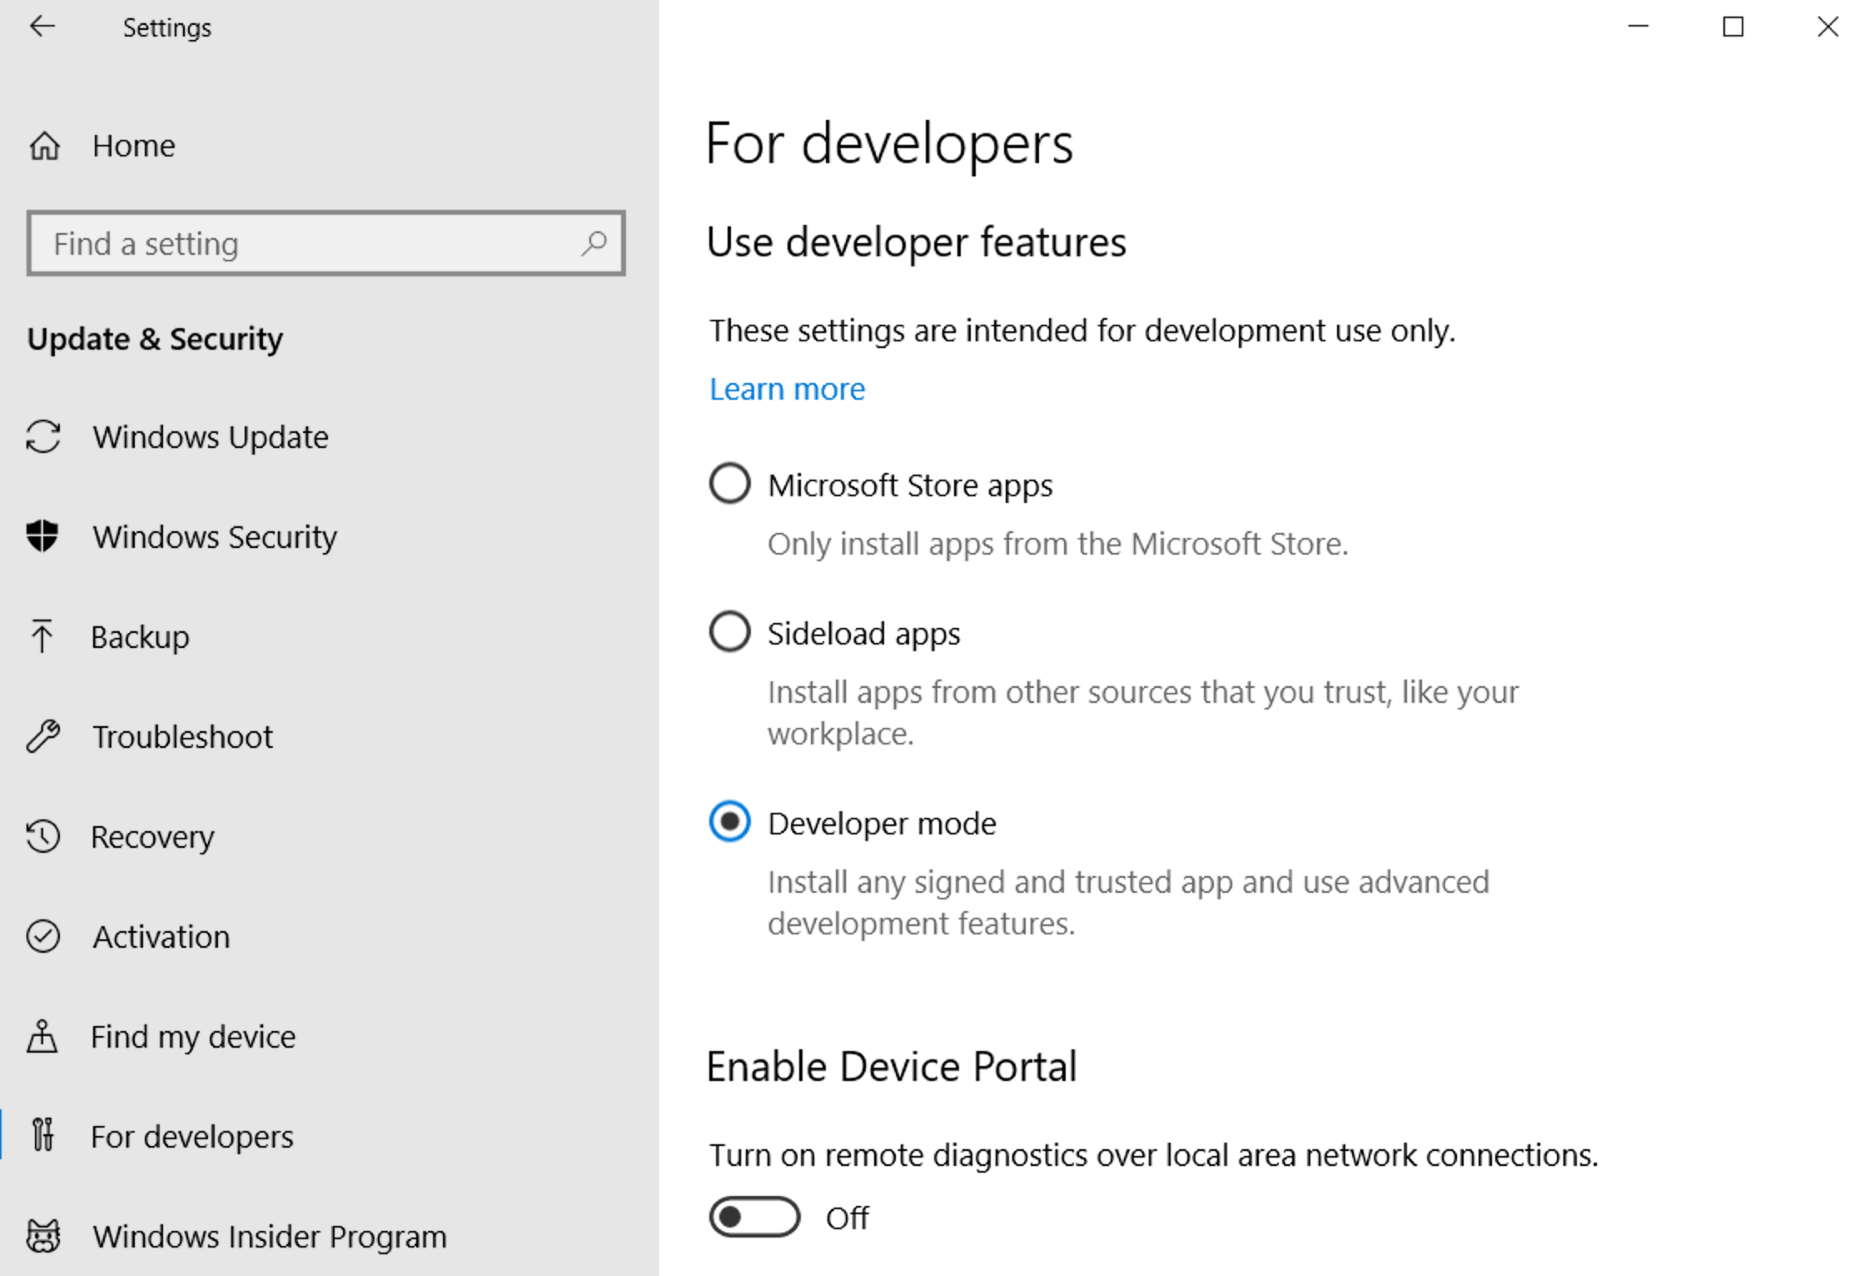
If we want a fast Android emulator that works smoothly, we need to enable hardware acceleration. This can be done using either Intel HAXM or Hyper-V. The disadvantage of Intel HAXM is that it can't be used on machines with an Advanced Micro Devices (AMD) processor; you have to have a machine with an Intel processor. We can't use Intel HAXM in parallel with Hyper-V.
For these reasons, Hyper-V is the preferred way to hardware accelerate the Android emulator on a Windows machine. To use Hyper-V with the Android emulator, we need to have the April 2018 update (or later) for Windows and Visual Studio version 15.8 (or later) installed. To enable Hyper-V, you need to go through the following steps:
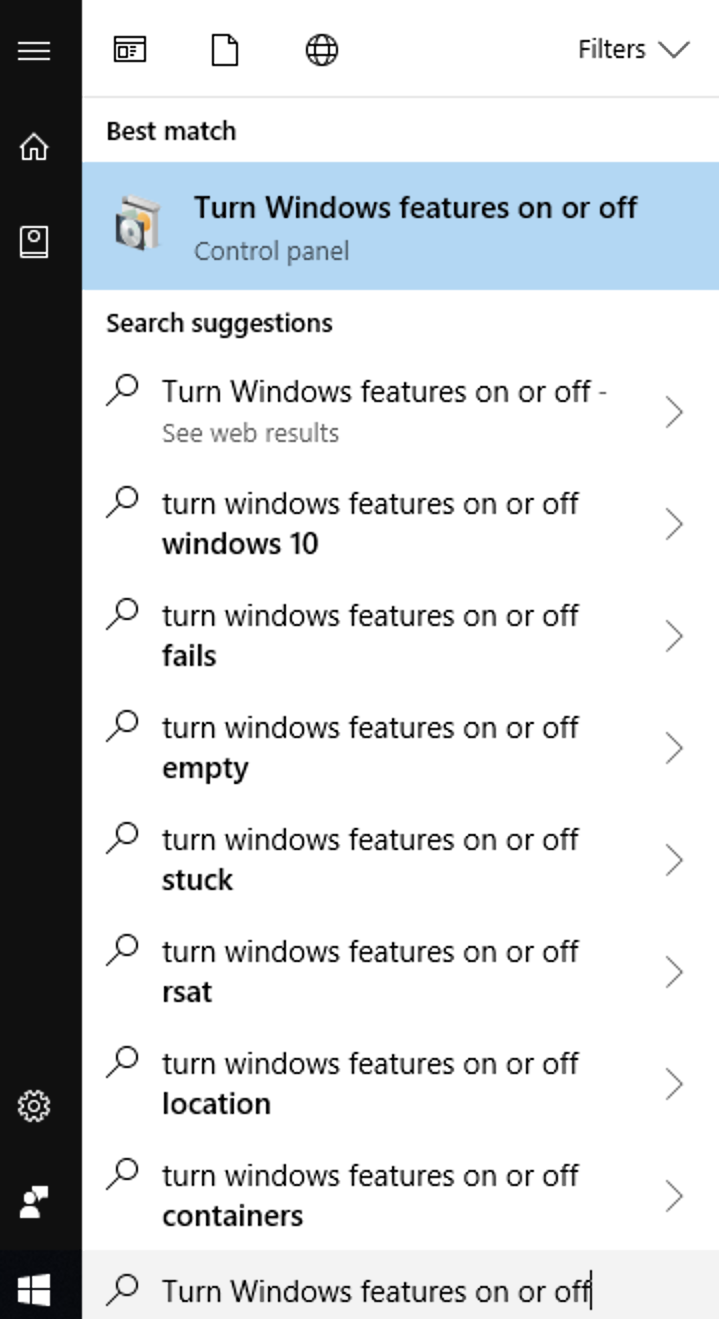
- Open the Start menu and type Turn Windows features on or off. Click the option that appears to open it, as shown in the following screenshot:
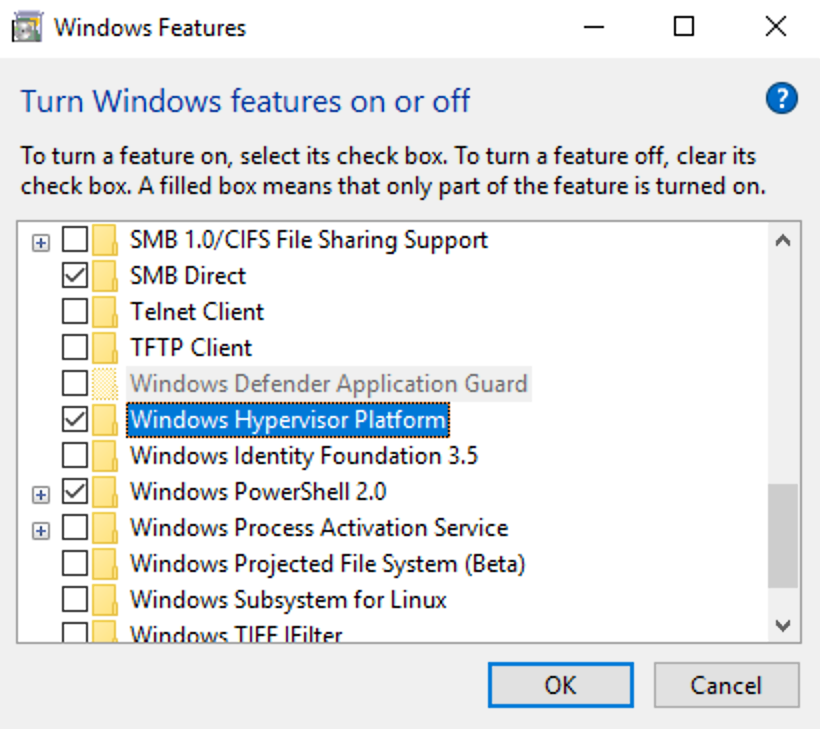
- To enable Hyper-V, select the Hyper-V checkbox. Also, expand the Hyper-V option and check the Hyper-V Platform checkbox. We also need to select the Windows Hypervisor Platform checkbox, as shown in the following screenshot:
- Restart the machine when Windows prompts you to.
Because we didn't install an Android emulator during the installation of Visual Studio, we need to install it now. Go to the Tools menu in Visual Studio, click on Android, and then Android SDK Manager.
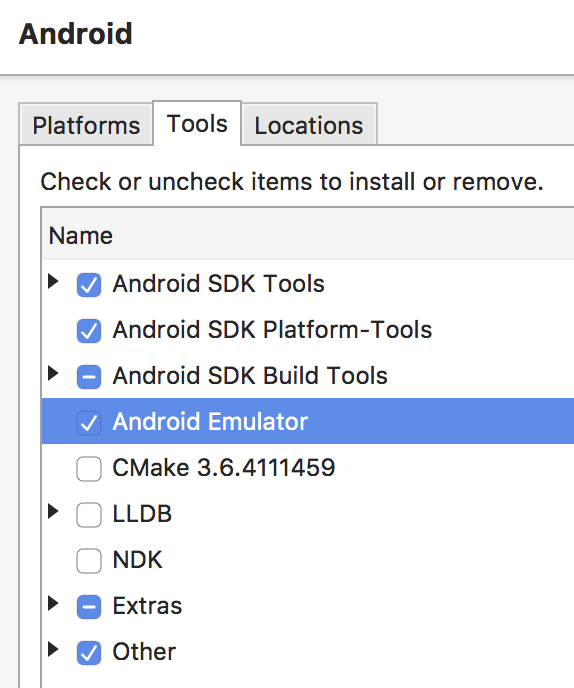
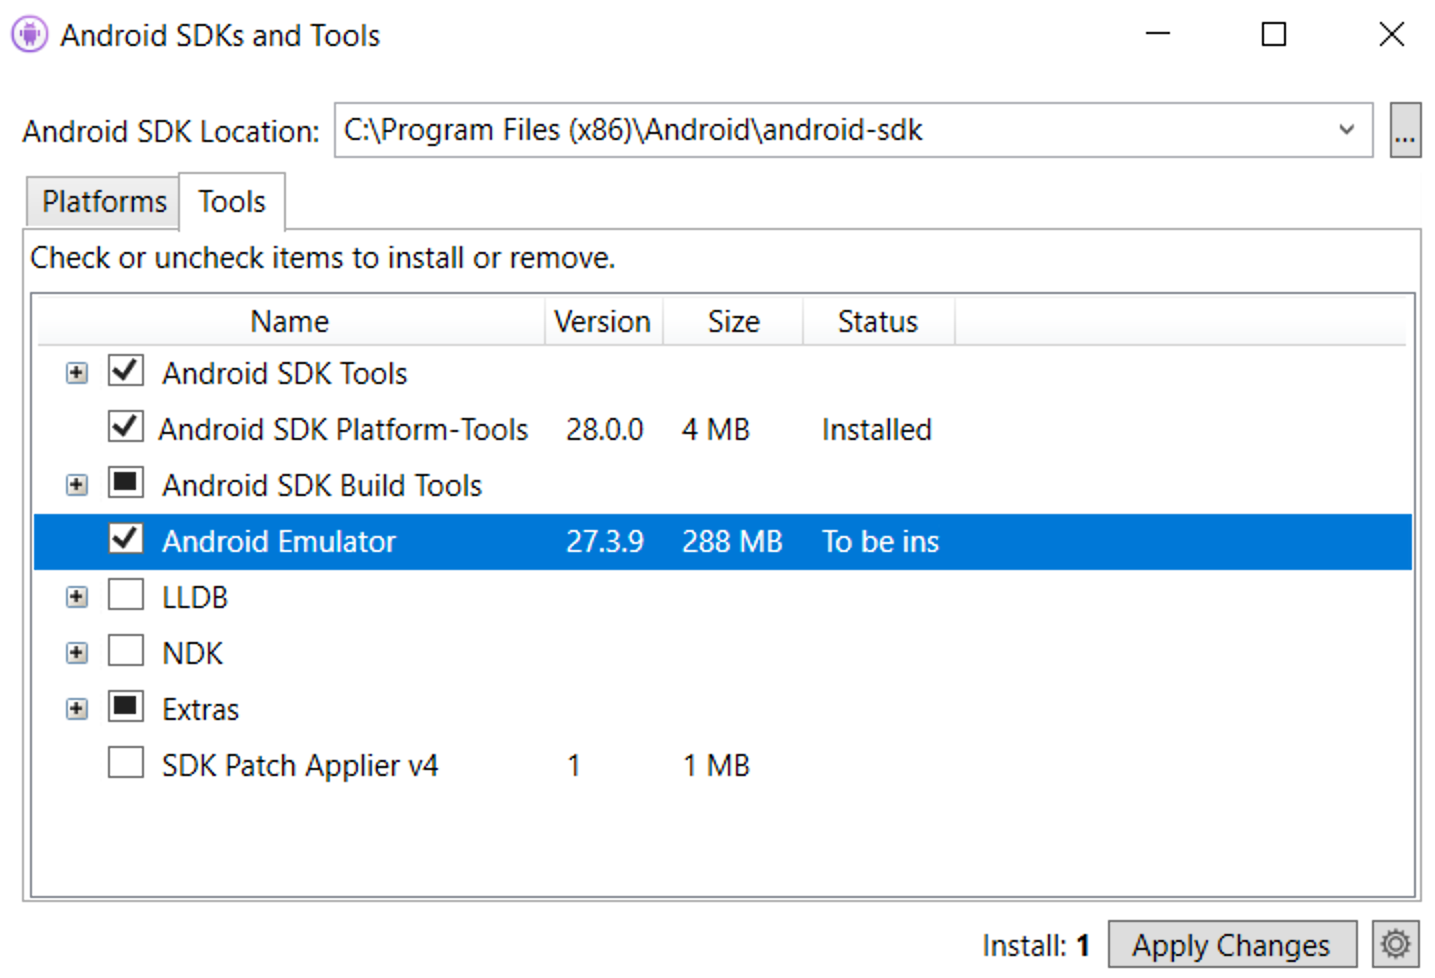
Under Tools in Android SDK Manager, we can install the emulator by selecting Android Emulator, as shown in the following screenshot. Also, we should ensure that the latest version of Android SDK Build Tools is installed:
We recommend installing the NDK (Native Development Kit). The NDK makes it possible to import libraries that are written in C or C++. NDK is also required if we want to AOT compile an app.
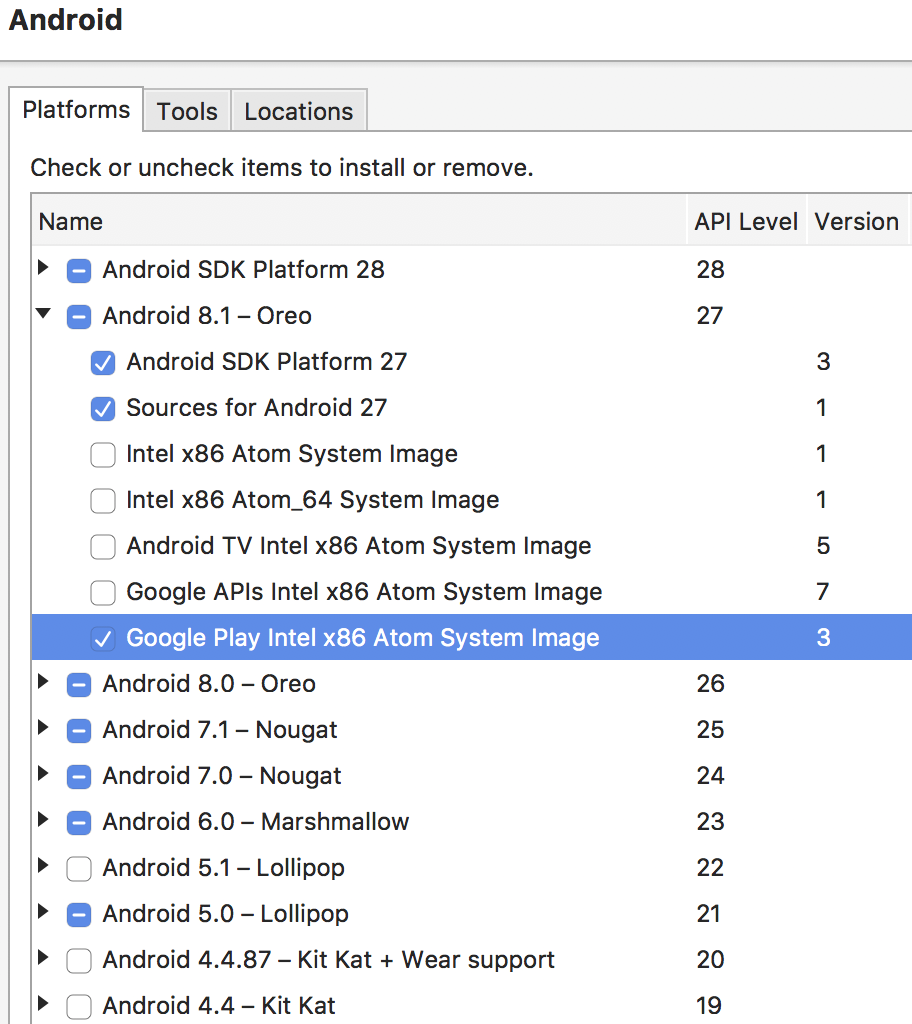
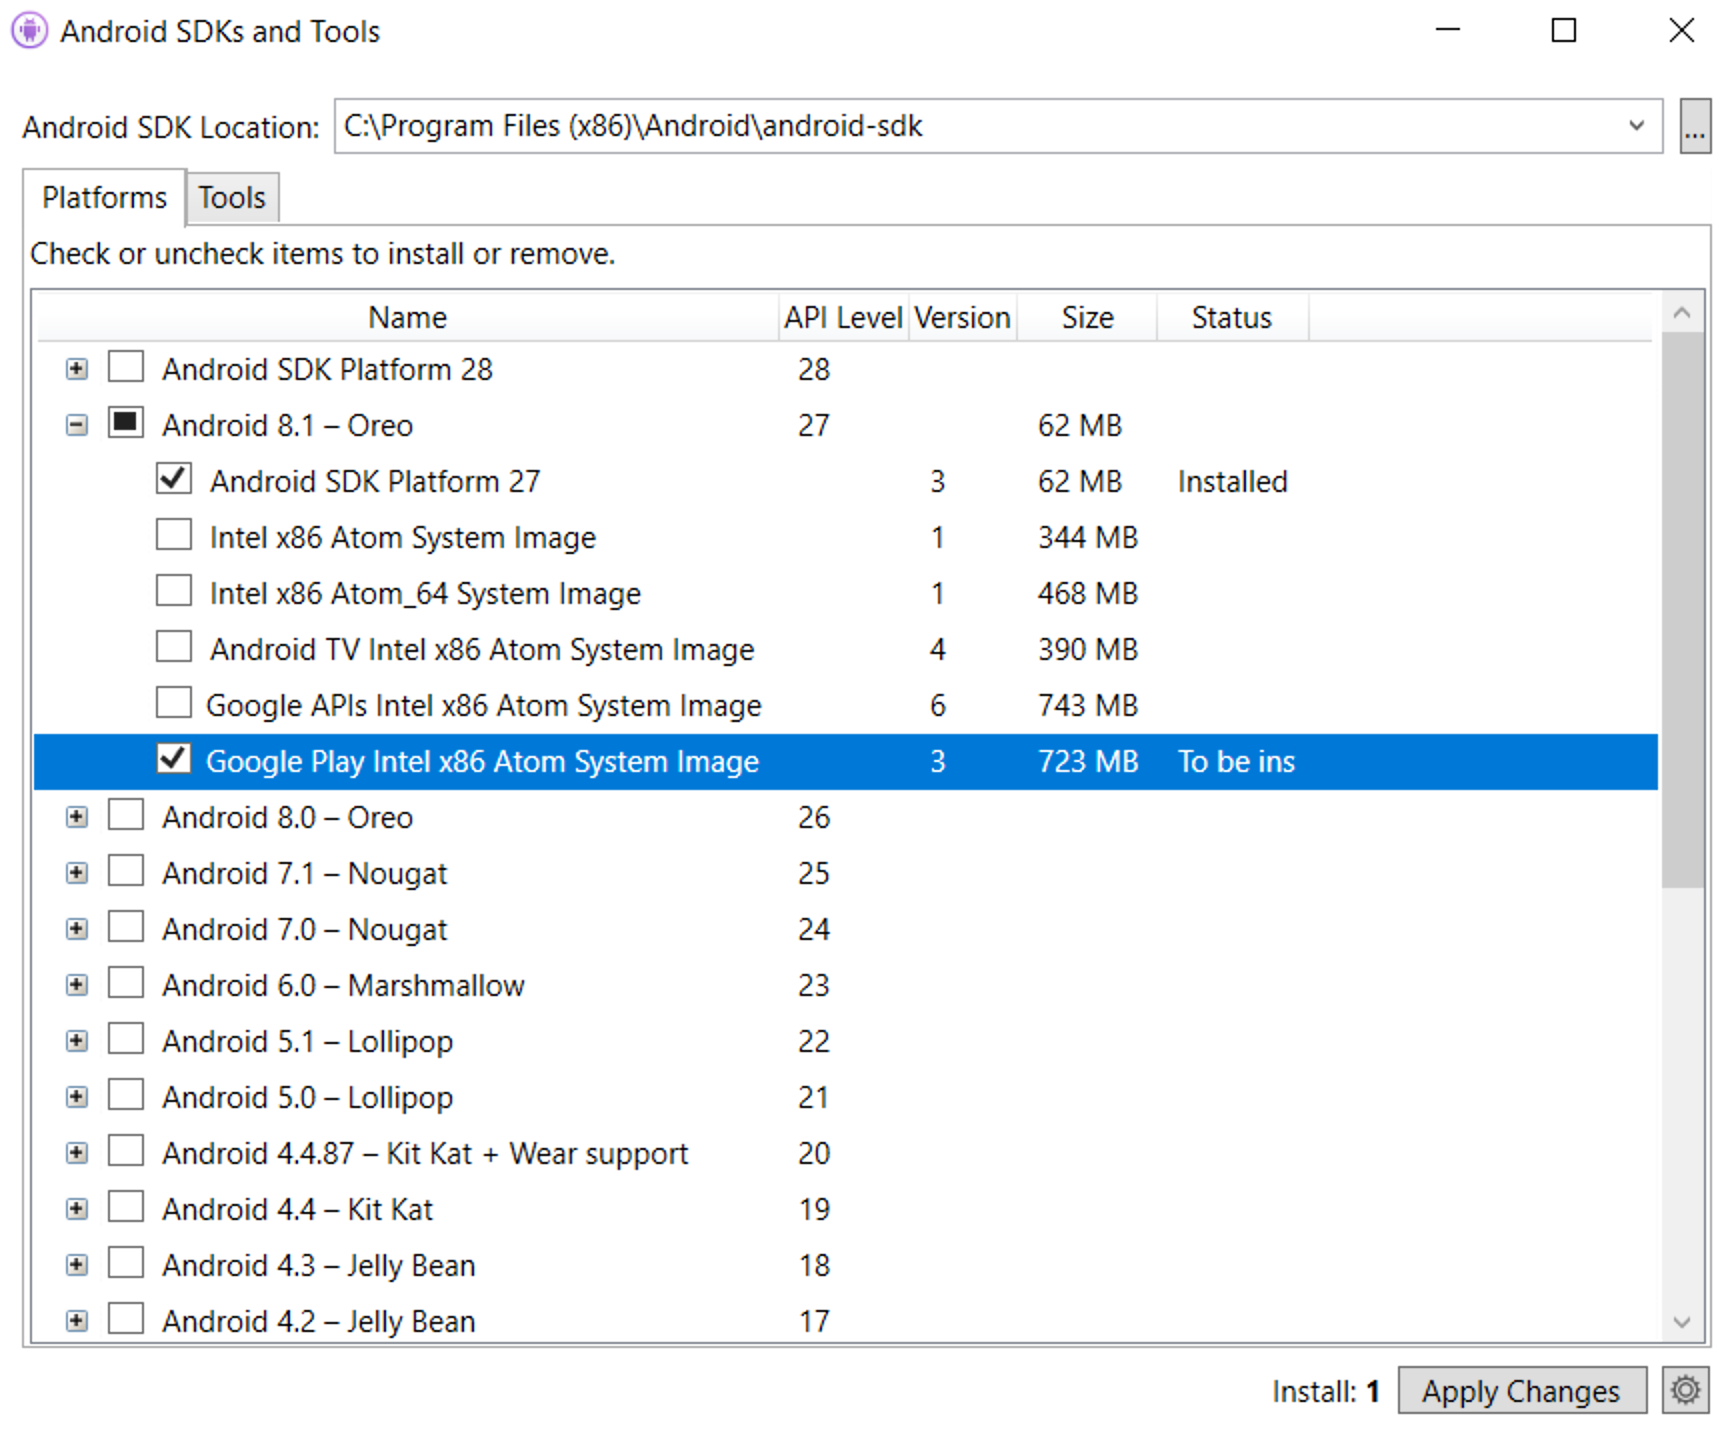
The Android SDK allows for multiple emulator images to be installed simultaneously. We can install multiple images if, for example, we want to run our application on different versions of Android. Select emulators with Google Play (as shown in the following screenshot) so we can use Google Play services in our app even when we are running it in an emulator.
This is required if we want to use Google Maps in our app, for example:
The next step is to create a virtual device to use the emulator image. To create and configure an emulator, go to the Android Device Manager, which we will open from the Tools tab in Visual Studio. From the Device Manager, we can either start an emulator—if we already have created one—or we can create new emulators, as shown in the following screenshot:
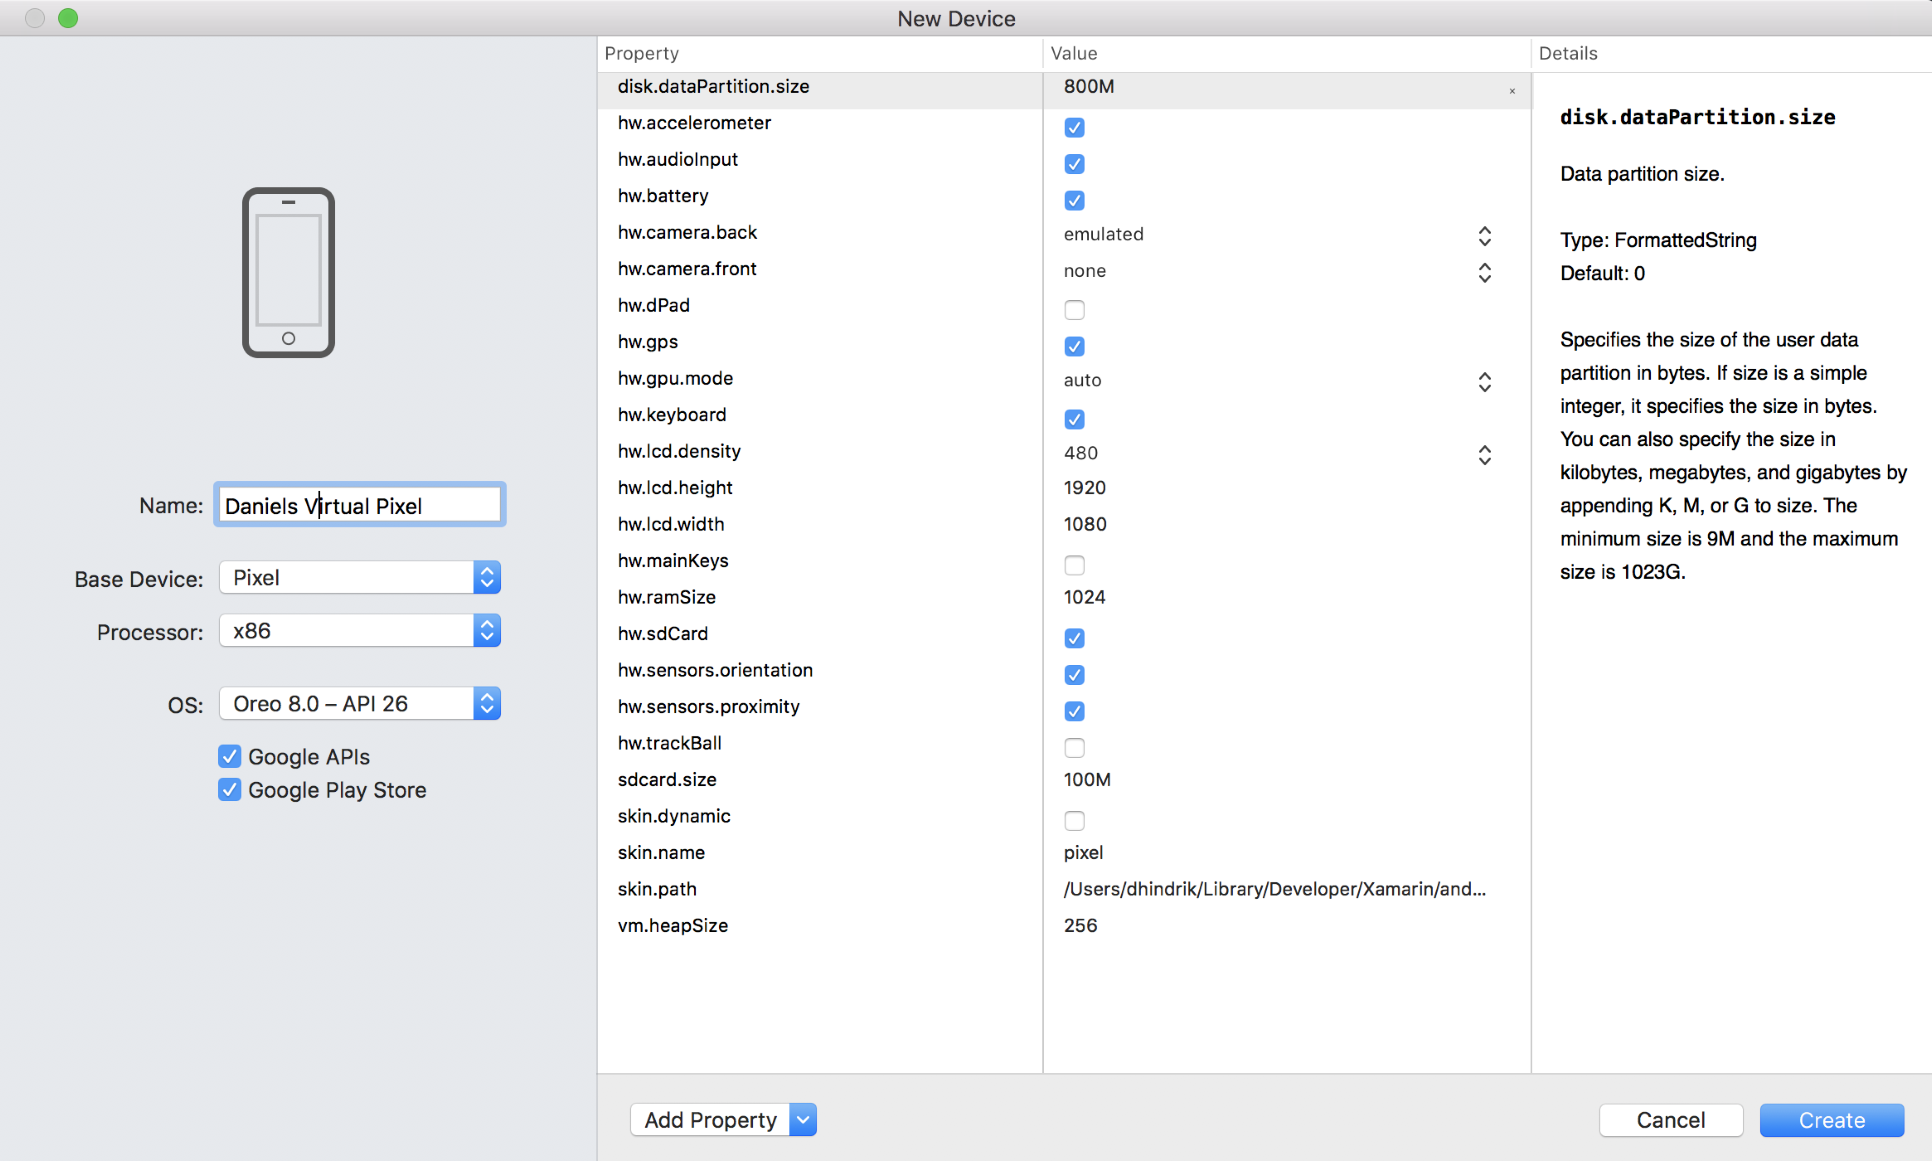
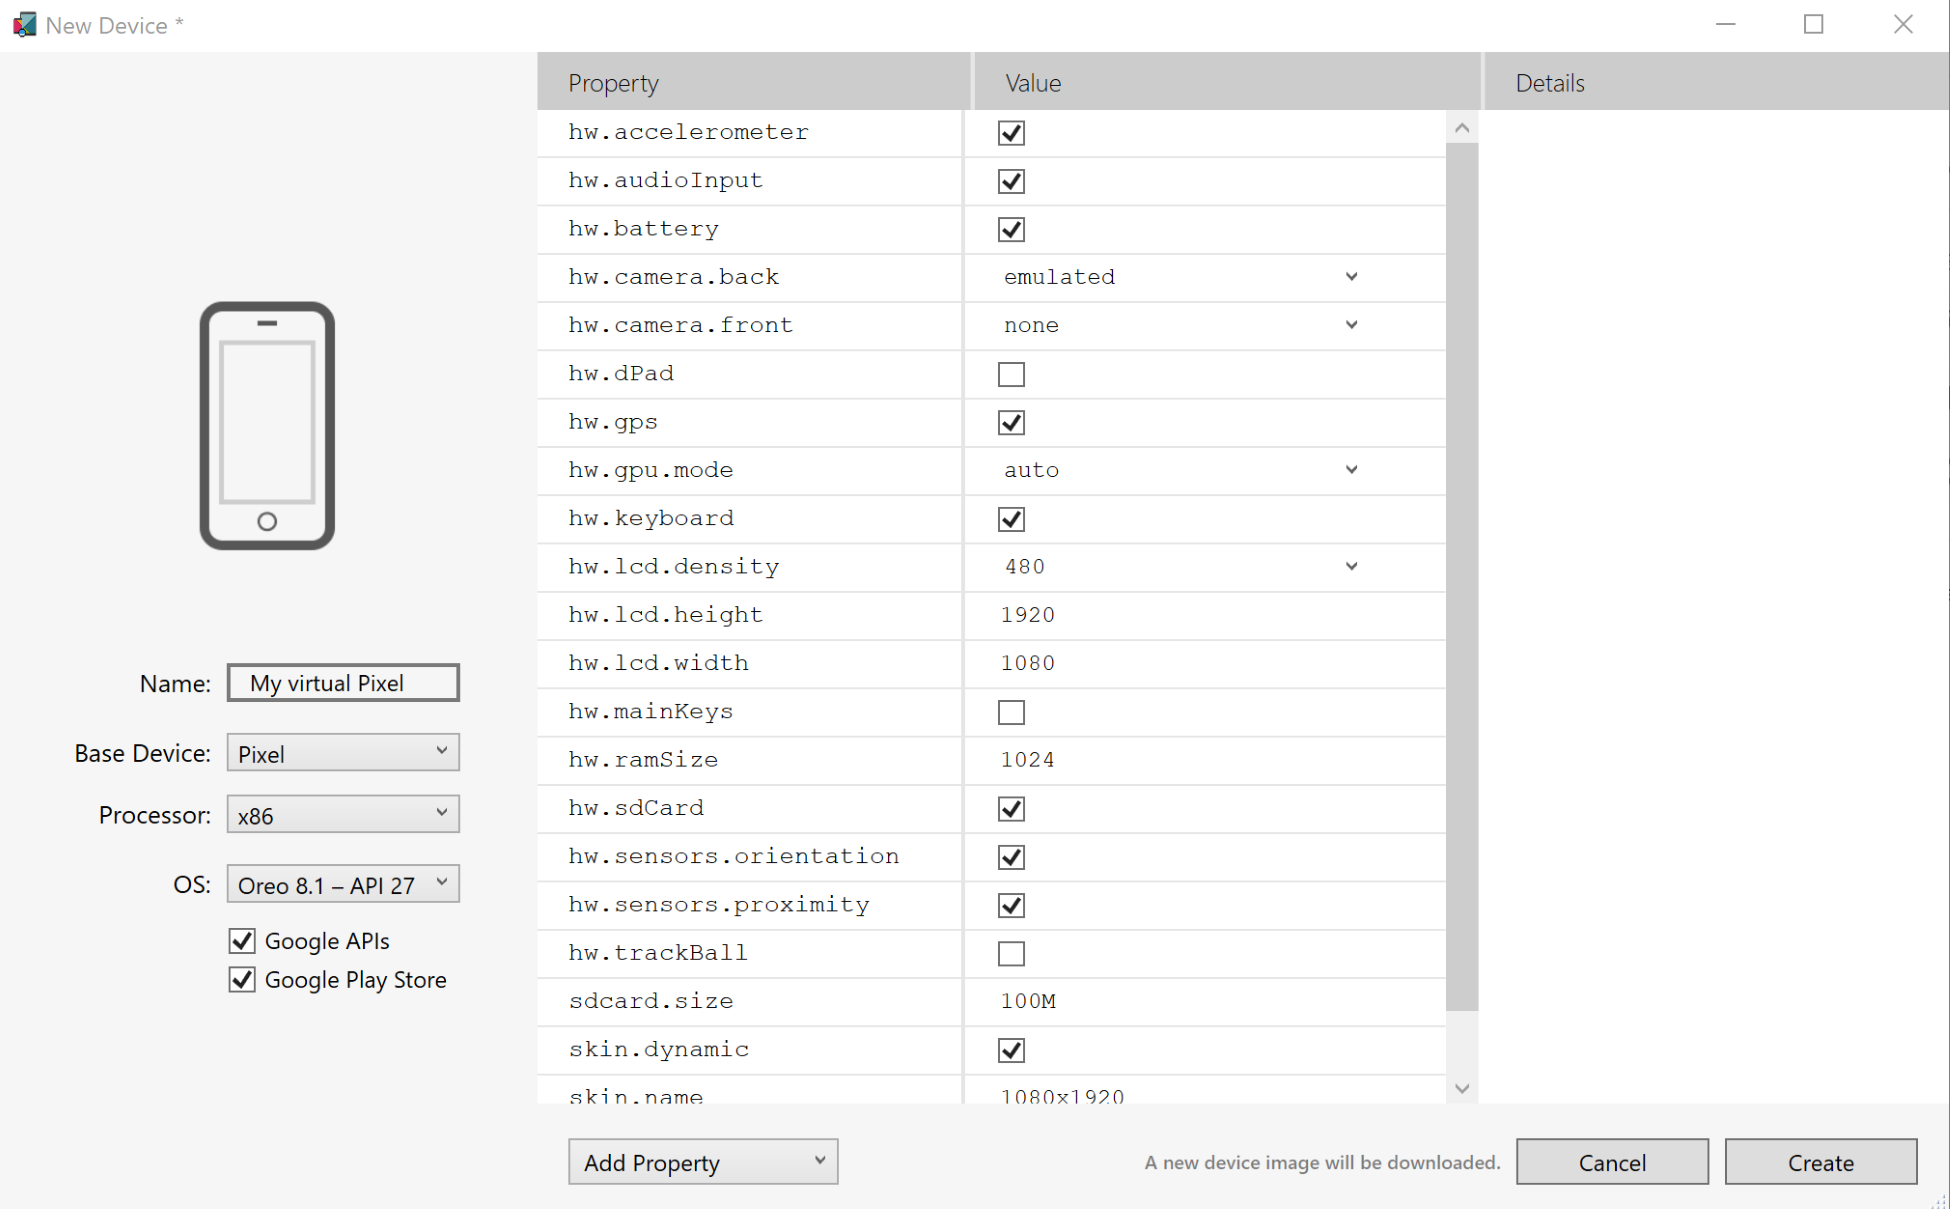
If we click the New Device button, we can create a new emulator with the specifications that we need. The easiest way to create a new emulator here is to select a base device that matches our needs. These base devices will be preconfigured, which is often enough. However, it is possible to edit the properties of the device so that we can get an emulator that matches our specific needs.
We have to select either an x86 processor (as shown in the following screenshot) or an x64 processor since we will not run the emulator on a device with an ARM processor. If we try to use an ARM processor, the emulator will be very slow:


