Splunk DB Connect is a popular application developed by Splunk that allows you to easily get data into Splunk from many common databases. In this recipe, you will install DB Connect and configure it to connect to an external database's product inventory table. This product inventory table will be used in Chapter 7, Enriching Data – Lookups and Workflows.
Getting data from databases using DB Connect
Getting ready
To step through this recipe, you will need a running Splunk Enterprise server. You should be familiar with navigating the Splunk user interface.
Additionally, it is recommended that you have one of the following supported databases installed:
- DB2
- Informix
- MemSQL
- MS SQL
- MySQL
- Oracle
- PostgreSQL
- SAP SQL
- Sybase
- Teradata
DB Connect might work with other JDBC-compatible databases and data stores, but this is not guaranteed. DB Connect 3 has several prerequisites detailed in the installation manual. Before attempting this recipe, please ensure that you have installed the Java Platform, Standard Edition Development Kit (JDK) 8 from Oracle. Additionally, you will also need to download the database drivers for your specific database.
How to do it...
Assuming JDK 8 is installed and your required database drivers are downloaded, follow the steps in this recipe to generate a local Splunk lookup using data from an external database and DB Connect:
- In your database application, create a new database called productdb, and within the database, create a new table called productInventory. Insert the contents of the provided productInventory.csv file into the new database table. The new table will resemble the following screenshot:

- Once the DB table is built, you need to install the DB Connect application to connect to it. From the drop-down application menu, select Find More Apps:

- Search for the Splunk DB Connect application and then select it to install it. You will have to enter your splunk.com account credentials after hitting the Install button. When prompted, select to Restart Splunk:

- After logging back in, select the Splunk DB Connect from the drop-down application menu. You will see a welcome notice initially. Click on the green Setup button to continue.
- The next screen will display an error warning if the DB Connect task server is not running. If it is not running, then you will need to enter the correct JRE Installation Path. The rest of the settings we will leave as they are for now. Click Save and ensure the task server is running, then click the Drivers tab:

- On the next screen, you will see a list of supported databases and whether any drivers are correctly installed. At this point, you must copy the database driver for your database over to DB Connect. Follow the instructions in the DB Connect installation manual to do this. Then, click the Reload button to ensure the driver is now installed. Once you see a green check mark next to the database you are looking to use, the driver has been detected properly:

- In the navigation bar, click on Configuration, then Settings, then select the Identities tab. Then, click New Identity to add a new database identity:

- Add a new database identity by entering the Identity Name, Username, and Password for the user that will be connecting to the database. Then, click Save to create the identity:

- In the navigation bar, click on Configuration, then Settings, then select the Connections tab. Then, click the New Connection to add a new database identity. Enter in the required database connection details. You will need to enter the Host, the Connection Type, the Default Database, and then select the newly created identity from the Identity drop-down box. The Default Database will match the name of your database—in this case, productdb. When done, select Save. The connection will be validated when saved and will report back any errors:

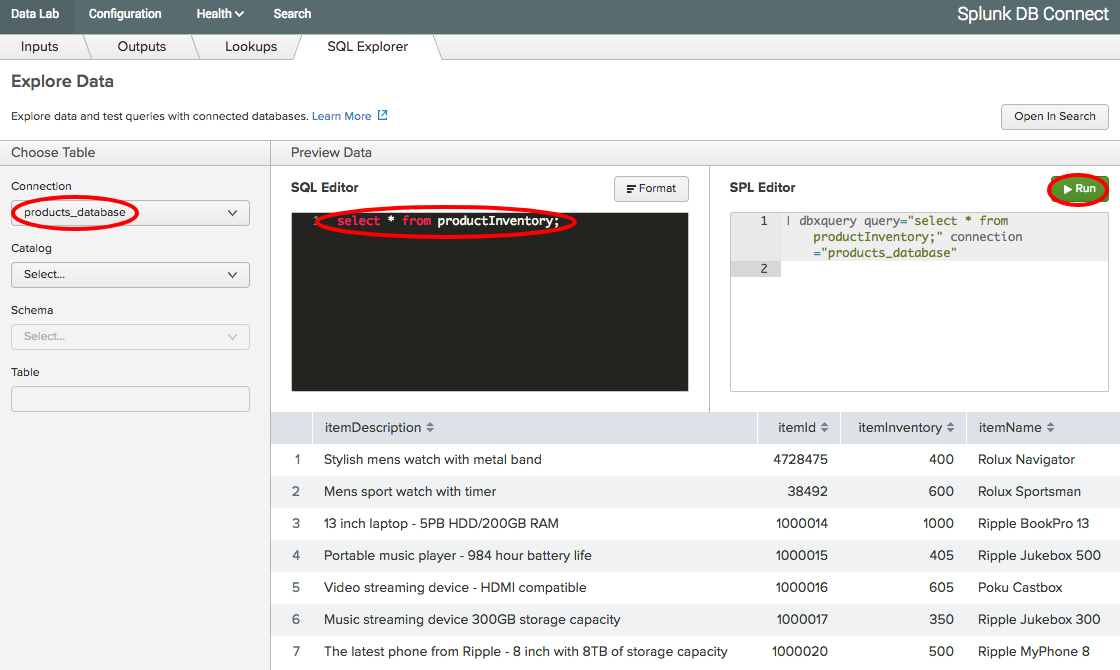
- Now, test that you are able to view the product inventory table by clicking on Data Lab and then SQL Explorer. Select your product database and then run the following SQL query:
select * from productInventory;
You should now be able to see the inventory table and your database connection is ready to go. We will use this data and connection in Chapter 7, Enriching Data – Lookups and Workflows:

How it works...
DB Connect enables real-time integration between Splunk and traditional relational databases. In this recipe, you installed the DB Connect application and configured it to talk to a database. When installed, DB Connect sets up something called a Java Bridge Server that is essentially a Java Virtual Machine (JVM) constantly running in the background. The Java Bridge Server helps speed up connectivity to external databases by allocating memory and caching a lot of the metadata associated with the database tables.


