This recipe describes how to assign interfaces using the console menu.
Assigning interfaces from the console
Getting ready
In order to complete this recipe, you will need at least one unassigned interface.
How to do it...
- On the console menu, press 1 and press Enter.
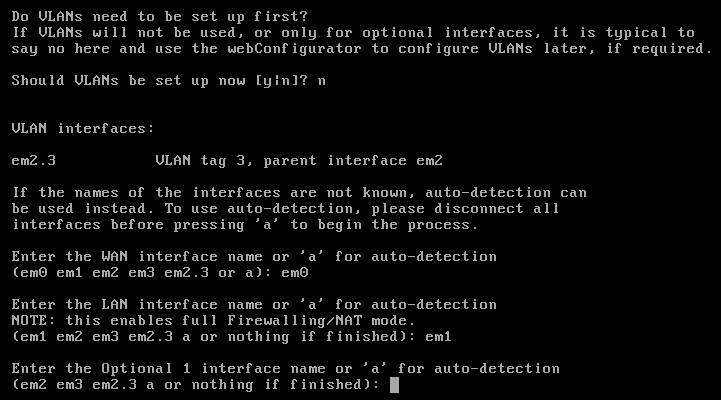
- The first option will be for setting up VLANs. Since we don’t want to set up VLANs now, press n and Enter:

- You will be prompted to enter the WAN interface name. Here, you must enter the device name for the interface that will be the WAN interface (for example, eth0, eth1, em0, em1, and so on). Enter the appropriate device name and press Enter.
- You will be prompted to enter the LAN interface name, or nothing if finished. You only need to assign the WAN interface (in which case you will be able to log into pfSense using the WAN IP address). However, if you want to assign an interface to LAN, enter the device name and press Enter. Otherwise, just press Enter.
- If there are more than two network interfaces, you can assign optional interfaces at the console. To do so, enter the device name and press Enter. Otherwise, just press Enter.
- The interface assignments will be listed, and you will be asked whether you want to proceed. Pressing n and Enter will result in no changes being made, while pressing y and Enter will commit the changes.
- If you pressed y and Enter, the changes will be written and the settings will be reloaded. You will then be returned to the console menu.
How it works...
In this recipe, we were able to assign interfaces (which was done earlier in the chapter via the web GUI) from the console. Many configurations can be done from the console—we can even restore earlier configurations and run utilities—and in this book, we will take advantage of this functionality.
See also
- The Configuring a WAN interface from the console recipe
- The Configuring a LAN interface from the console recipe
- The Configuring optional interfaces from the console recipe
- The Configuring VLANs from the console recipe


