In this section, we will explore some of PyCharm's features. PyCharm has a huge collection of tools out of the box, including an integrated debugger and test runner, Python profiler, a built-in Terminal, integration with major VCS and built-in database tools, remote development capabilities with remote interpreters, an integrated SSH Terminal, and integration with Docker and Vagrant. For a list of other features, please check the official site (https://www.jetbrains.com/pycharm/features/).
Exploring some nifty PyCharm features
Code debugging
Code debugging is a process that can help you to understand the cause of an error, by providing an input to the code and walking through each line of the code and seeing how it evaluates at the end. The Python language contains some debugging tools to get insights from the code, starting with a simple print function, assert command till a complete unit testing for the code. PyCharm provides an easy way to debug the code and see the evaluated values.
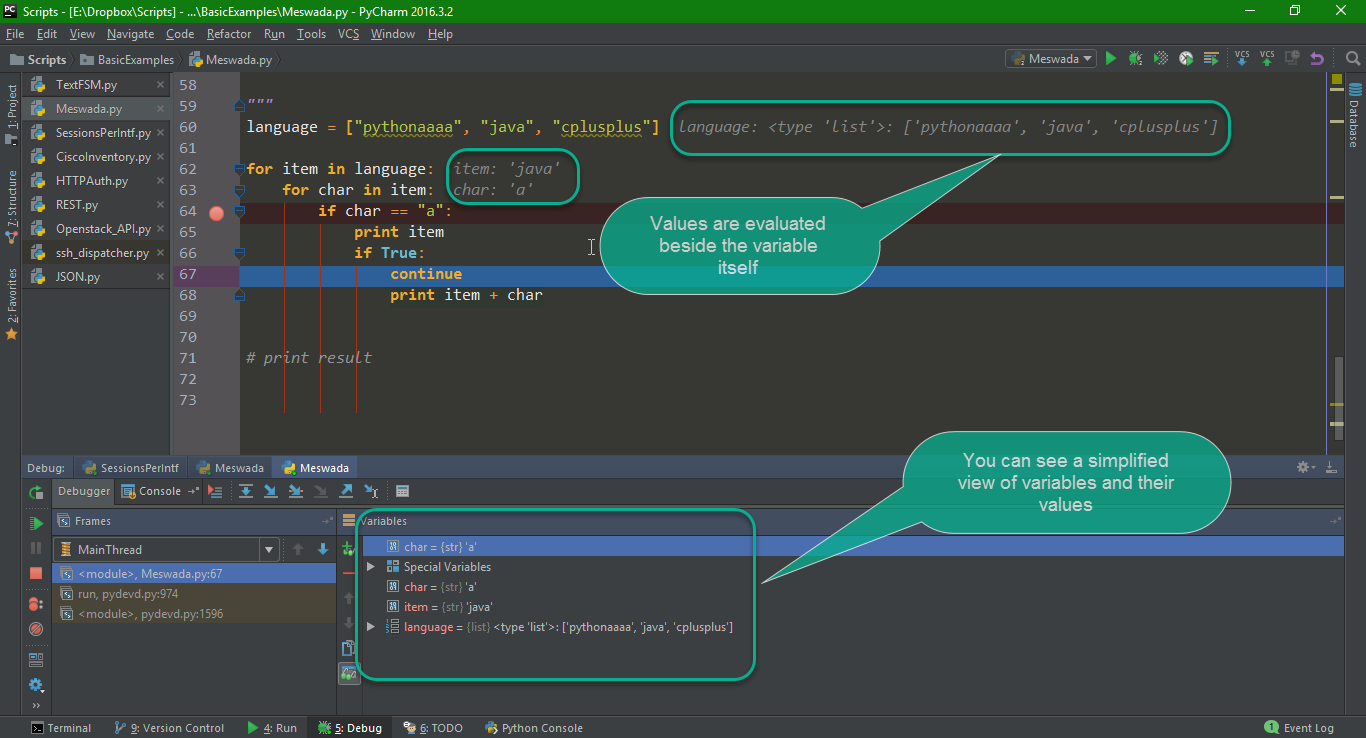
To debug code in PyCharm (say, a nested for loop with if clauses), you need to set a breakpoint on the line at which you want PyCharm to stop the program execution. When PyCharm hits this line, it will pause the program and dump the memory to see the contents of each variable:

Notice that the value of each variable is printed besides it, on the first iteration:
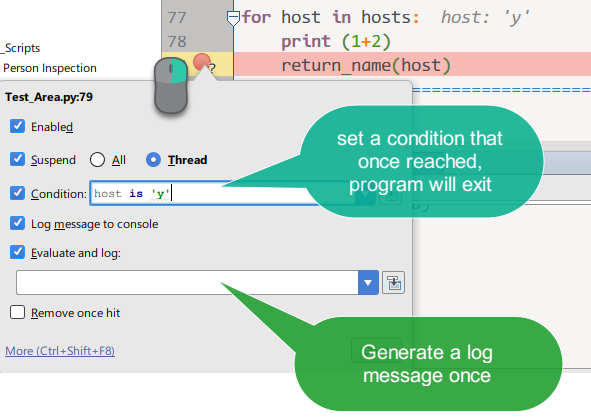
Also, you can right-click on the breakpoint and add a specific condition for any variable. If the variable is evaluated to a specific value, then a log message will be printed:
Code refactoring
Refactoring the code is the process of changing the structure of a specific variable name inside your code. For example, you may choose a name for your variable and use it for a project that consists of multiple source files, then later decide to rename the variable to something more descriptive. PyCharm provides many refactoring techniques, to make sure that the code can be updated without breaking the operation.
PyCharm does the following:
- The refactoring itself
- Scans every file inside the project and makes sure that the references to the variables are updated
- If something can't be updated automatically, it will give you a warning and open a menu, so you can decide what to do
- Saves the code before refactoring it, so you can revert it later
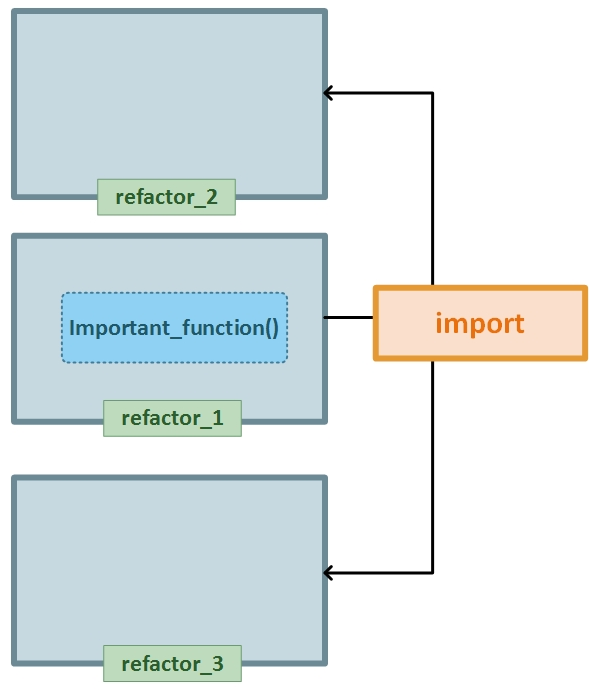
Let's look at an example. Assume that we have three Python files in our project, called refactor_1.py, refactor_2.py, and refactor_3.py. The first file contains important_funtion(x), which is also used in both refactor_2.py and refactor_3.py.
Copy the following code in a refactor_1.py file:
def important_function(x):
    print(x)
Copy the following code in a refactor_2.py file:
from refactor_1 import important_function
important_function(2)
Copy the following code in a refactor_3.py file:
from refactor_1 import important_function
important_function(10)
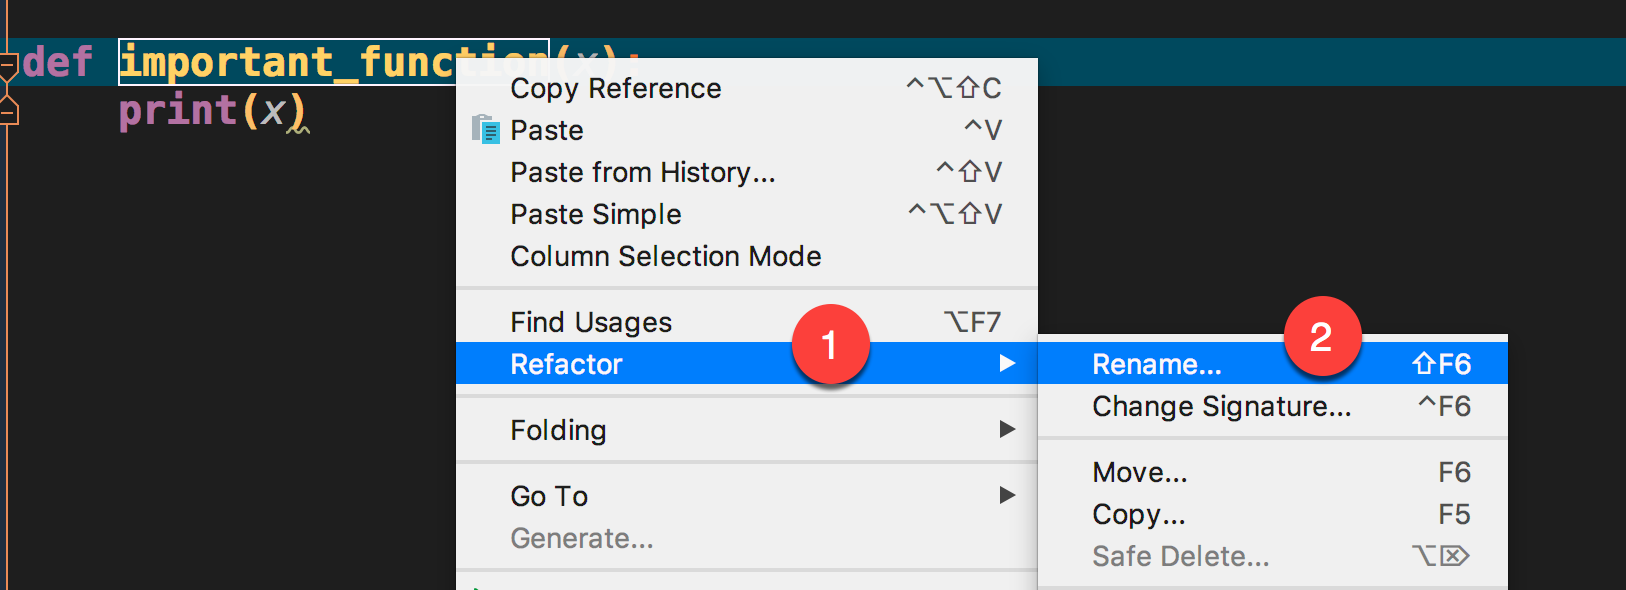
To perform the refactoring, you need to right-click on the method itself, select Refactor | Rename, and enter the new name for the method:
Notice that a window opens at the bottom of the IDE, listing all references of this function, the current value for each one, and which file will be affected after the refactoring:
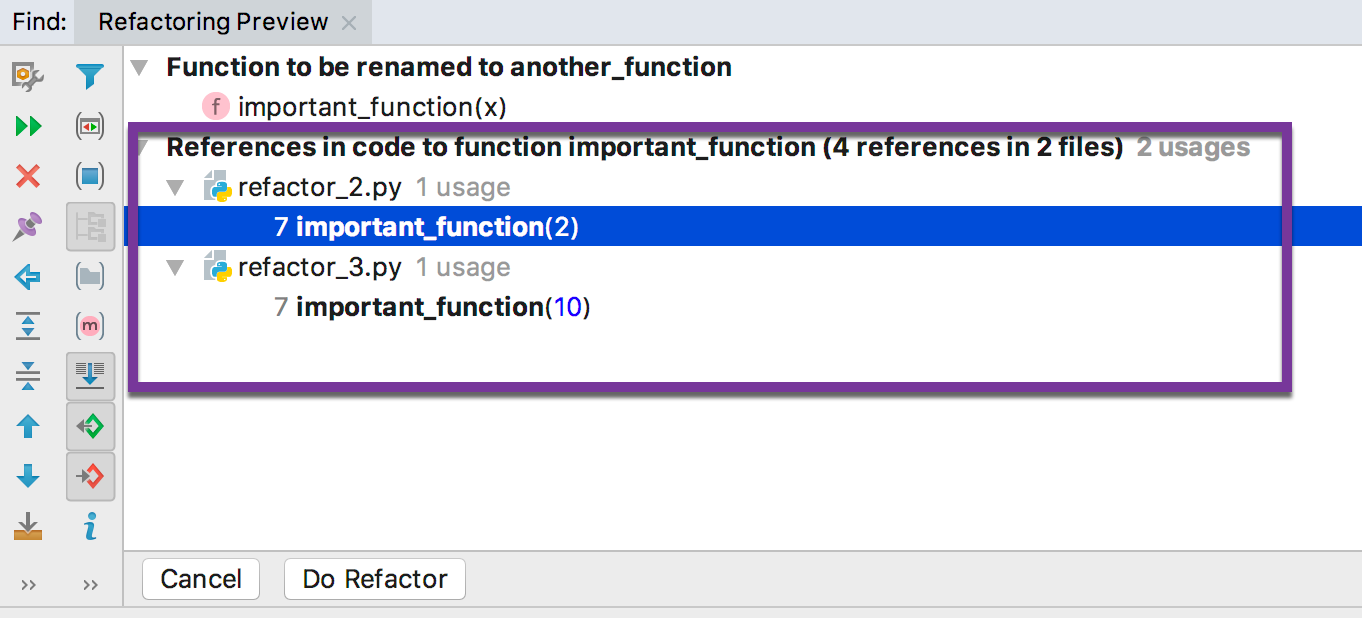
If you choose Do Refactor, all of the references will be updated with the new name, and your code will not be broken.
Installing packages from the GUI
PyCharm can be used to install packages for existing interpreters (or the virtualenv) using the GUI. Also, you can see a list of all installed packages, and whether upgrades are available for them.
First, you need to go to File | Settings | Project | Project Interpreter:
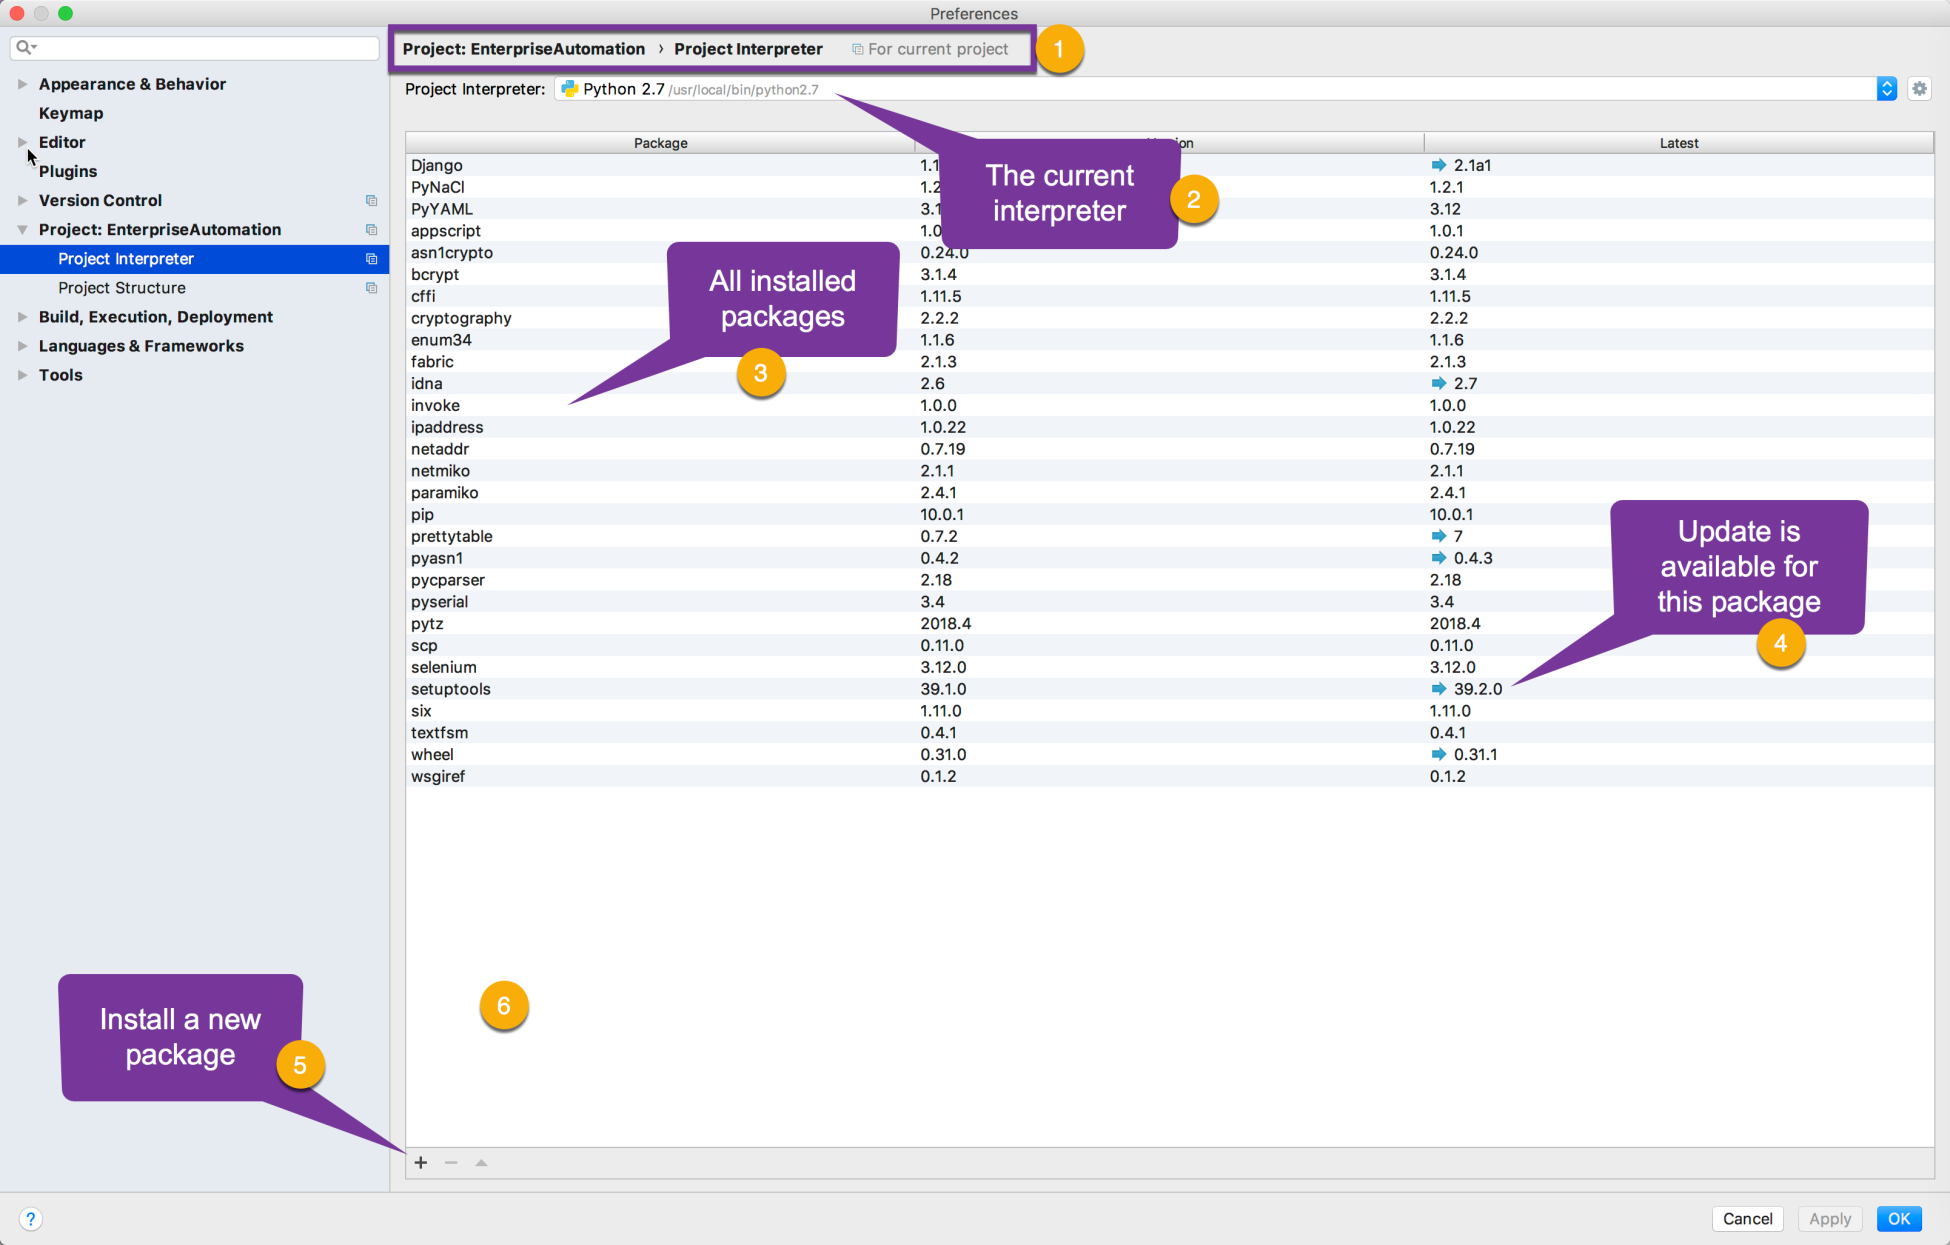
As shown in the preceding screenshot, PyCharm provides a list of installed packages and their current versions. You can click on the + sign to add a new package to the project interpreter, then enter the package initials into the search box:
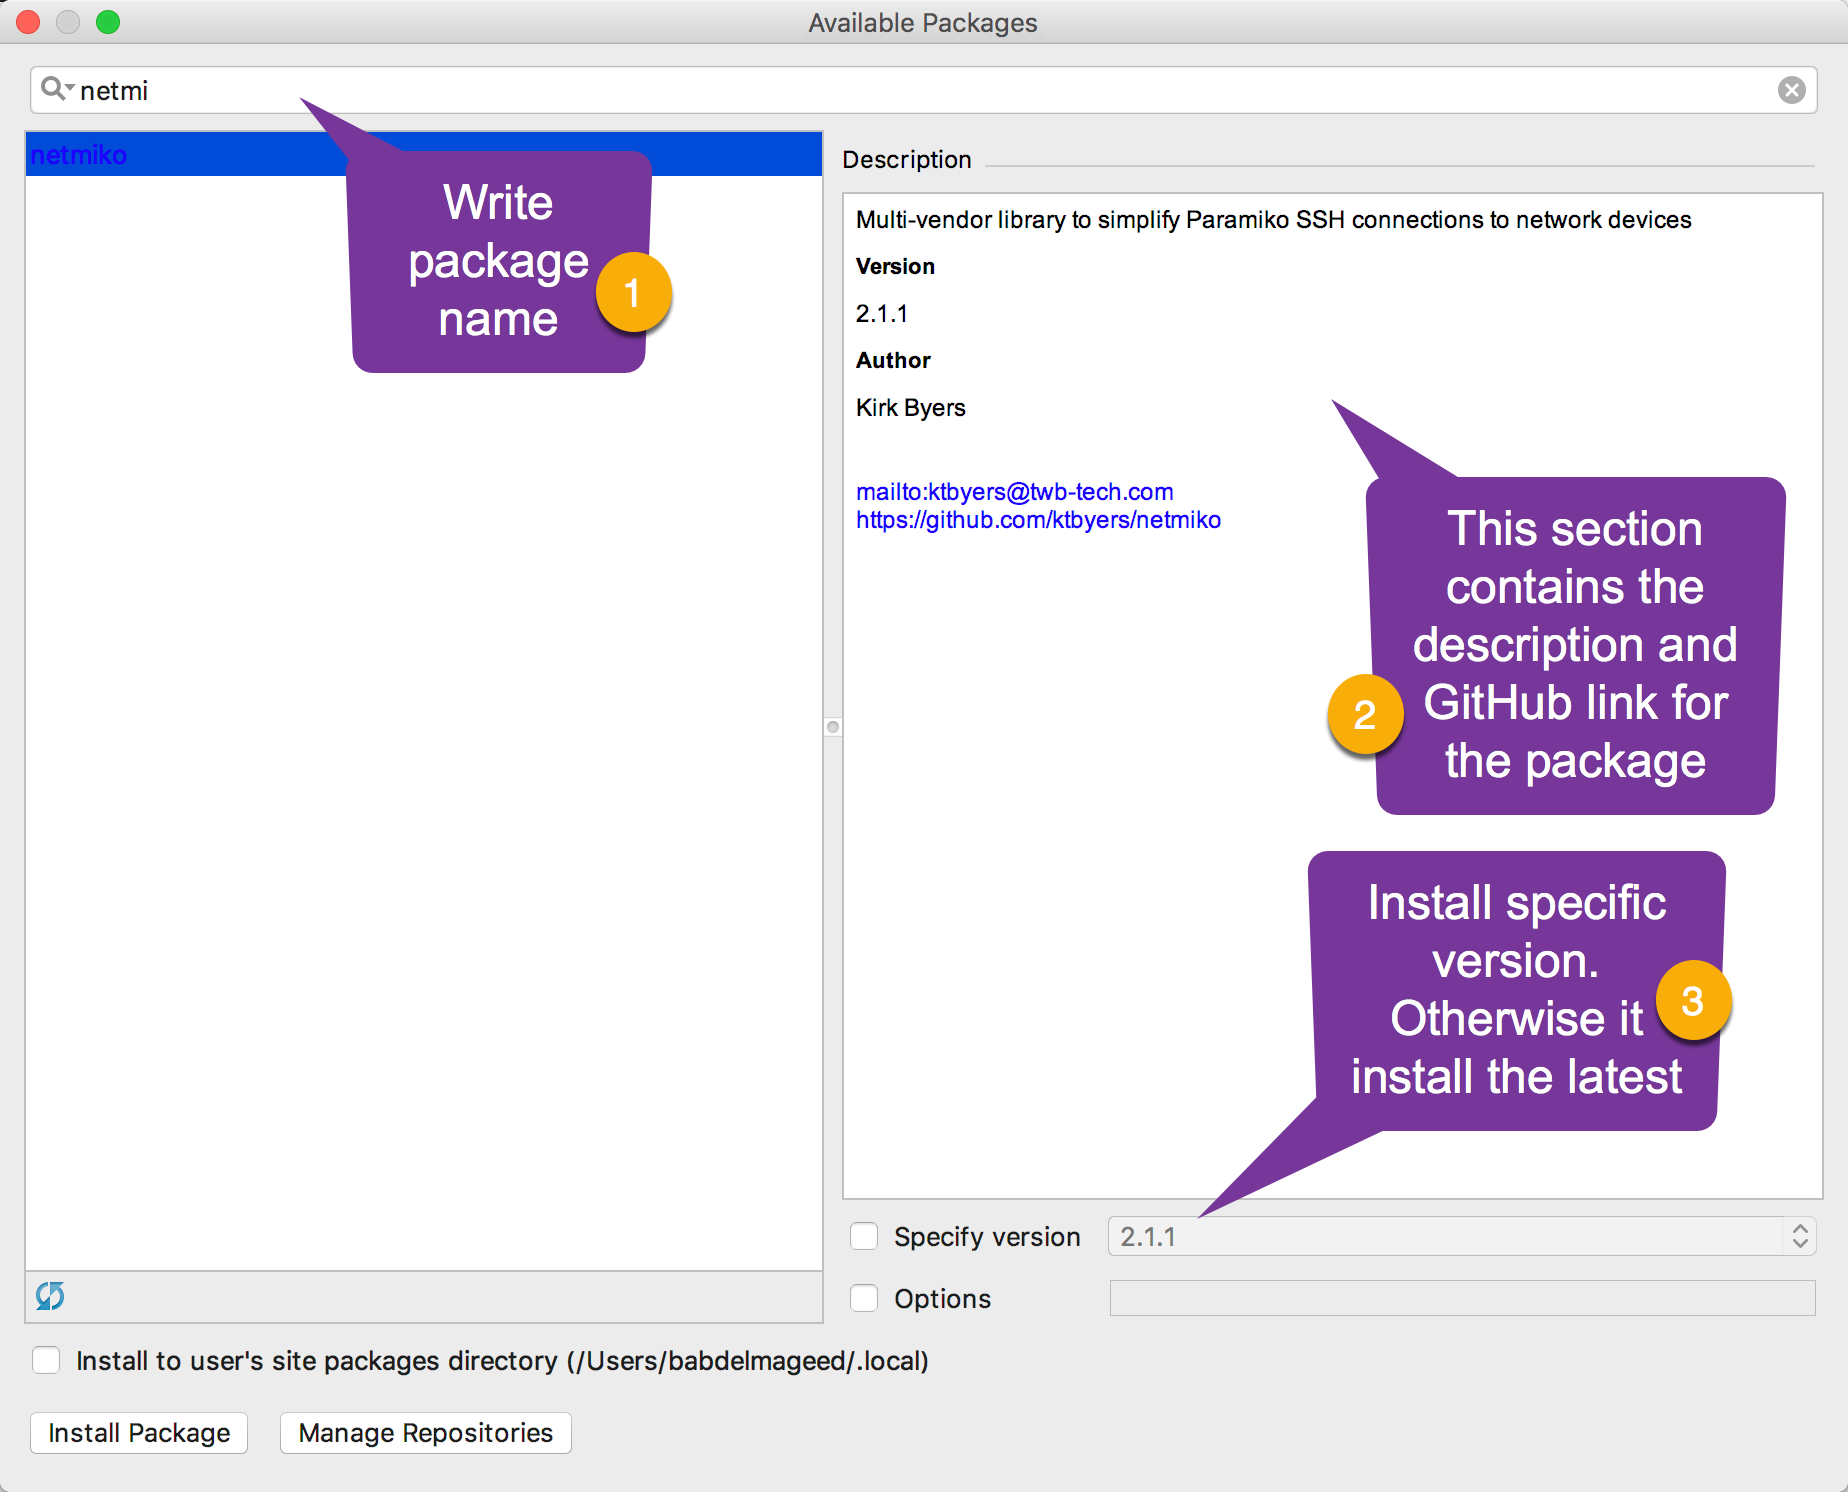
You should see a list of available packages, containing a name and description for each one. Also, you can specify a specific version to be installed on your interpreter. Once you have clicked on Install Package, PyCharm will execute a pip command on your system (and may ask you for a permission); then, it will download the package onto the installation directory and execute the setup.py file.


