Using Neo4j Desktop
In this section, we will take a look at how we can use Neo4j Desktop to create a Neo4j instance and manage it.
Creating a local DBMS
Let’s go through the steps to create a local DBMS:
- To create a local DBMS, a project should be created and selected.
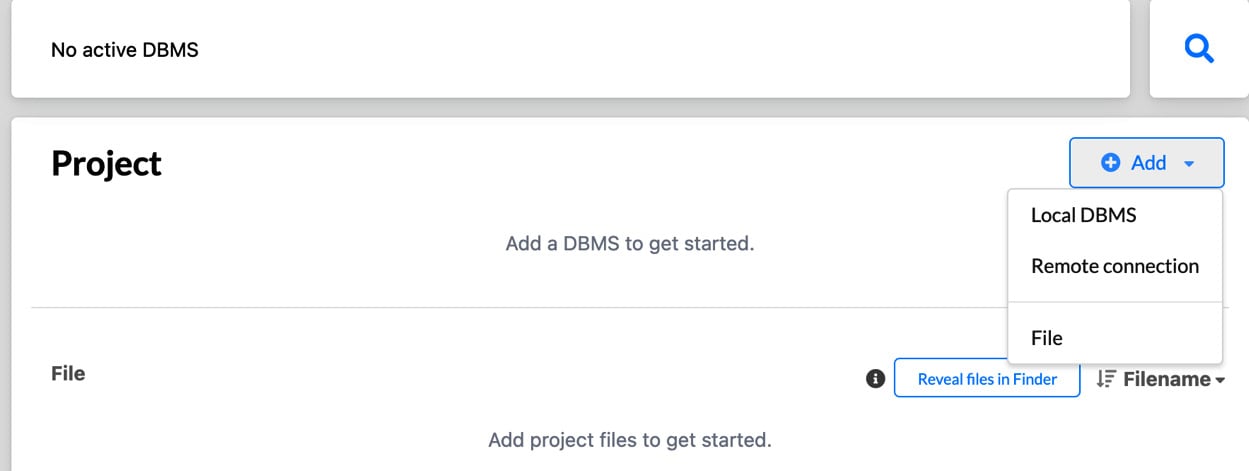
Figure 1.17 – Creating a local DBMS
- Click on the Add button and select Local DBMS to create a local DBMS instance.
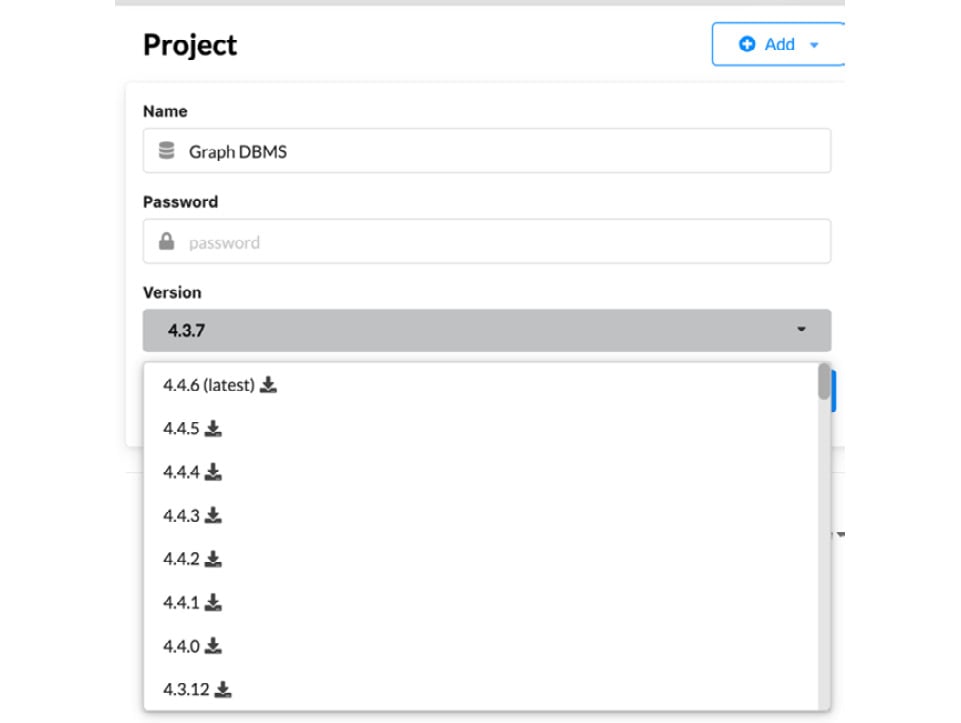
Figure 1.18 – Select the Neo4j version
- You can change the name from Graph DBMS to anything that makes sense. You will need to provide a password. This would be the password for the Neo4j admin user.
- In the Version dropdown, Neo4j Desktop shows the latest downloaded version as the selected one and, if there are newer versions, they are also shown in the dropdown with a download icon next to them. This means this version is not available locally and needs to be downloaded. If you would like to use any of those versions, then click on the download icon. This will download that version of the Neo4j software before creating the local DBMS instance.
- Once the required version is selected, click the Create button to create the local instance.
Next, we will take a look at how we can manage the instance we have created.
Managing a local DBMS instance
Once we have created the local database instance, we can then manage that instance. We can start/stop the instance, change the configuration, and add plugins. Here, we will take a look at how to manage the local Neo4j instance we created.
Reviewing DBMS details
Once the instance is created, an entry is shown in the selected project. The following screenshot shows the instance details:
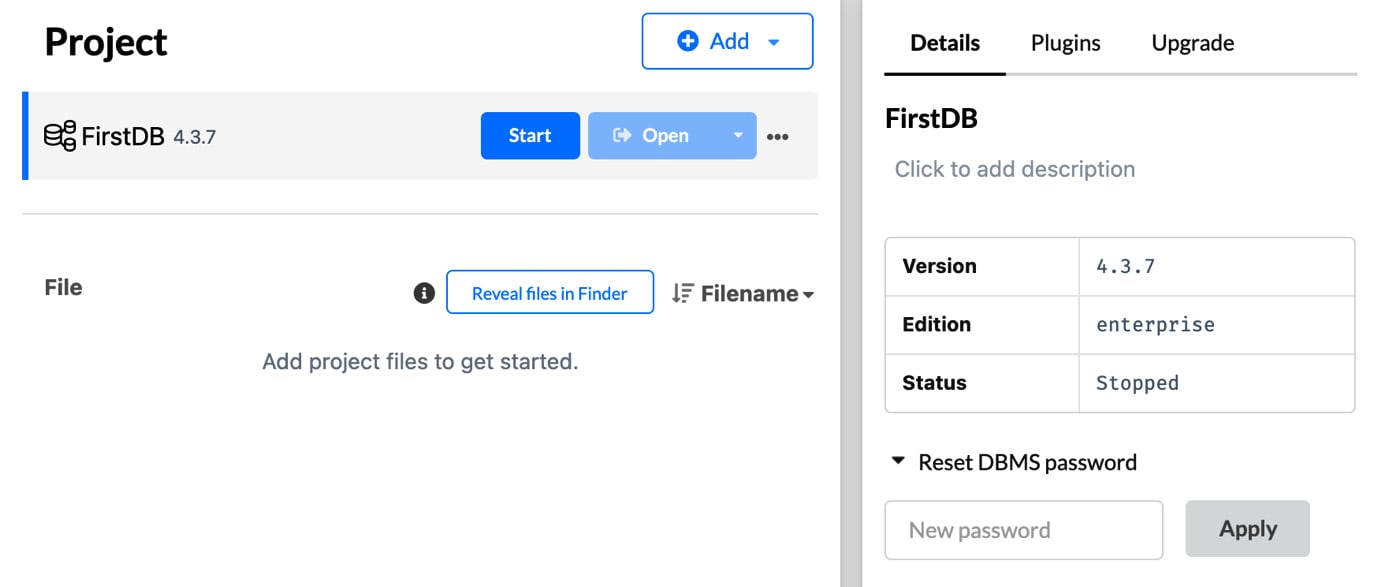
Figure 1.19 – Local instance details
When you click on the name of the instance, it shows the details on the right-hand side. The description box can be used to add details about this DBMS instance. If you need to change the password, it can be done under the Reset DBMS password option.
Managing DBMS plugins
For this instance, we can add or remove plugins. To do this, click on the Plugins tab. It displays all the installed plugins and the available plugins to install. The following screenshot captures this aspect:
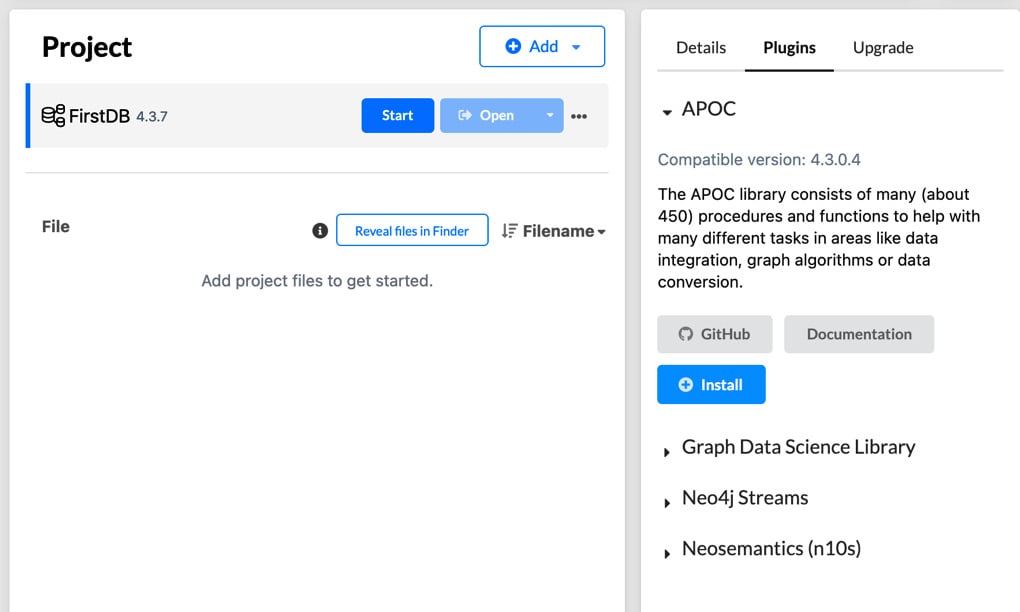
Figure 1.20 – Plugins installation
The list of the plugins available is dependent on the version of the Neo4j instance. When you click on the name of the plugin, it shows the details of that plugin and any related links. You can click on the Install button to install a plugin. Neo4j Desktop will install the plugin and make the required changes to the server configuration.
Upgrading the server
It is possible to upgrade the version of the instance we have created. When you click on the Upgrade tab, it shows the options available. The following screenshot captures this aspect:
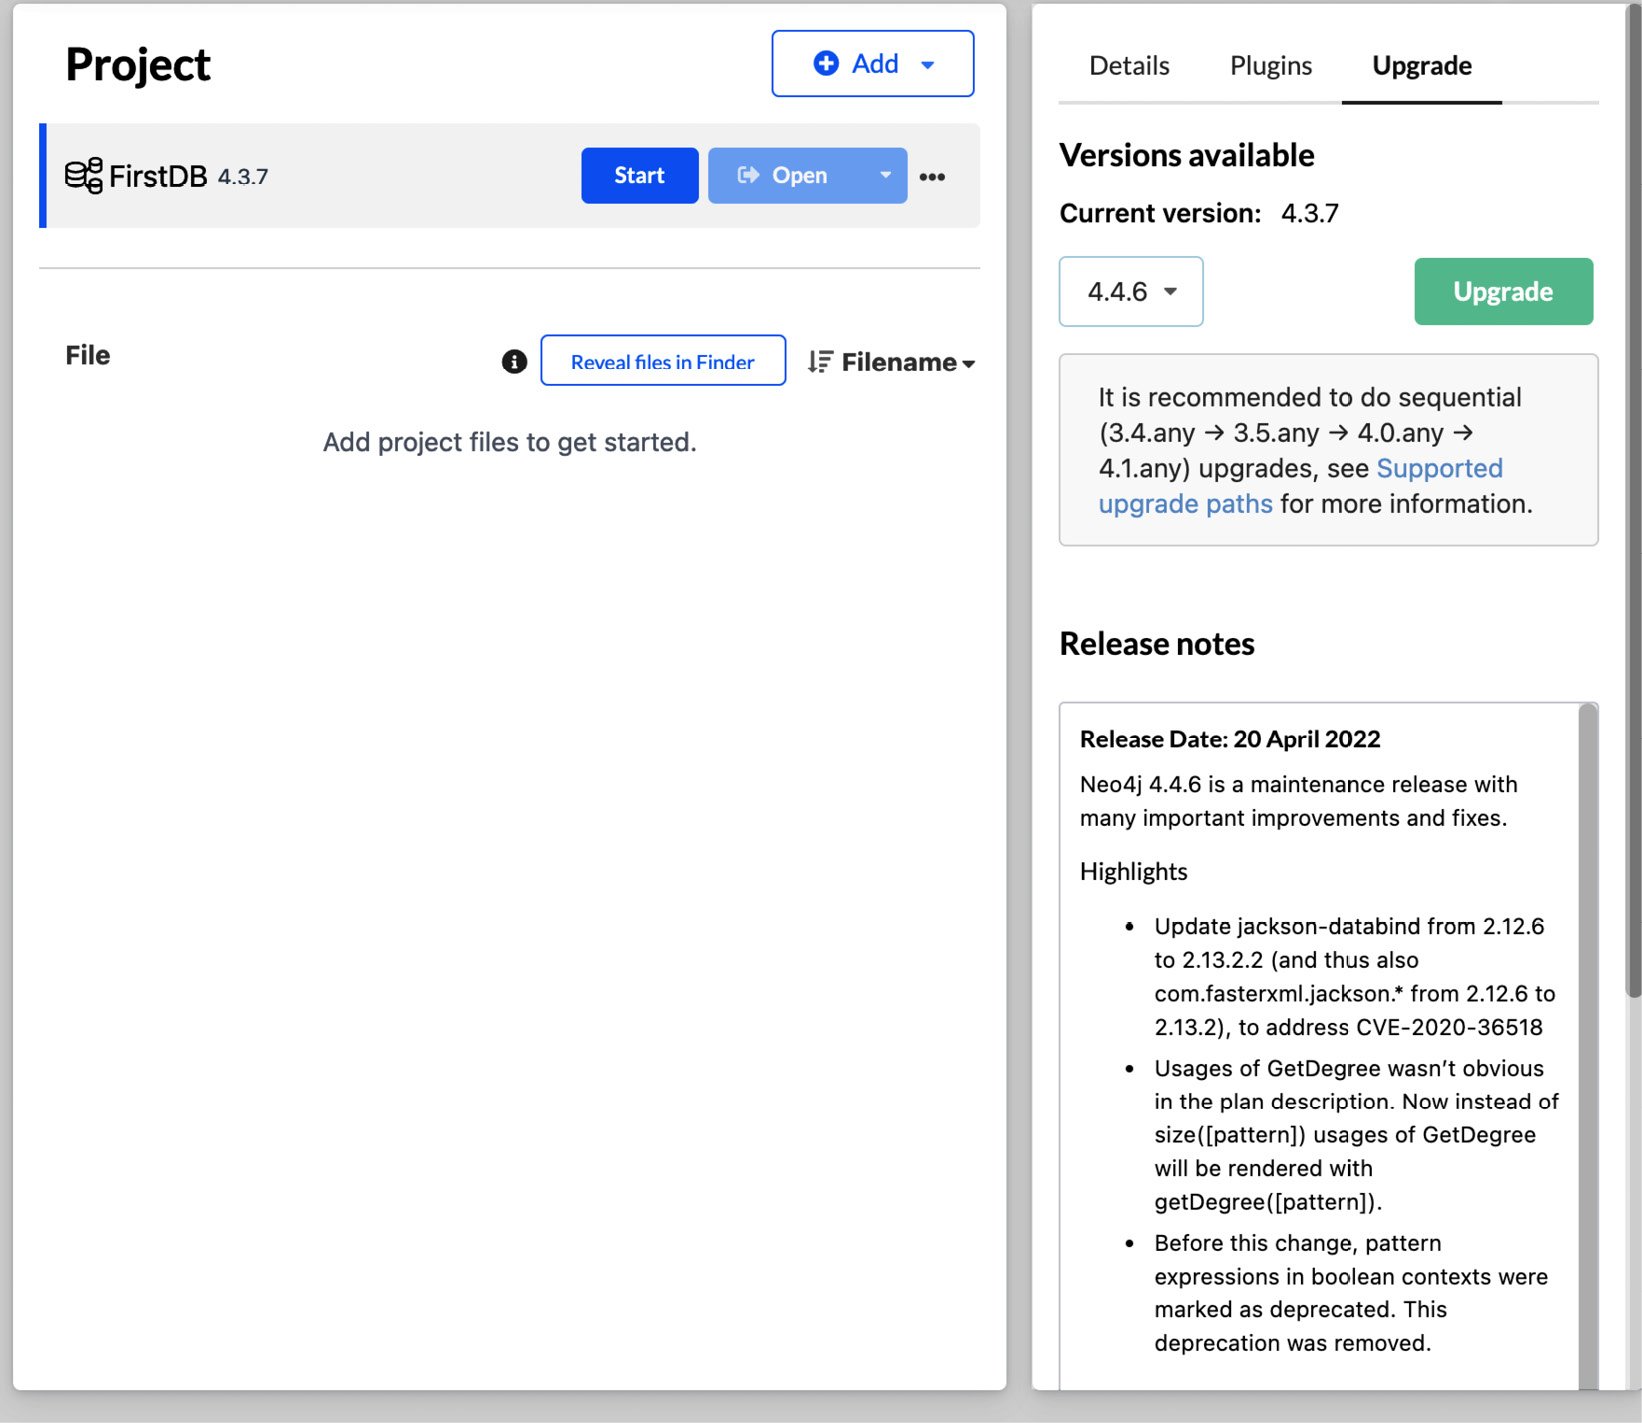
Figure 1.21 – Upgrade options
Here, you will find a dropdown of all possible versions of this instance that can be upgraded. When a version is selected, the release notes for that version are shown. By clicking the Upgrade button, you can upgrade the selected DBMS instance.


