The InDesign toolbox
By default, the InDesign toolbox is arranged as a single vertical column of tools to the left of your interface. You can change the toolbox view to a double vertical column or a horizontal row arrangement by clicking on the double arrow ![]() located in the top-left corner of the toolbox. There are tools found in the toolbox that are for specific tasks like selecting, editing, or creating a page. Whether it is type, shapes, lines, or gradients, this is applicable. You can click and drag the top of the toolbox – the vertical lines above the Selection tool – to move it to a different location.
located in the top-left corner of the toolbox. There are tools found in the toolbox that are for specific tasks like selecting, editing, or creating a page. Whether it is type, shapes, lines, or gradients, this is applicable. You can click and drag the top of the toolbox – the vertical lines above the Selection tool – to move it to a different location.

Figure 1.12a: The toolbox arranged as a single column
Figure 1.12b: The toolbox set up as double vertical columns

Figure 1.12c: The toolbox arranged in a horizontal row

Select a tool from the toolbox by clicking on it. The toolbox also contains several hidden tools related to the visible tools. Hidden tools have tiny arrows that can be accessed by clicking on these arrows found at the bottom right of tool icons in the toolbox. You can select a hidden tool by clicking and holding your mouse on a tool in the toolbox, opening up a set of variations. You can then select the tool that you require from the resulting flyout.
The name of the tool and its keyboard shortcut will appear if you hover it. This is called a tooltip.
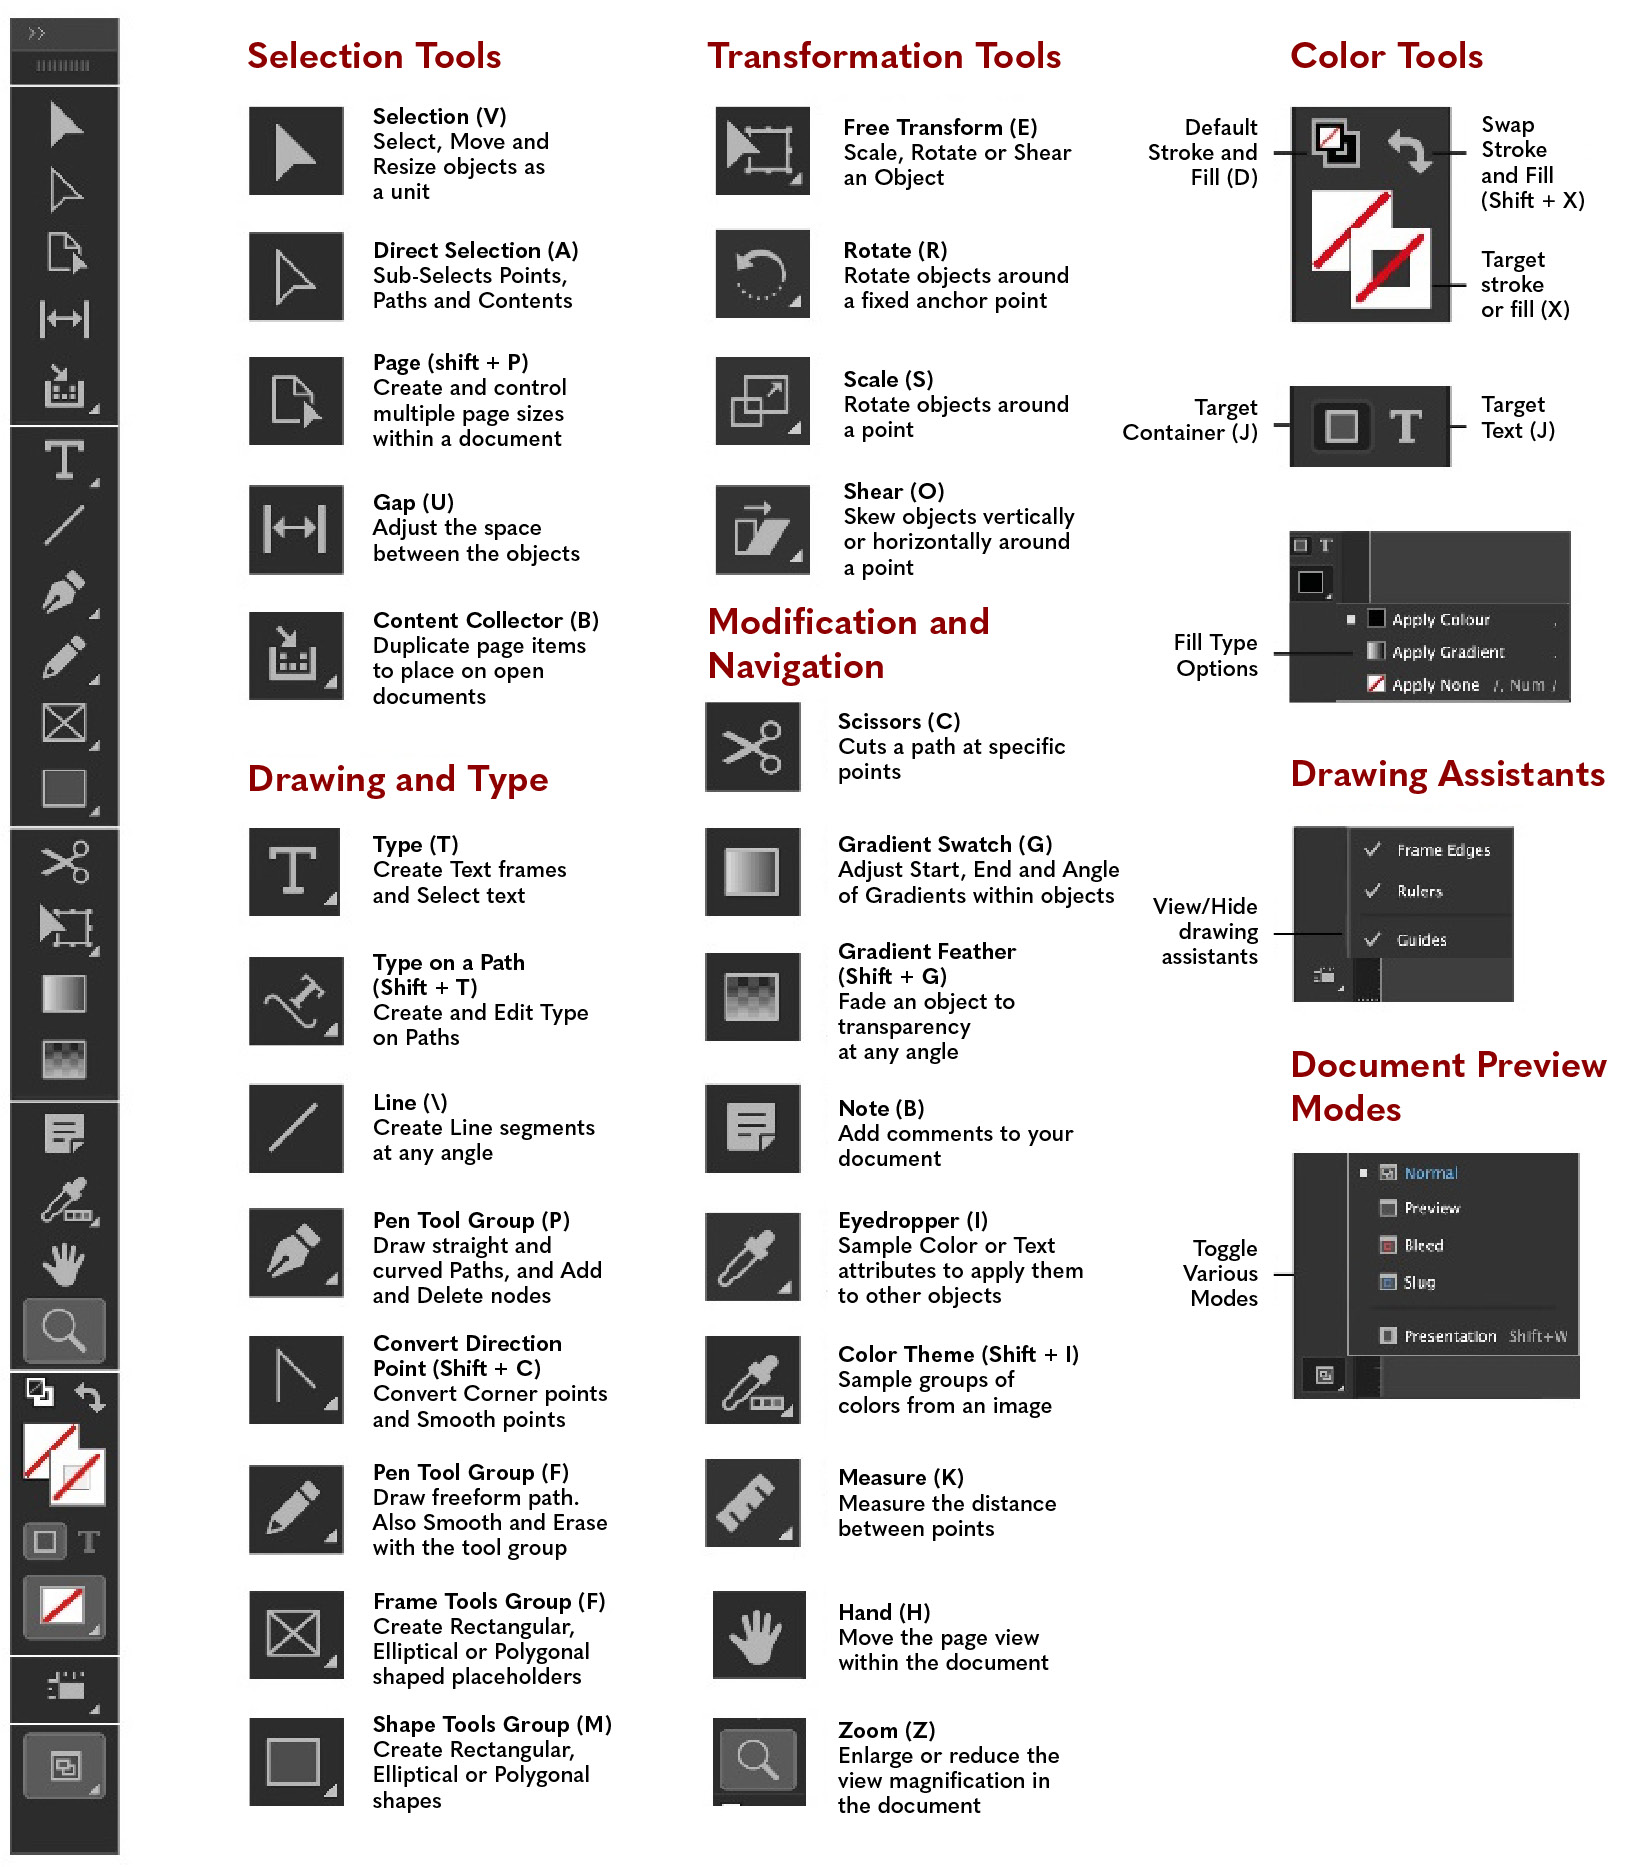
The toolbox is organized into six distinct sub-sections (see Figure 1.13). Having a general sense of the toolbox arrangement will help speed up your proficiency in InDesign.

Figure 1.13: An exploded view of the toolbox
- Selection Tools: This subset of tools are used to select objects, groups, sub-components of elements, and the page itself.
- Drawing and Type Tools: Use these tools to create geometric and freeform shapes, as well as text frames. You can create rectangles, circles, stars, freeform shapes, and open paths. The type tools are used for creating text frames on your page.
- Transformation Tools: This collection of tools allow you to rotate, scale, skew and distort content. You can also use them to edit gradients, which are multi-colored fills or strokes that have been applied to objects.
- Modification and Navigation Tools: These tools can be used to move around the page and manipulate viewing properties. Additionally, you can magnify or decrease the viewing percentage of your document, measure the properties of objects, and collaborate with fellow InDesign users using notes.
- Color Tools: This subset of tools allows you to define the fill and stroke (border) properties for graphic and text objects.
- Viewing Modes: You can view a document in multiple ways. Options include hiding and showing non-printing guides and document construction aids. You can also preview the final document as it will appear printed or exported.
This concludes our exploration of the toolbox. Strictly speaking, the InDesign toolbox is a panel. We will discuss panels in greater detail in the next section.


