Amazon provides you with Free Tier to get started with AWS on production quality servers. Free Tier provides you with free access to many services and features with decent limits.
Getting started with the AWS platform
Getting ready
To work with AWS Free Tier, you need a decent computer, a reasonable internet connection, a working credit card, and basic knowledge of computers and the internet.
How to do it...
Let's get started on the AWS platform by creating a Free Tier account. We will then do some basic IAM settings as suggested by AWS. Finally, we will also create a billing alarm to keep track of any unexpected costs. If you already have a working account with basic setup done, you may skip this part of the recipe:
- Go to https://aws.amazon.com and create a new Free Tier account (if you do not already have one) as follows:
- Provide login credentials.
- Provide personal information such as address, phone number, and other required details, if you have selected Personal account, or Corporate information if you have selected company account.
- Provide credit card details.
- Proceed with telephonic verification.
- Select Basic plan for Free Tier account with community support (or select a paid plan if you want to).
After logging in for the first time, it is recommended that you complete the basic Identity and Access Management (IAM) security settings listed under the Security Status heading. If you have previously logged in, the options might not be displayed as shown next. If so, you need to manually go to IAM service from the Services dropdown.
- Click on Activate Multi-Factor Authentication (MFA) on your root account and do as follows:
- Click Manage.
- Select A Virtual MFA Device.
- Click Continue on the message for installing an MFA-compatible application (assuming you have installed Google Authenticator along with barcode scanner, or any similar applications).
- Scan the barcode shown on screen using Google Authenticator, and enter two consecutive codes for confirmation.
- Click on Create individual IAM users and do as follows:
- Enter Username.
- Select Access Type (Programmatic access and AWS Management Console access).
- Download the credentials .csv file to a secure area in your local machine. You will not be able to download it later, but you can regenerate it.
- Click on Use groups to assign permissions and assign some random permissions.
- Click on Apply an IAM password policy to set up a basic password policy.
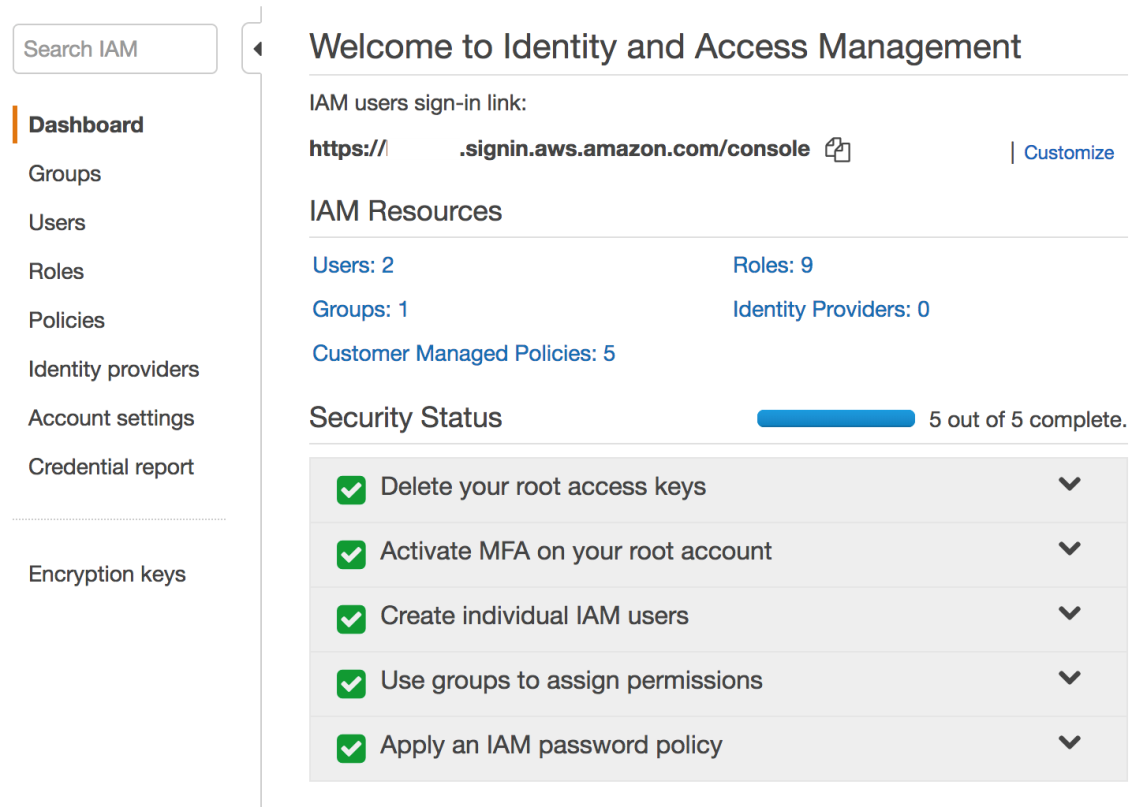
IAM dashboard should now show all security status items as green:

- Create a billing alarm to have a check on accidental costs:
- Go to My Billing Dashboard (by clicking the drop-down arrow near to your name).
- Under Alerts and Notifications, click on Enable Now to Monitor your estimated charges.
- After going to Preferences, select Receive Billing Alerts and click on Manage Billing Alerts link within the contents, which will take you to CloudWatch.
- Click on Billing and create an alarm.
If you followed all previous steps successfully, you are ready to get started with further recipes in this book.
How it works...
Most of the steps in this recipe are self-explanatory and similar to registering for any other paid online service. The following are the important AWS services and concepts that were introduced in this recipe.
AWS Identity and Access Management (IAM)
IAM enables secure access to AWS resources. IAM supports standard security concepts such as users, groups, roles, and permissions. The user is an individual who wants to use AWS services. Users can be added to groups. Users and groups are assigned with permissions. Roles are used by a service (for example, Amazon Ec2) for accessing other services.
Amazon CloudWatch
Amazon CloudWatch is a service that helps in monitoring your applications, responding to changes (such as performance changes and billing alarms), optimizing resource utilization, and providing you a unified view of the health of services in your account. We will see more use cases of Amazon CloudWatch in later recipes.
Multi-Factor Authentication (MFA)
Multi-Factor Authentication provides additional levels of authentication. In addition to passwords, it also requires you to authenticate using a token generated by a virtual or physical authenticator. It is a good practice to set up MFA even for personal accounts, as the password is the same as the e-commerce portal and Prime Video.
There's more...
The following are some of the common AWS services that are used in building Serverless applications on the AWS:
- AWS Lambda lets you write code without configuring any server.
- Amazon API Gateway lets you create REST APIs without coding.
- Amazon Simple Storage Service (S3) is an object store that helps you store and retrieve data. S3 can also be used for hosting single-page applications (SPA) such as an angular or react application.
- Amazon DynamoDB is a scalable NoSQL database.
- Amazon CloudFront is a Content Delivery Network (CDN) service.
- Amazon CloudWatch is a service to monitor your applications and respond to changes.
- AWS CloudFormation templates written in JSON or YAML can be used to provision and model our infrastructure.
- AWS Identity and Access Management (IAM) provides access control for AWS resources.
- Amazon Cognito helps you build access control for your application with features such as user sign-up, sign-in, and more.
- Other services can be used alongside these services for advanced use cases, such as natural language processing (for example, Alexa Skills kit, and Lex), Analytics (Amazon Kinesis Streams), Machine Learning (Amazon Machine Learning), and so on.
Apart from using the AWS management console from a browser, we can also interact with AWS services from AWS CLI (command line) and AWS SDK (programmatic access). Except for the first few recipes, we will mostly focus on using Amazon CloudWatch with AWS CLI for modeling and provisioning our infrastructure.


