Actor Blueprint
Continuing with our exercise, we’ve already accomplished two key steps: creating a Landscape material and painting the landscape to suit our needs. Now, we’ll move on to preparing the Actor Blueprint, following the approach that we have used in previous chapters. Let’s get started:
- Inside
Content->Blueprints, right-click and choose Blueprint Class. Create a new Actor blueprint and name itBP_PCGLandscape:
Figure 6.24 – Creating the Actor Blueprint
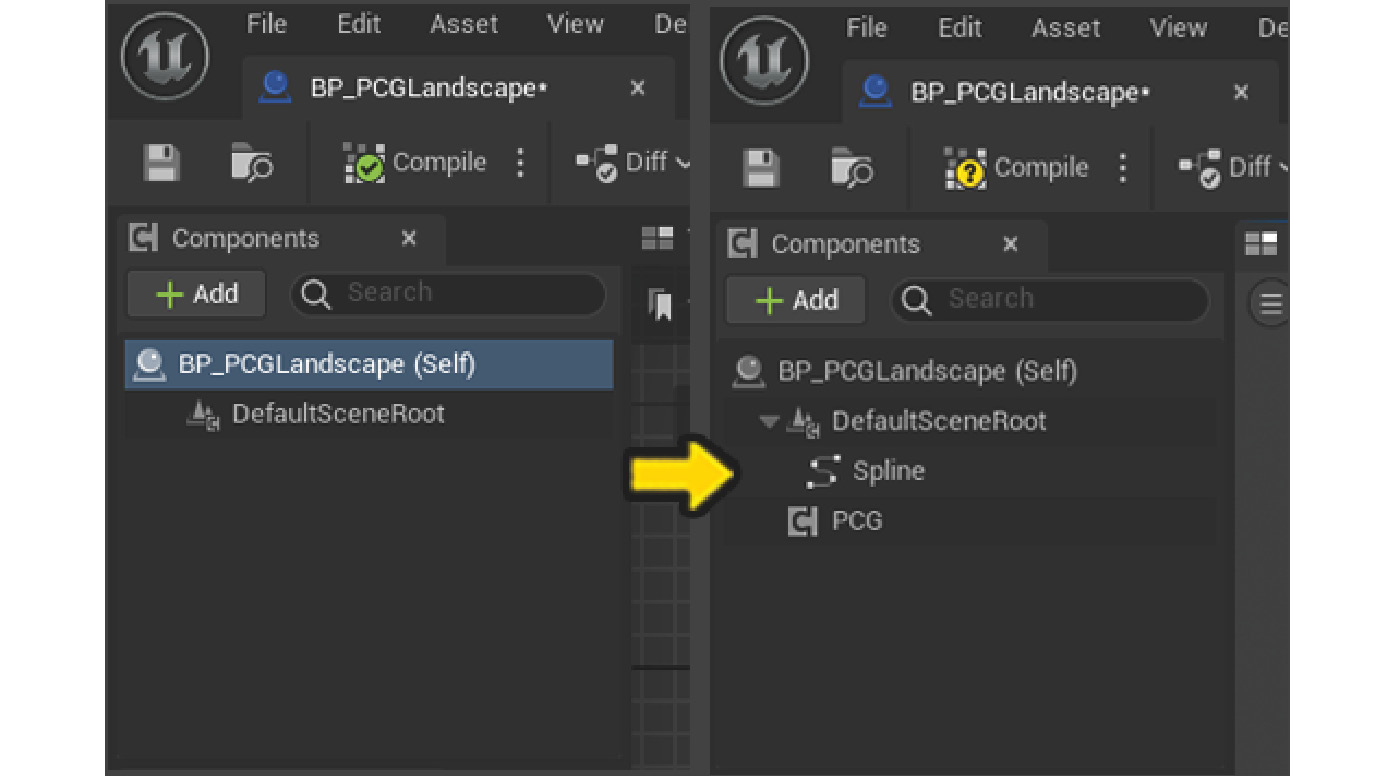
- Open the BP_PCGLandscape Actor blueprint and, on the left-hand side under the Components tab, click the + Add button to add the Spline and PCG components:

Figure 6.25 – Adding the Spline and PCG components
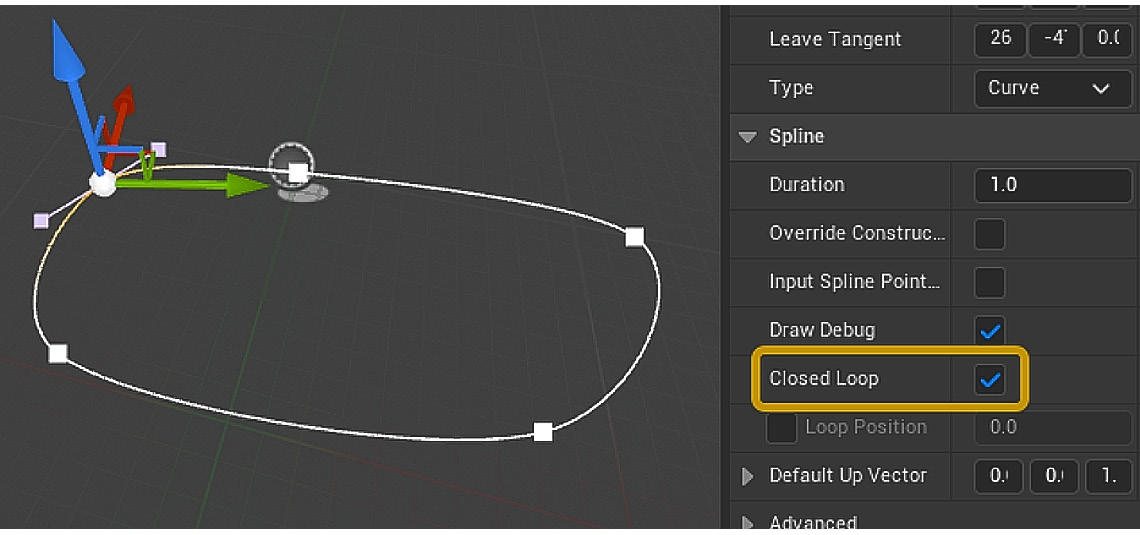
- Select the Spline component and create the loop shape similarly to how we did in Chapter 5. This is the shape (Figure 6.26) we want to use for our exercise:

Figure 6.26 – Shaping the...


