Basic setup and customization of your Moodle site
Once you've managed to get your site up and running, you are ready to log in to your Moodle site and begin the initial customization process. As stated earlier, we'll be using the XAMPP package in Mac OS with Moodle 1.9.8+ installed for screenshots and explanation. So if you are using a Windows version, a hosted server, or have installed on your own server, the screen you see may be slightly different. The process however, will be identical as long as you are using the same version of Moodle. The latest 1.9 version is recommended and will look the same.
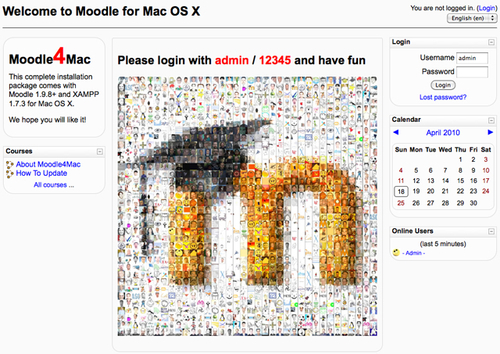
The first screen you will see after navigating to the front page of your Moodle site will look something like this:

In the MAMP package for the Mac, you will see the Username and Password for the administrator account on the front page of Moodle. This is only acceptable because this site is not being served to the public and is only accessible by the user of the machine it is installed on. If you install Moodle on a hosted server, or on your own server, you will select a user name and password for the admin account when installing the system. In all public server situations, make sure you protect the privacy of your administrator login information. Access to the admin account is one of the easiest ways for an individual with malicious intent to abuse your site.


