


Customizing the player
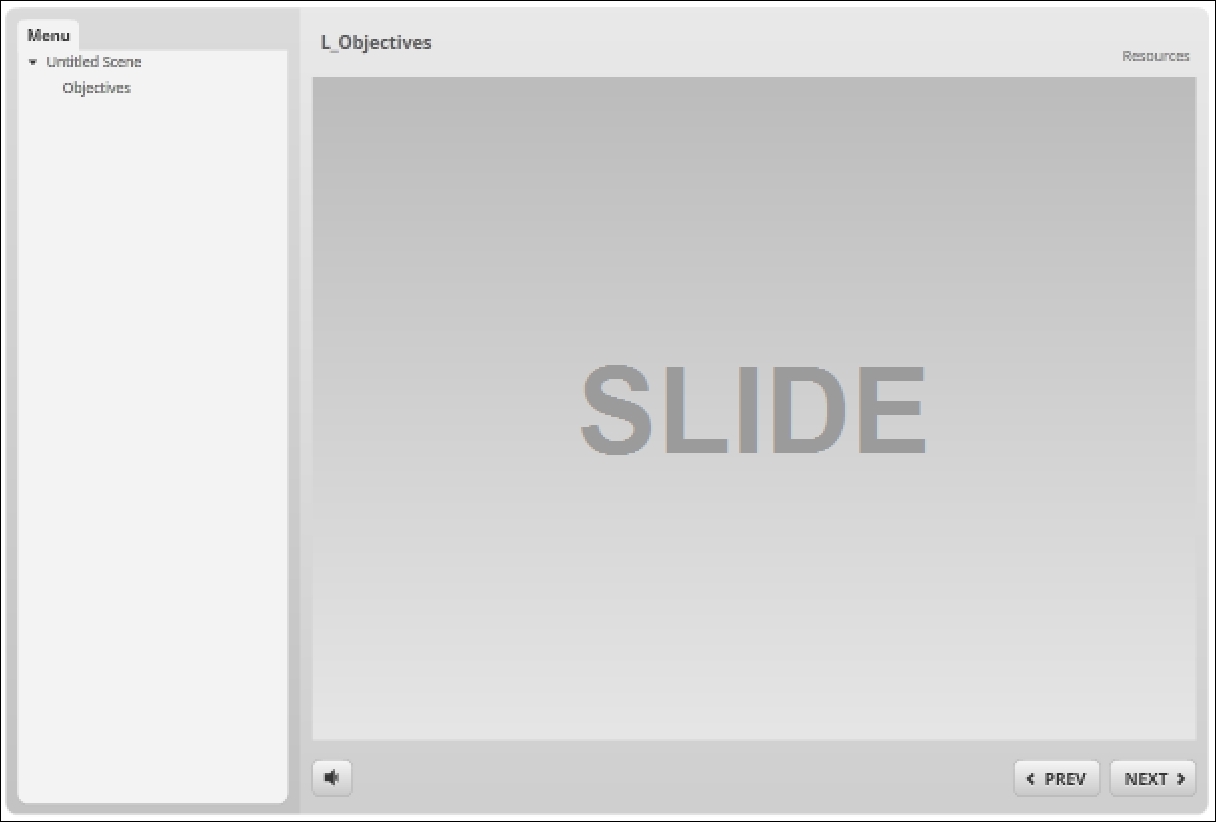
The course player is the overall interface for your Story. It's the frame around your slides and it usually looks something like the following:
The default Storyline player gets the job done, but there's nothing really special about it, right? Well, powered by your own creativity, you can convert the downright default into something simply spectacular, and this chapter is going to guide you along this customization journey! But first, we need to cover our basics and do a little bit of an overview.
To access the Player Properties panel, select Player from the HOME tab or select the Player button in Story View, as shown in the following screenshot:

You'll be presented with the Player Properties panel, as shown in the following screenshot:
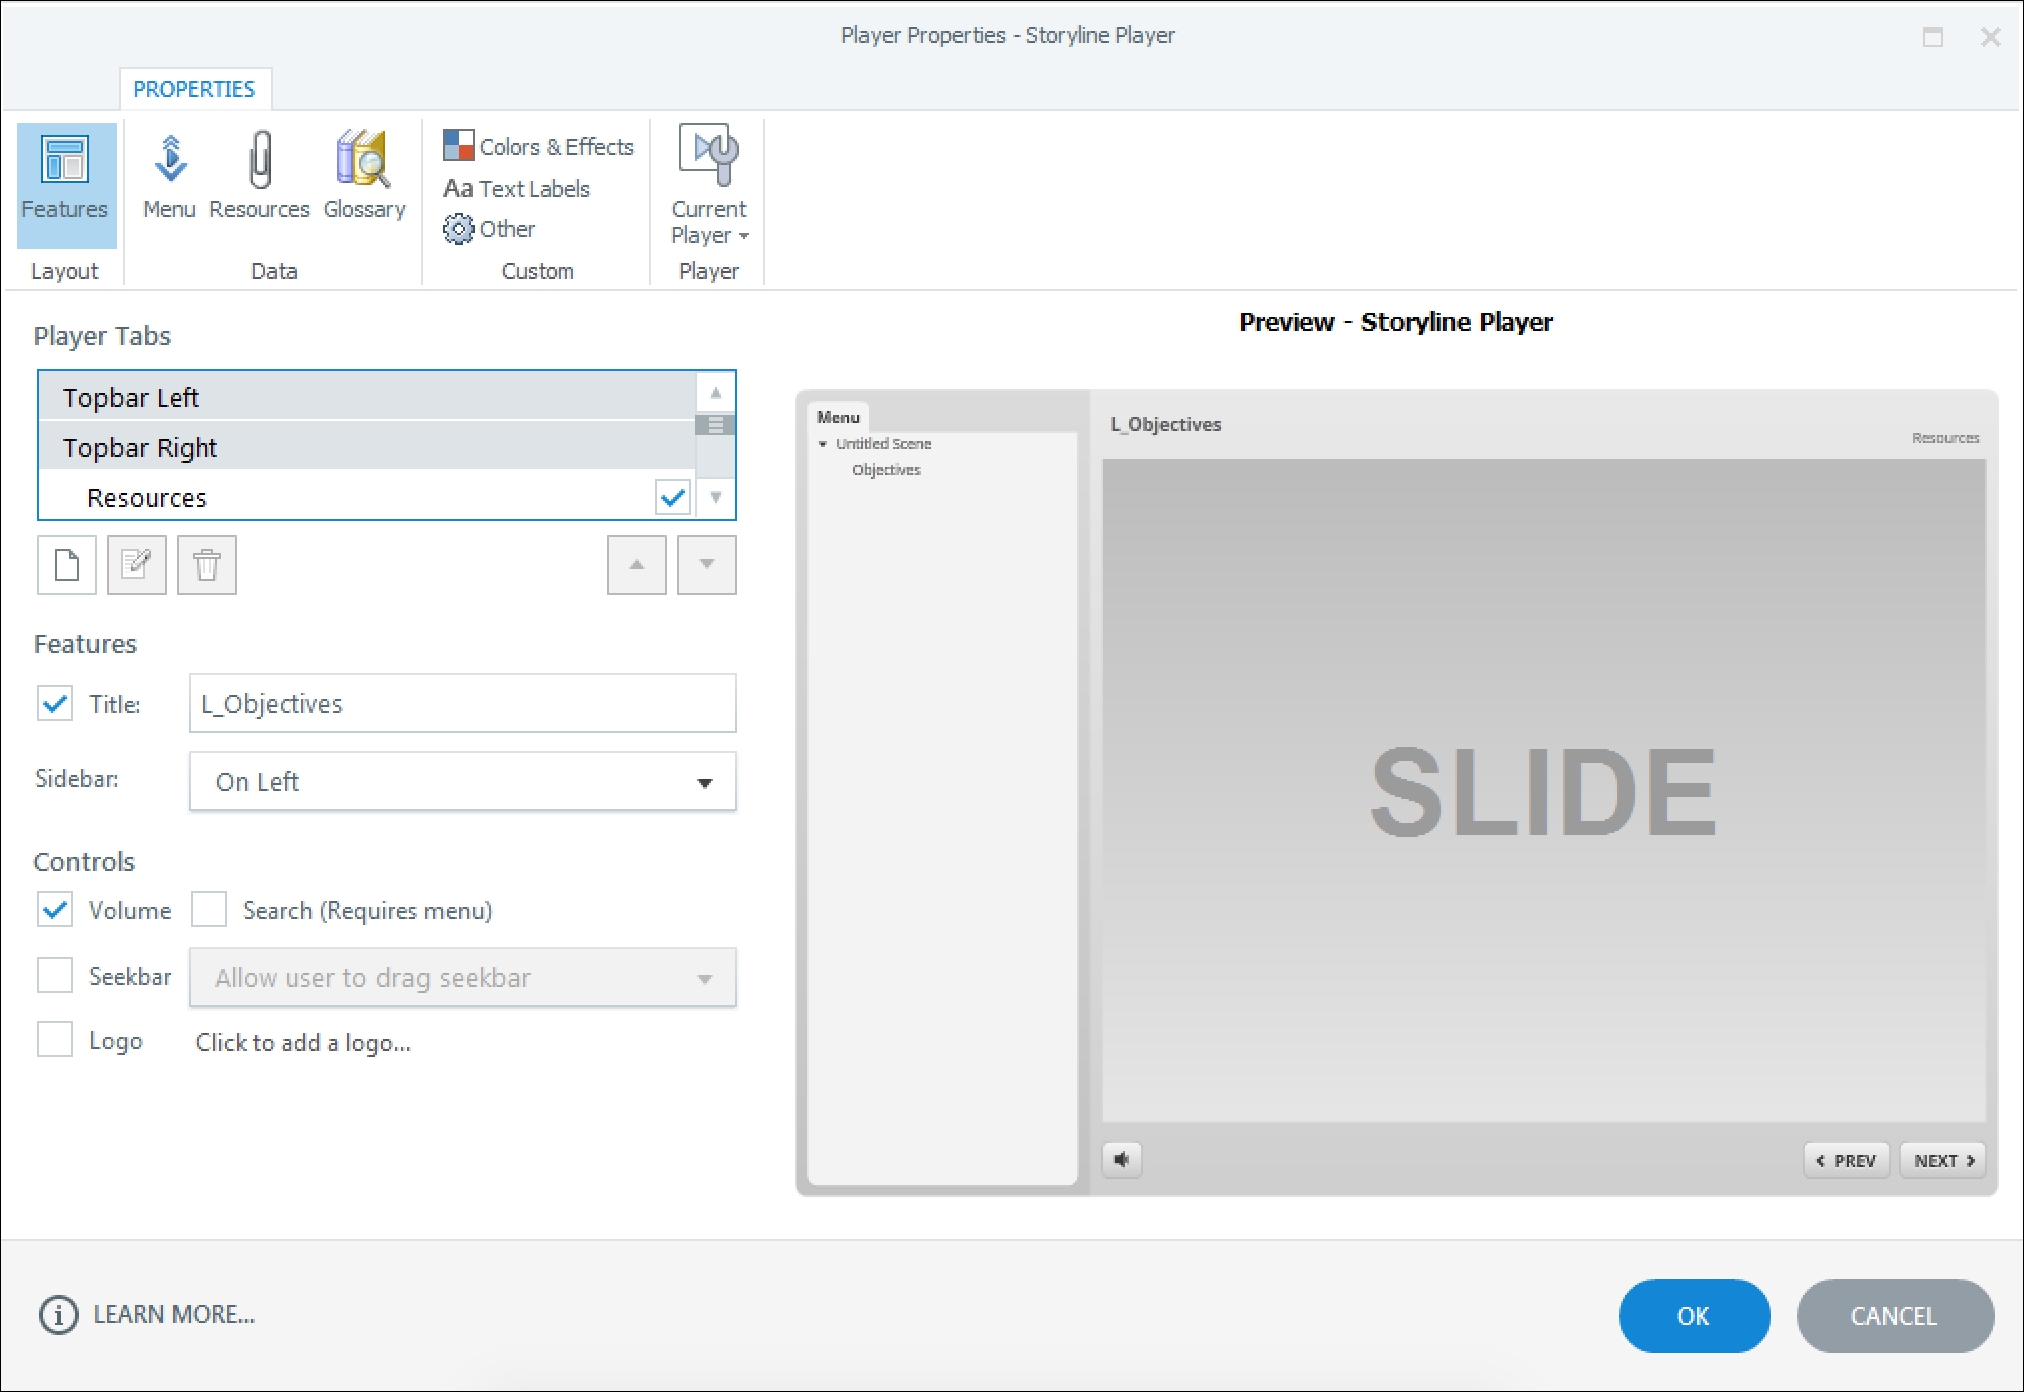
Within the Player Properties panel, you can do so many things. There's a lot of information to cover, so let's get to it!
Tip
Whenever you make changes to the Player, you should save your changes by selecting...


