Routing with OSPF
In this recipe, we will cover routing with OSPF, including configuring an OSPF interface policy and profile.
How to do it...
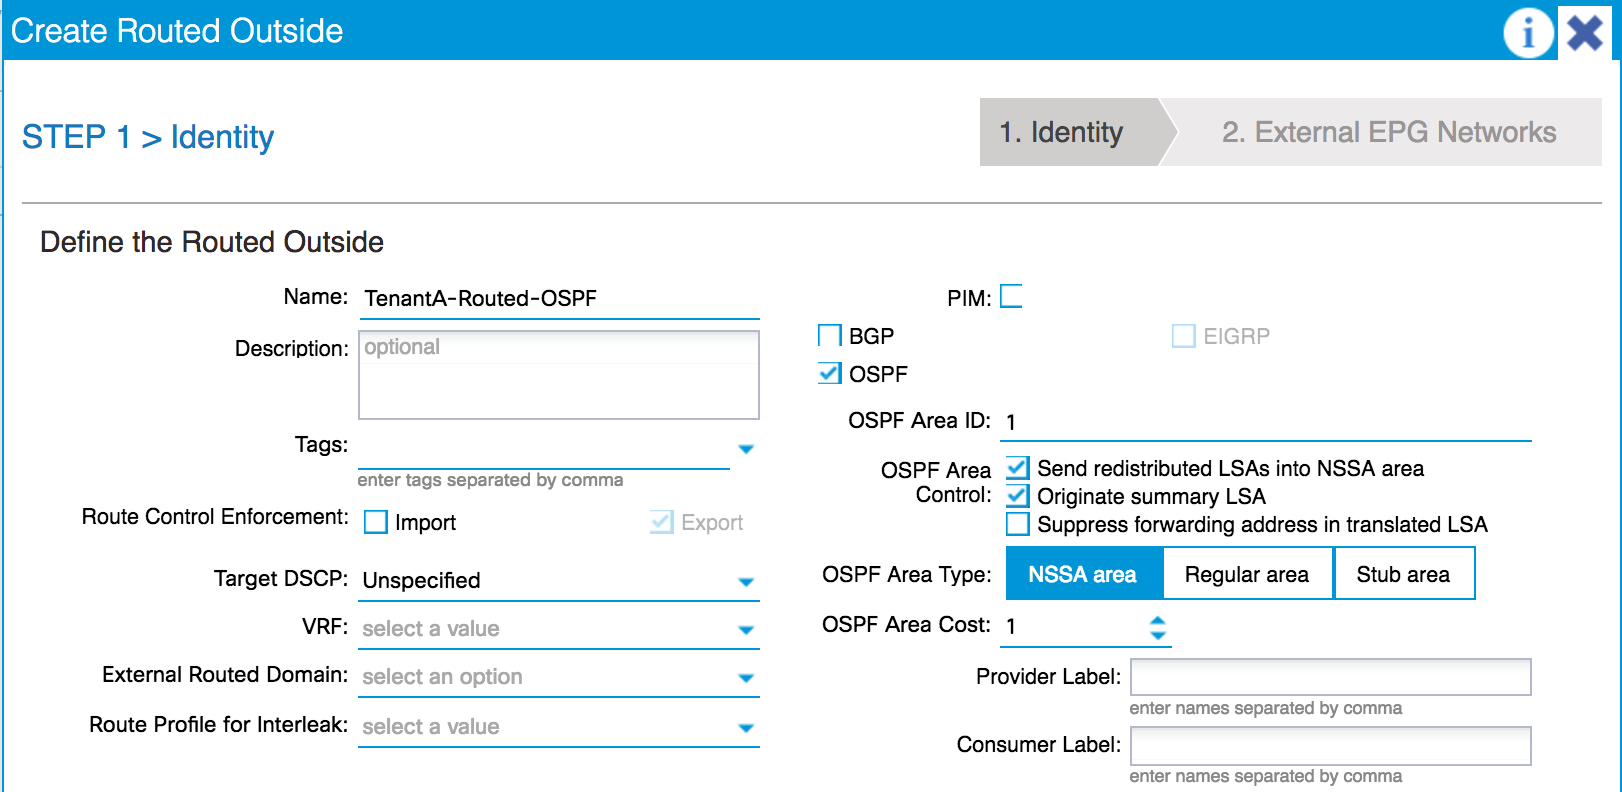
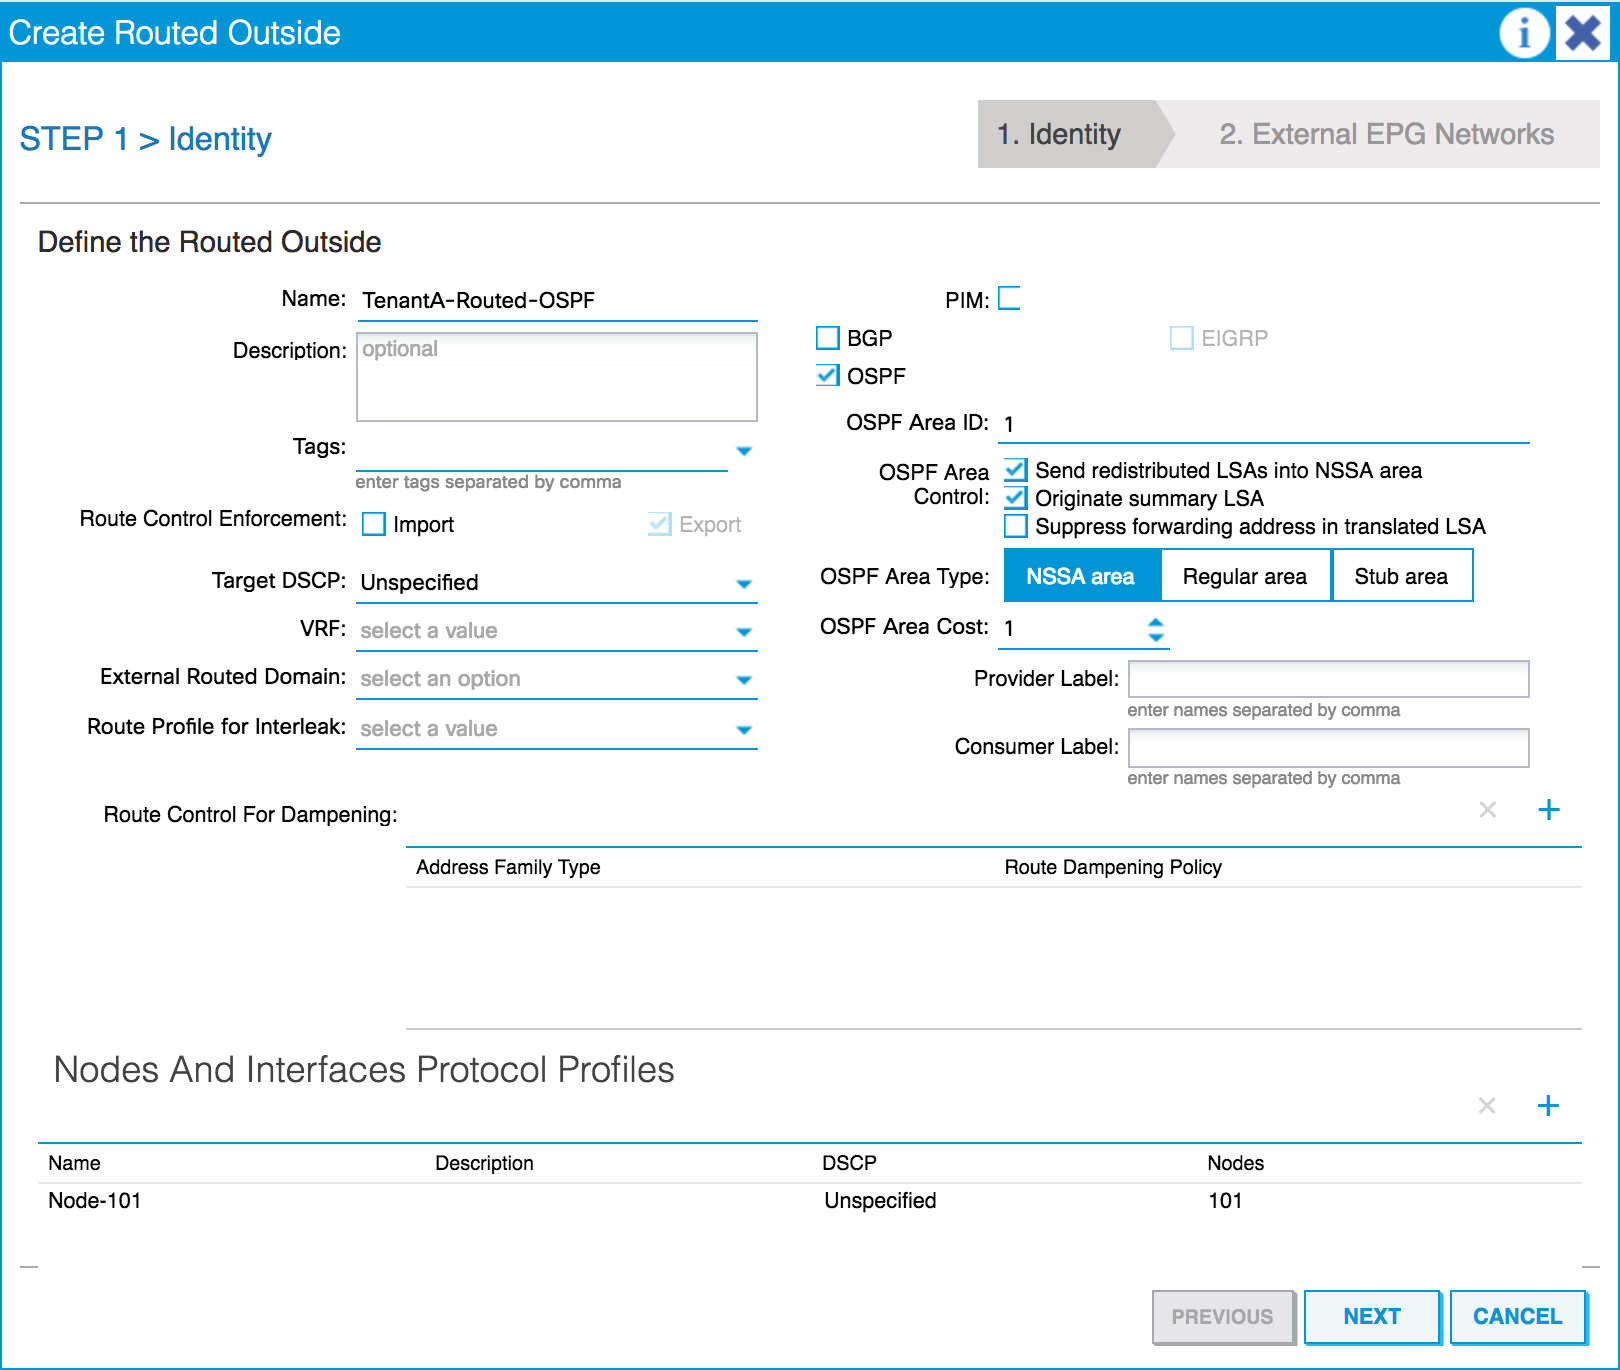
- Start by creating an external routed network. Navigate to
Tenants|TenantA|Networking|External Routed Networks. Right-click on this and selectCreate Routed Outside. - Name it, choose
OSPF, and set theOSPF Area ID. Cisco ACI supports NSSA, regular areas, and stub areas.
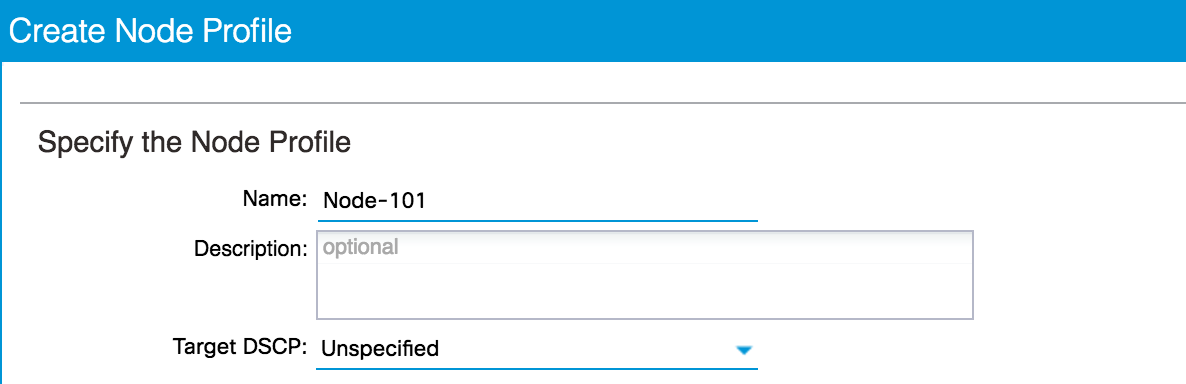
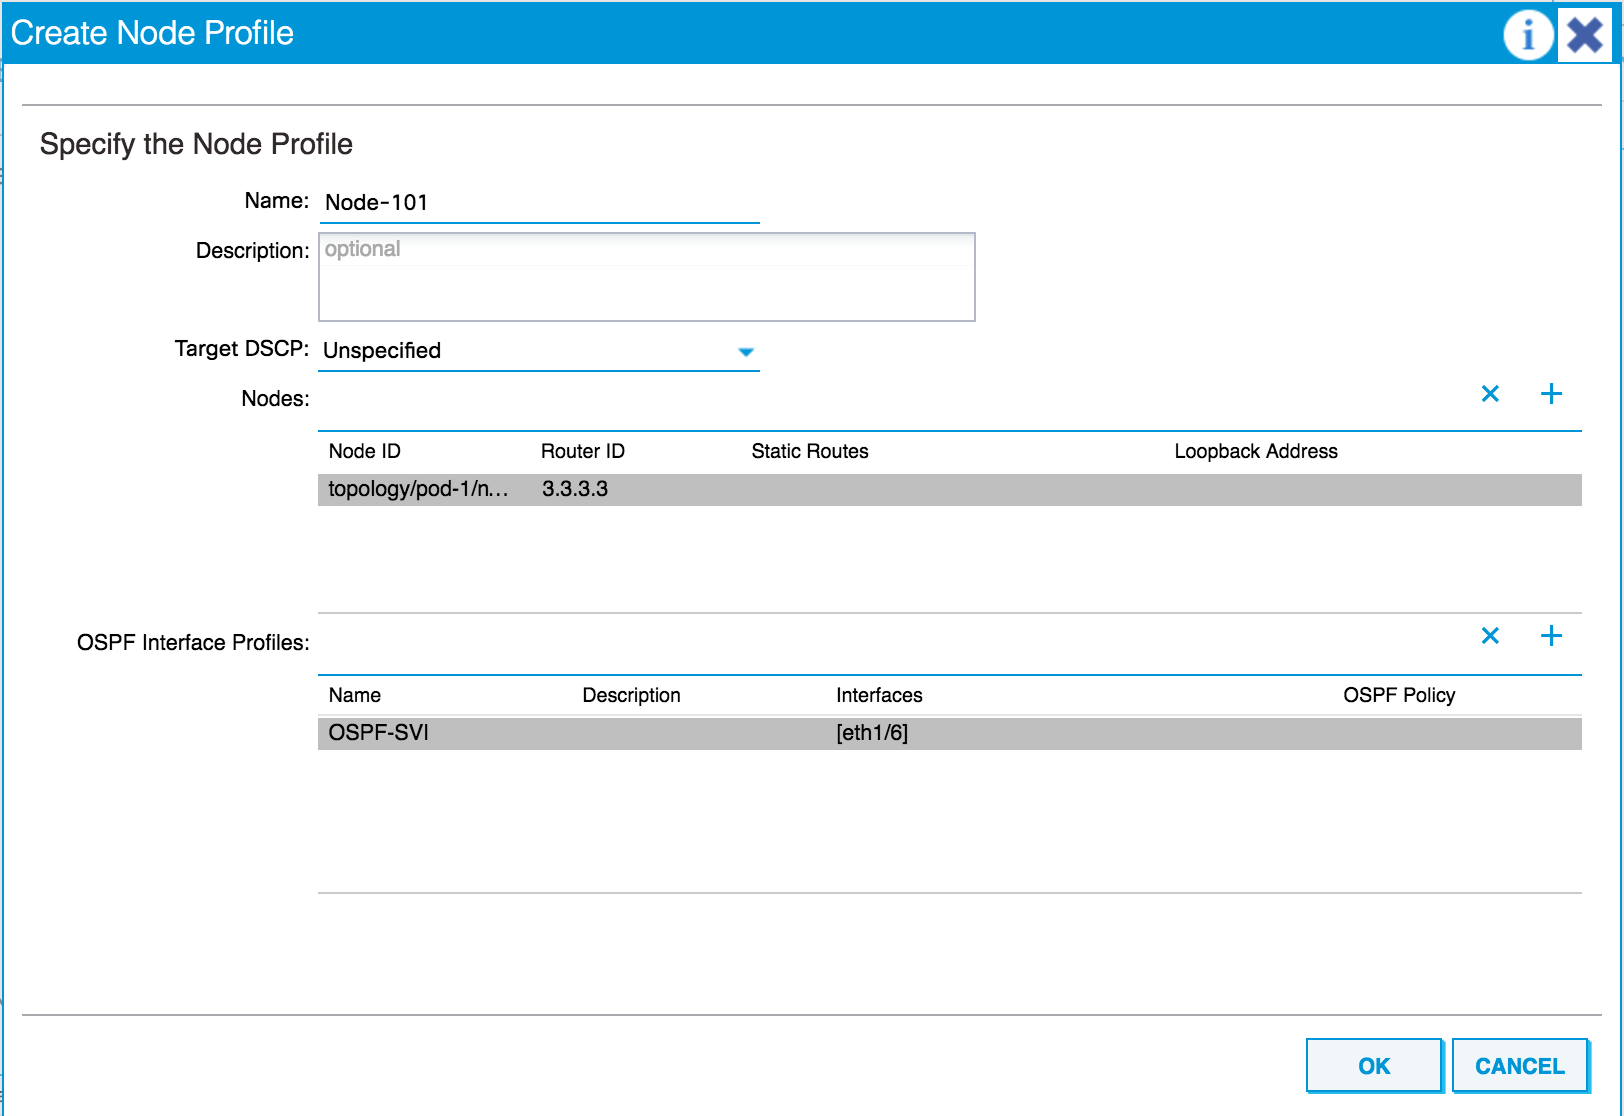
- Click on the plus sign next to
Nodes And Interfaces Protocol Policies. - Name the policy.
- Click on the plus sign next to
Nodes. - Select the node and set a router ID.
- Set any static routes that may be required.
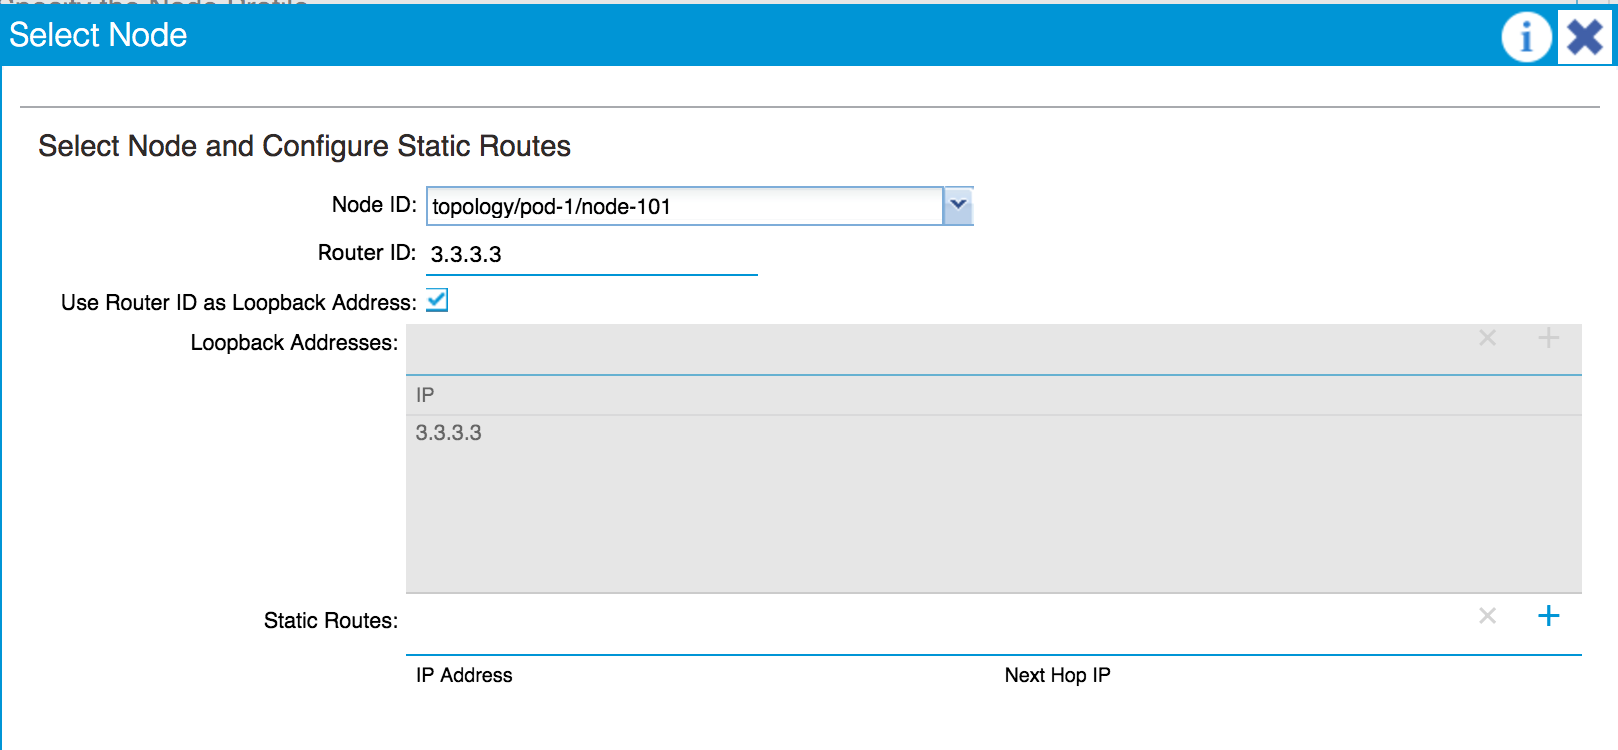
- Click on
OK. - Click on the plus sign next to
OSPF Interface Profiles. - Name the profile and set any authentication settings and BFD (BiForwarding Detection) configurations.
- Configure the interface type (again, choosing from Routed, SVI or Routed Sub-Interface).
- Click on the plus sign to create the interface.
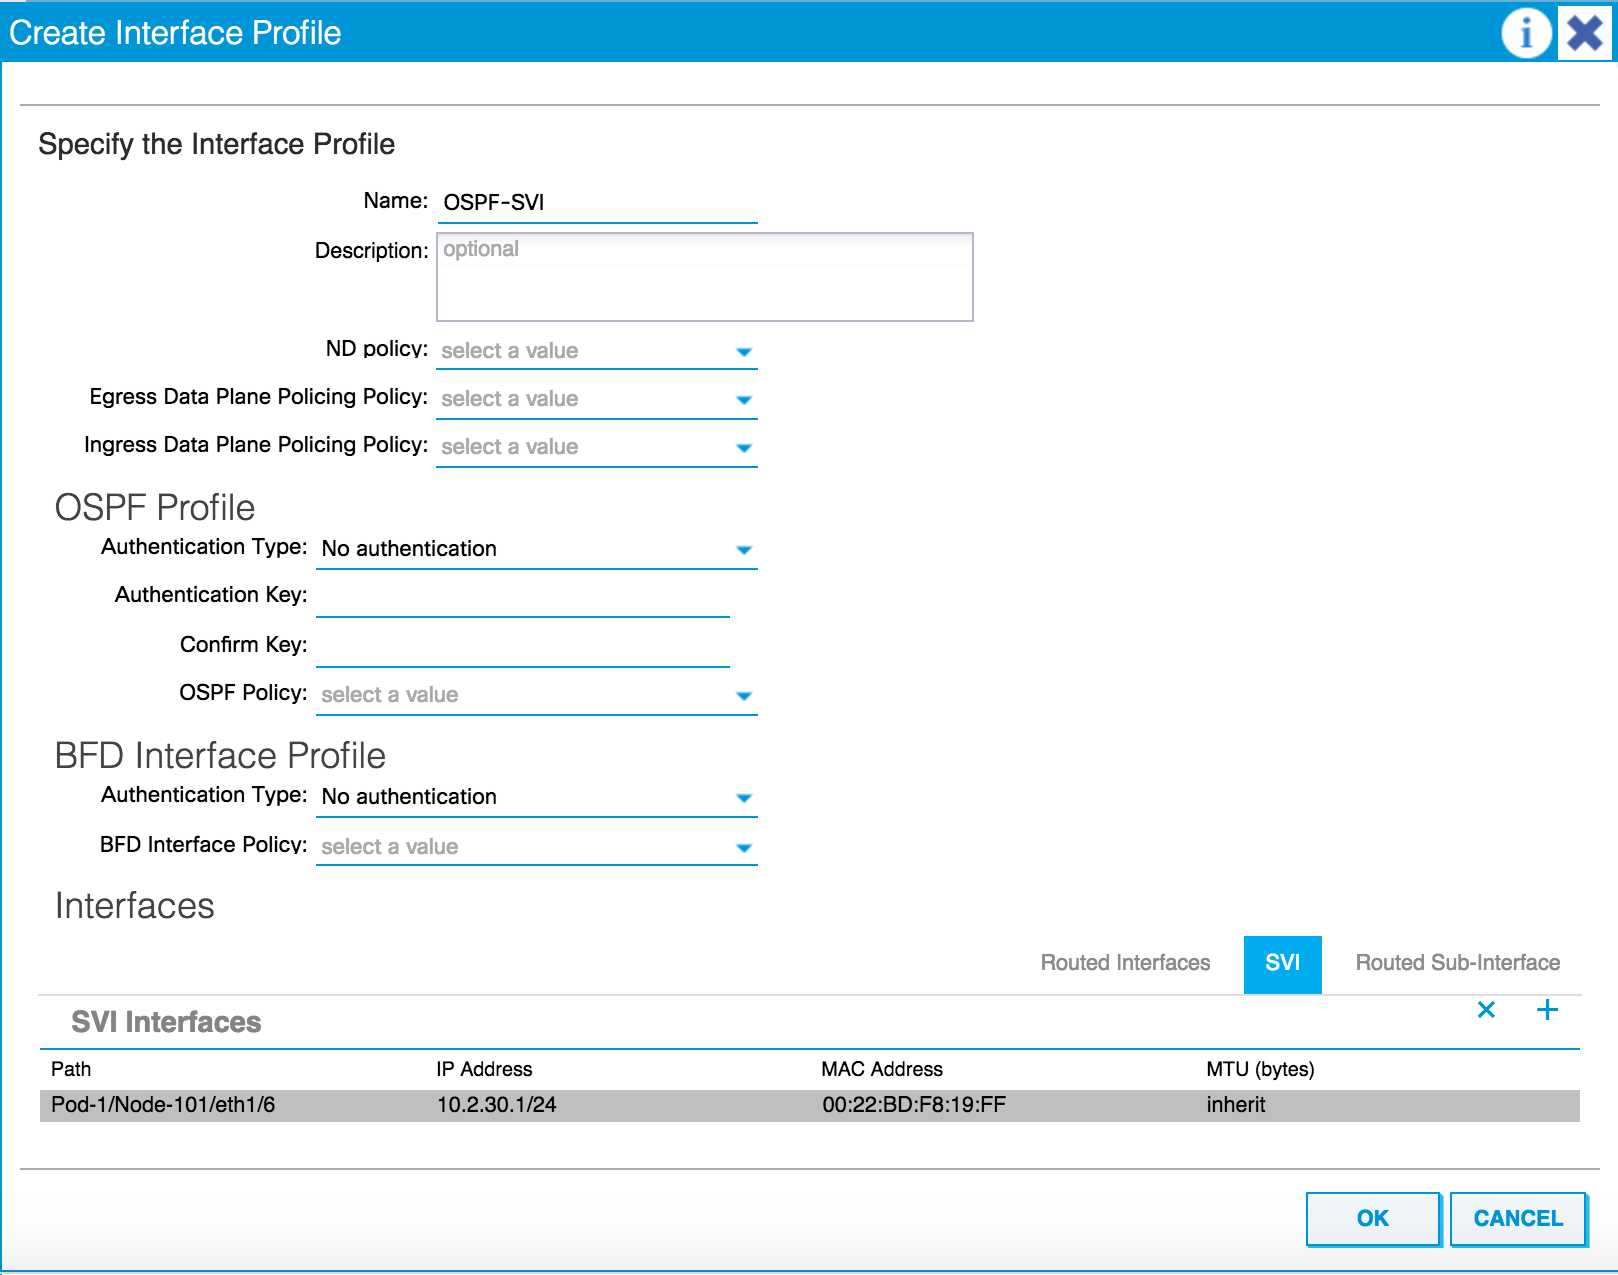
- Click on
OK.
- Click on
OKagain.
- Click on
NEXT. - On the
Configure External EPG Networks...