Understanding PostgREST’s OpenAPI Schema exposure
In this section, I want to talk about schemas, their structures, how PostgREST exposes them, as well as how to avoid exposure.
You must be aware that your complete public schema structure is, in fact, publicly visible to everyone who has the Anonymous Key to your project. But you might wonder, why is that? And shouldn’t we have discussed this in Chapter 11? The short answer is this – PostgREST follows the OpenAPI specs, and even though someone can see the schema, they can’t see your data, so it’s not a security issue per se. Let’s dig into this further.
In Chapter 1, I explained how PostgREST introspects the database and provides an API on top of it. PostgREST hereby follows the OpenAPI specification and allows us to explore the possible API calls (https://postgrest.org/en/v12/references/api/openapi.html) and build upon them. This means that once someone has your API URL and Anonymous Key (which is exposed when you use Supabase with frontend clients), everybody knows what your schema looks like, which relationships between the tables exist, and which RPCs are available to be called.
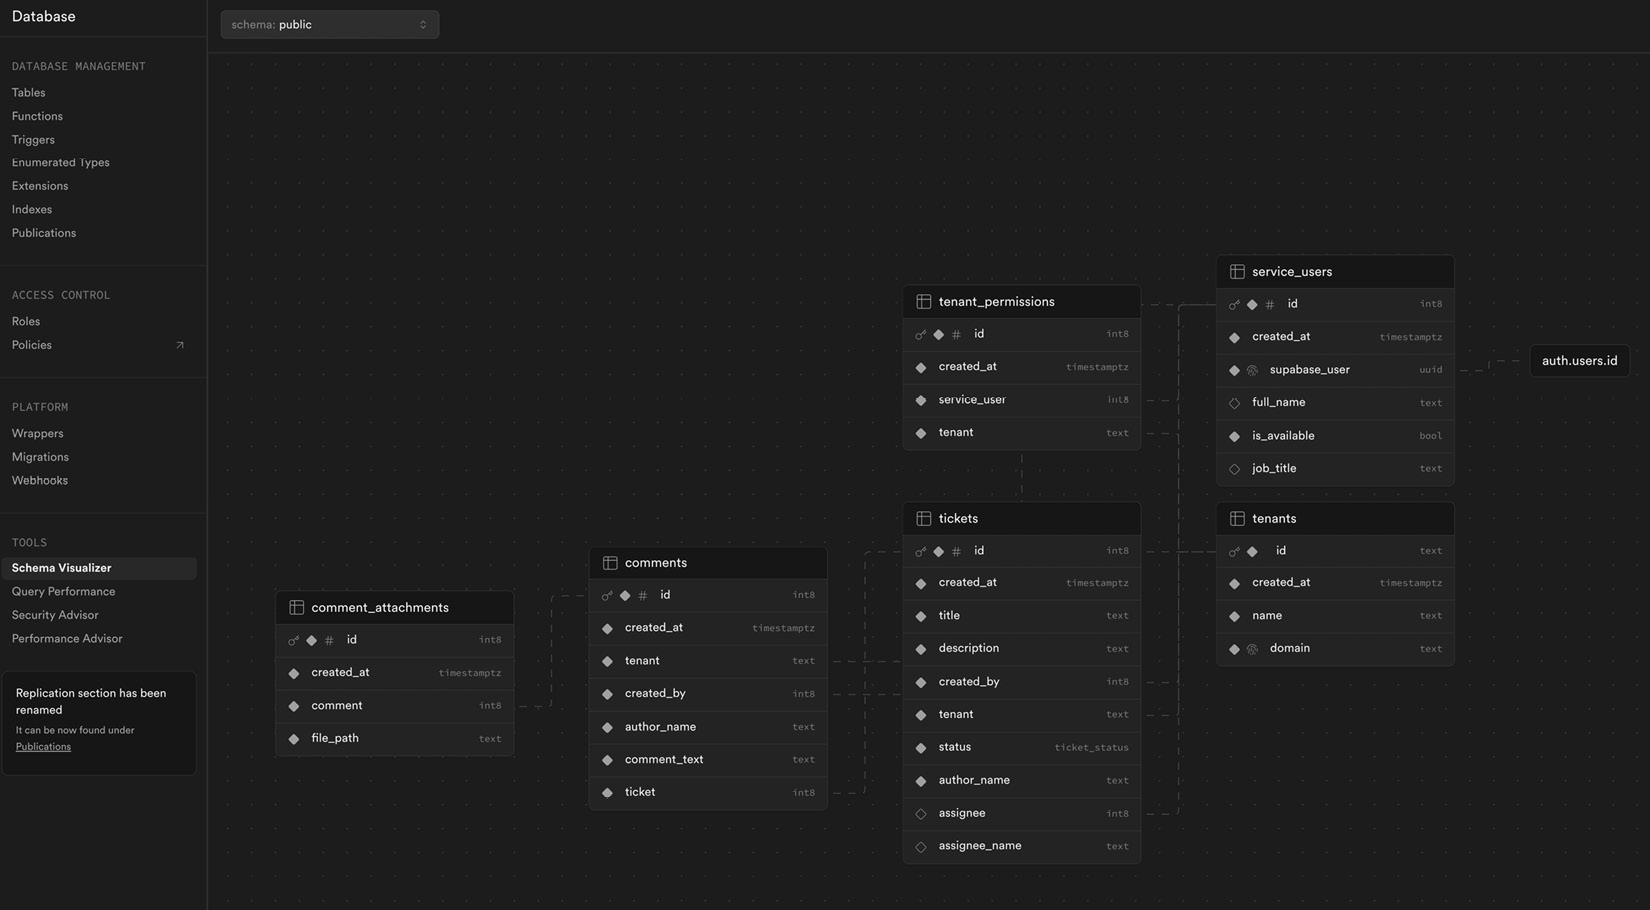
There is an open-source Supabase Schema Visualizer (created by GitHub user @zernonia and available at https://github.com/zernonia/supabase-schema) that creates a visual representation of your schema. You can find it integrated within your project’s Supabase Studio Dashboard (see Figure 12.1), but it is also independently usable and will create a schema visualization, with a provided API URL and an Anonymous Key.

Figure 12.1: A visualized schema with relations (don't worry about the specifics; this is just an overview of the Supabase Schema Visualizer)
This means that a potential hacker could use the existing information as an easy-to-understand visualization of your structure. Also, it means that your maybe-super-precious architecture is partially exposed to the outside world.
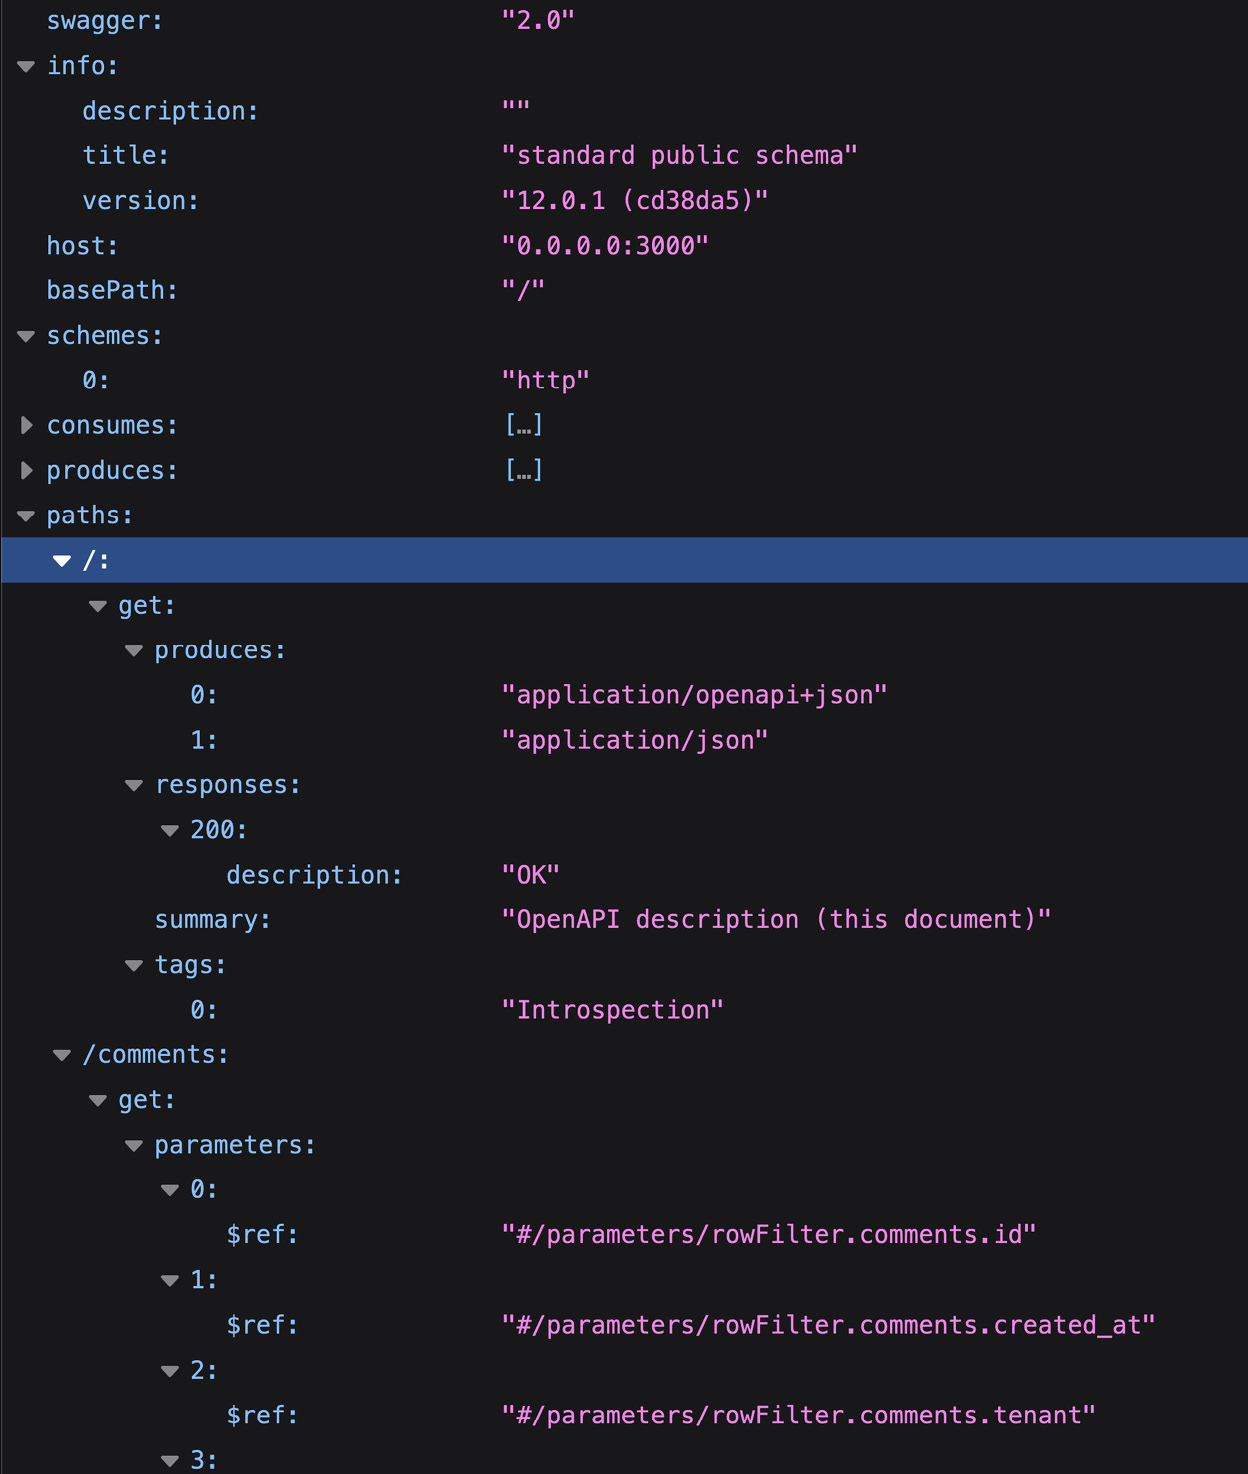
PostgREST exposes this information at the base path of the Supabase REST API. You can just make a GET request to YOUR_API_URL/rest/v1/ and add an HTTP header with the Anonymous Key (in curl, this is -H 'Apikey: YOUR_ANON_KEY'). The server will then respond with the full JSON output of the schema (which the visualizer uses to create a diagram):

Figure 12.2: A small extract of the PostgREST OpenAPI introspection
Note
On localhost, don’t use ?apikey, as it works without it and throws an error otherwise.
But what about other schemas, like the rls_helpers schema we created? Is that exposed as well? No. The default schemas that are exposed are public, storage, and graphql_public (graphql_public is a schema that reflects data from the public schema for the GraphQL endpoint of Supabase, which you can learn more about here: https://supabase.com/docs/guides/graphql).
Okay, but what if I don’t want my schema structure to be visible/exposed? Let’s discuss that now!
Preventing schema exposure
If you want to avoid people scanning through your schema with the PostgREST APIs (which are available at YOUR _API_URL/rest/v1/), there’s a simple solution and a correct solution.
The simple solution is to completely disable OpenAPI exposure by running this SQL expression:
ALTER ROLE authenticator SET pgrst.openapi_mode TO 'disabled';
NOTIFY pgrst, 'reload config';
By running this, OpenAPI generation will be disabled, but this also means that Supabase’s health check assumes that PostgREST is down, as it doesn’t respond anymore on the base URL. So don’t do this!
If you did, reverse your code to this:
ALTER ROLE authenticator RESET pgrst.openapi_mode;
NOTIFY pgrst, 'reload config';
Instead, let’s look at the correct solution – this involves returning a mocked OpenAPI response with empty API data, as described at https://postgrest.org/en/v12/references/api/openapi.html#overriding-full-openapi-response. To do so, we need to define a mock function in our database that returns the most basic JSON as a valid OpenAPI response:
create or replace function mock_openapi() returns json as $_$
declare
openapi json = $$
  {
    "swagger": "2.0",
    "info":{
      "title":"Overridden",
      "description":"This is a my own API"
    }
  }
$$;
begin
  return openapi;
end
$_$ language plpgsql;
Once executed, we need to tell PostgREST to use this function to generate the schema response:
ALTER ROLE authenticator SET pgrst.db_root_spec
 TO 'public.mock_openapi';
NOTIFY pgrst, 'reload config';
Note
In Supabase Studio, there is an API Docs tab that usually shows you documentation specifically for each of your tables. As it is based on the returned OpenAPI response from PostgREST, which is now empty, this will not show auto-generated docs anymore – however, this should be your least concern, as your documentation is now this book!
Now you know how to hide away your schema while still being able to use PostgREST on the schema. If you want to undo this action, just use RESET:
ALTER ROLE authenticator RESET pgrst.db_root_spec ;
NOTIFY pgrst, 'reload config';
We can also remove schemas for use with PostgREST completely. Let’s see that next.
Removing schemas from usage via API
If you really want to, you can go as far as saying that you don’t want PostgREST to act on a schema at all. This also means disabling the usage with the Service Role Key. The only thing that you can then do to perform a query on the database is to connect directly to it.
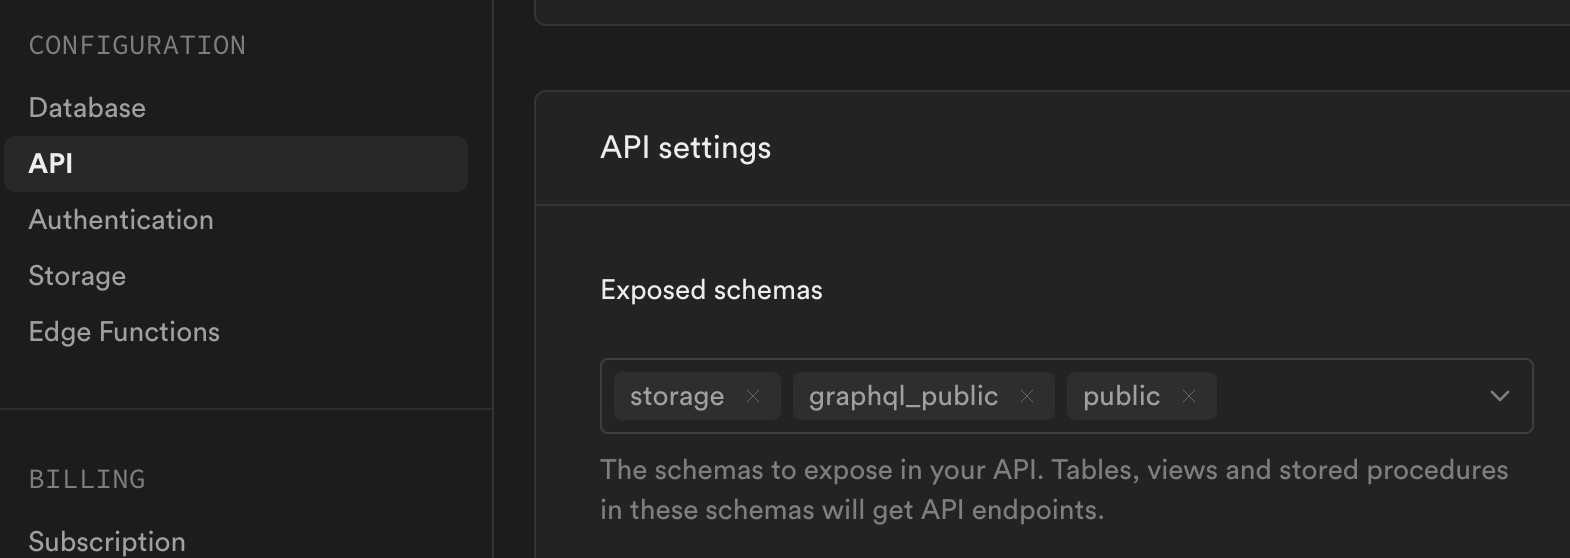
With a local instance, you can control the API-exposed schemas in the config.toml file under the [api] section. There, you will find the schemas = ... configuration. On supabase.com, you’ll find this in the API | API settings section, where you can add or remove schemas to be used by the API:

Figure 12.3: Setting the PostgREST-enabled schemas
That’s all you need to do to disable API access to a schema. But what if you want the opposite – to specifically allow a custom schema to be used with PostgREST? Let’s see that too.
Specifically exposing a schema to the API
Removing a schema to be able to be used by the API was straightforward; however, adding a custom one to be exposed isn’t as intuitive as just creating it. Obviously, after creating a new schema, you must add it to the Exposed schemas section shown in Figure 12.3, but you also need to set a few permissions for the API to be able to read the tables properly. This is done with SQL commands granting the proper permission roles within Postgres.
You can find the set of commands to execute for an API-exposed schema on this page: https://supabase.com/docs/guides/api/using-custom-schemas. I will refrain from copying and pasting them into this book; note that you need to replace myschema with the custom schema you want to expose.
As an additional note, creating a Supabase client with a different schema than public can be done by passing { db: { schema: 'schema-name' }} to the options when creating a client, like so:
createClient(url, key, { db: { schema: 'your-schema' } }); That’s all there is to know about schema exposure. Let’s hit the next topic.


