Setting up your local environment and writing your first CDK app
AWS CDK comes with two important tools, as follows:
- The AWS CDK v2 standard library, which includes constructs for each of the AWS services
- The CDK CLI, which is a command-line tool for interacting with apps and stacks
Before setting these up, let’s go ahead and set up AWS’s main CLI application to aid us with our CDK setup and deployments later on.
Setting up the AWS CLI and profile
To use CDK to provision AWS services, we will first need to set up our local machine with the configuration it needs to work with AWS. The easiest way to do this is via the AWS CLI.
Note
The AWS CLI is different from the AWS CDK CLI. The AWS CLI is mainly used to interact with AWS via command-line or Bash scripts, but it also comes in handy when using CDK.
AWS has detailed AWS CLI installation documentation for various operating systems and processor architectures, which can be found by visiting the following link: https://docs.aws.amazon.com/cli/latest/userguide/getting-started-install.html.
Follow the steps required for your operating system and come back here once you’re done.
We hope that wasn’t too painful. we’re on macOS, which seems to have the fewest steps of them all. Next, let’s check the installation was successful by running the following command:
$ aws --version
If all has gone well during the installation process, you should be seeing an output like the following screenshot:

Figure 1.1 – AWS CLI version output
Next, let’s create a separate profile for this book. As mentioned in the Technical requirements section, We highly recommend you create a separate account while you’re developing with CDK rather than using the account you normally use in your day-to-day activities.
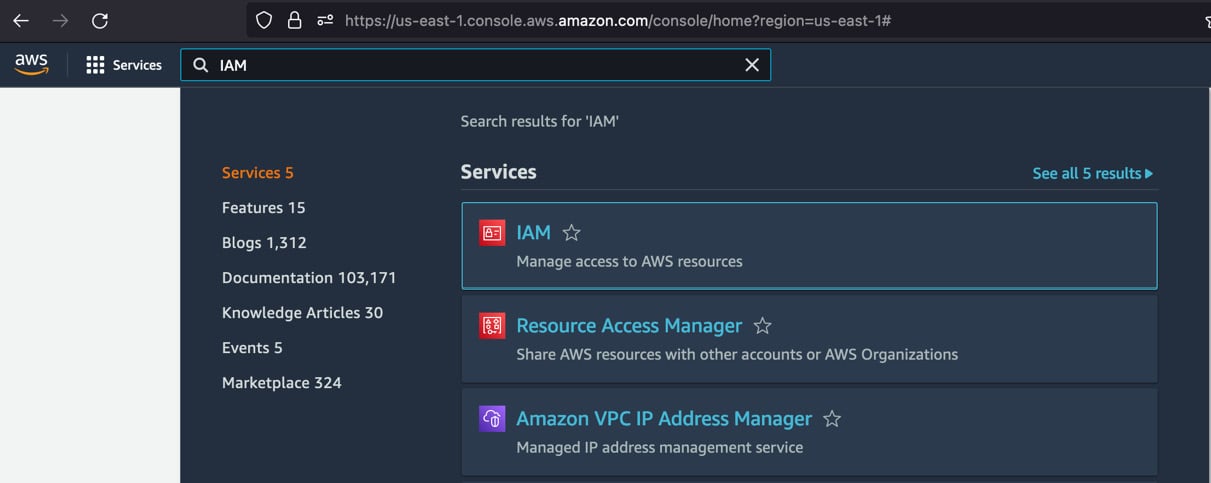
Log in to the AWS account of your choosing, and once logged in, type IAM in the search box at the top of the AWS dashboard:

Figure 1.2 – Finding IAM in the sea of AWS services
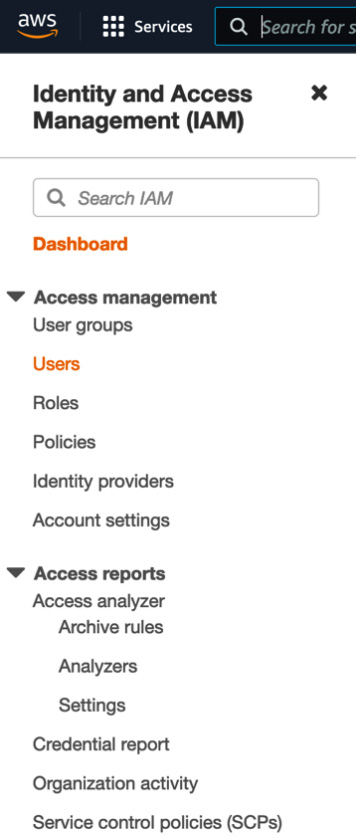
Click on IAM next, and from the menu on the left, select Users:

Figure 1.3 – Users section in IAM
From the list of users, click on your own username. You will be taken to the user dashboard where the Permissions tab is active:

Figure 1.4 – IAM user roles
As you can see in the preceding screenshot, we’ve given our user AdministratorAccess permissions so that we have free rein on spinning up various services via CDK. Otherwise, we will have to constantly come back here and give ourselves service-specific permissions to spin up services.
If you are the root account holder, you should already have these permissions assigned to you. If not, you can click on Add permissions to search for your username and give yourself this permission, or it might be something that you have to ask your account administrator to do for you.
Important note
It’s generally not advised to use the root account to spin up services via CDK or any other means directly. The root account should be used to give granular permissions to secondary users that can then deploy CDK stacks. We are, for now, skipping such steps to simplify the instructions.
Next, click on the Security credentials tab. Under Access keys, click Create access key. A popup should appear offering you the option to download the credentials as a CSV file or copy them directly from the popup. You can do whichever one of them you like. Once we use the credentials, don’t forget to delete the CSV file on disk.
Now that we have the keys file downloaded from the AWS console, let’s configure our local environment with these given keys. Run the following command:
$ aws configure --profile cdk
You will be prompted to enter the AWS access key ID. You can get this from the CSV file you downloaded or the value you copied over from the previous step. Once you have done this, press Enter.
Next, you will be prompted to enter the AWS secret access key. Just as in the previous step, copy this over and press Enter.
Now you will be prompted to enter a default Region name. We normally work within us-east-1 since it’s one of the cheapest Regions (yes—AWS pricing differs per Region) and one of the first ones to receive new services and products. You can choose a Region near your geographical location if response promptness during the course of this book matters to you. us-east-1 has been selected—off we go.
Last, the tooling will ask you for a default output format; enter json.
Now, let’s make sure you’ve set things up right. To do that, run the following command:
$ aws configure list --profile cdk
If you see an output like the one shown in the following screenshot, voilà! You’re all set:

Figure 1.5 – Checking the configuration with the AWS CLI
Important note
As you see, even though the list command covers most of our keys and secrets, we’re not taking any chances because even the last few characters could be used by a malicious actor for tracking. Keep your AWS keys as secret as your bank account details because if leaked, you could take a considerable financial hit.
Setting up the AWS CDK CLI
The AWS CDK CLI is a command-line tool that is installed as an npm package. If you’re a JavaScript or TypeScript developer, you will have it already installed on your machine; otherwise, here is a link to the Node.js website to install this as well as Node’s package manager, npm: https://nodejs.org/en/download/.
Note
Aim for the Long-Term Support (LTS) version of Node.js when downloading it. Generally, a good habit to hold as a developer is to use LTS versions of their tooling.
Once you have npm running, installing cdk on any operating system can be done by simply running the following command:
$ npm install -g aws-cdk@2.25.0
By running this, we are aiming for a specific version of the CLI, and we will also do the same with the library. CDK changes quite significantly between versions, therefore it’s best for us to focus on a specific version of CDK. Once you’ve learned the ropes, you will be able to upgrade to a later version of it when available. At the time of writing this, 2.25.0 is the latest version of CDK.
Next, type in and run the following command:
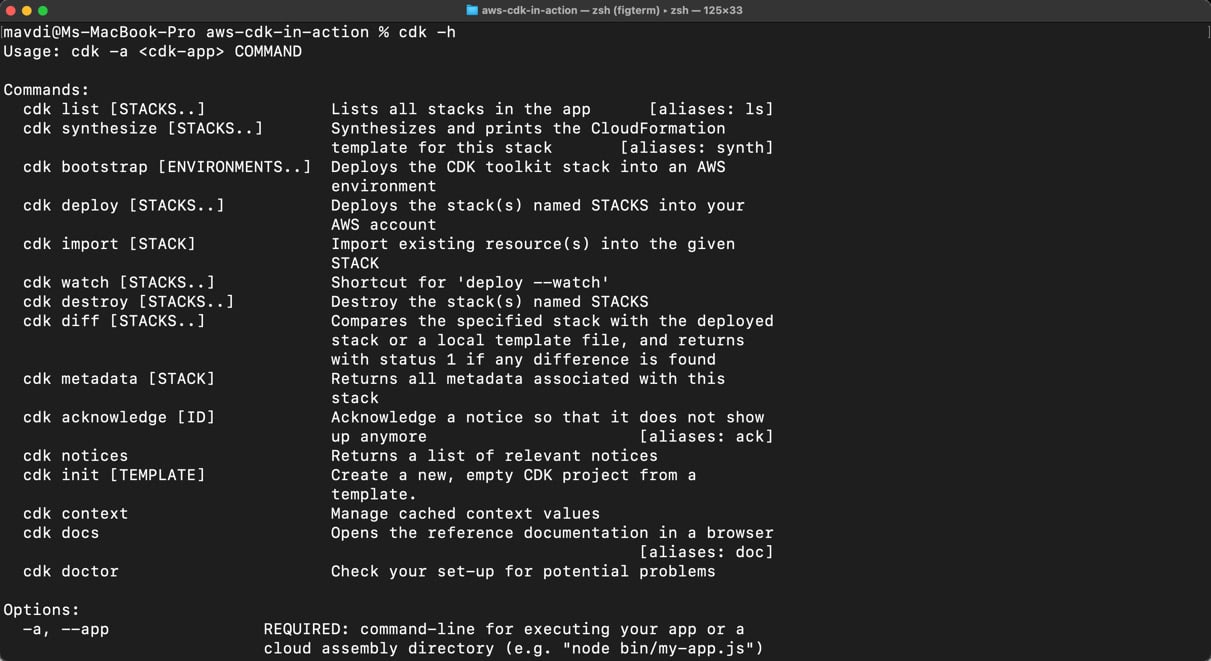
$ cdk -h
If you see a bunch of commands like the ones seen in the following screenshot, you’ve done things right:

Figure 1.6 – Making sure the CDK toolset is installed correctly
Great! Now that we have the CDK CLI installed, let’s go ahead and create our first CDK app.
Creating our first CDK app
Go ahead and create a directory on your workspace. In the example code provided, we’ve named it chapter-1-introduction-to-iac-and-aws-cdk. Next, bring up the CLI of your beloved operating system and run the following command inside the directory:
$ cdk init app --language typescript
A bunch of green text should appear while CDK does its magic. Once done, run the ls command to see the top-level folder structure, or even better, if you have the tree command installed, run it as such:
$ tree -I node_modules
The following is what you should be seeing:

Figure 1.7 – Folder structure of our CDK app
If you don’t have tree installed, you can install it with one of the following commands.
On Mac (using the Homebrew package manager), run this command:
brew install tree
On Linux (Ubuntu), run this command:
sudo apt install tree
Note
tree is already installed on Windows 10/11.
We’ve intentionally told the tree command to ignore node_modules since it’s an abyss of directories we don’t need to know about. At a high level, here are explanations of the files and directories:
README.mdis essentially a Markdown documentation file. You must’ve come across it.- The
bindirectory is essentially where the top-level CDK app files reside:chapter-1-introduction-to-iac-and-aws-cdk.tsis the filecdkcreated based on the name of the directory we ran the CLIinitcommand in. This file contains the entry point of the application.
cdk.jsontells the toolkit how to run the application and passes along some further configurations.jest.config.jsis the configuration file thecdklibrary uses to run local tests.libcontains all the goodies. All the constructs we will be creating for our project will be placed inside here, as outlined next:chapter-1-introduction-to-iac-and-aws-cdk-stack.tsis one such construct or component. In this chapter, we will be spending most of our time here.
- You can safely ignore
package-lock.jsonfor now; it’s whatnpmuses to keep track of specific versions of node libraries installed. package.jsonis thenpmmodule’s manifest information such as app, versions, dependencies, and so on.testis pretty self-explanatory. Our test files reside here, as detailed next:chapter-1-introduction-to-iac-and-aws-cdk.test.ts:cdkhas gone ahead and created a test file for us, urging us to test our application. We will do so in later chapters. For now, ignore it.
tsconfig.jsonis where TypeScript-specific configuration is stored.
Now that we’ve learned about the files cdk has created, let’s dive in and kick off our first AWS CDK app!


