Search icon CANCEL
Subscription
0
Cart icon
Your Cart (0 item)
Close icon
You have no products in your basket yet
Save more on your purchases! discount-offer-chevron-icon
Savings automatically calculated. No voucher code required.
Arrow left icon
Explore Products
Best Sellers
New Releases
Books
Videos
Audiobooks
Learning Hub
Newsletter Hub
Free Learning
Arrow right icon
timer SALE ENDS IN
0 Days
:
00 Hours
:
00 Minutes
:
00 Seconds
3D Printing Designs: Octopus Pencil Holder

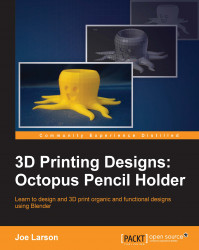
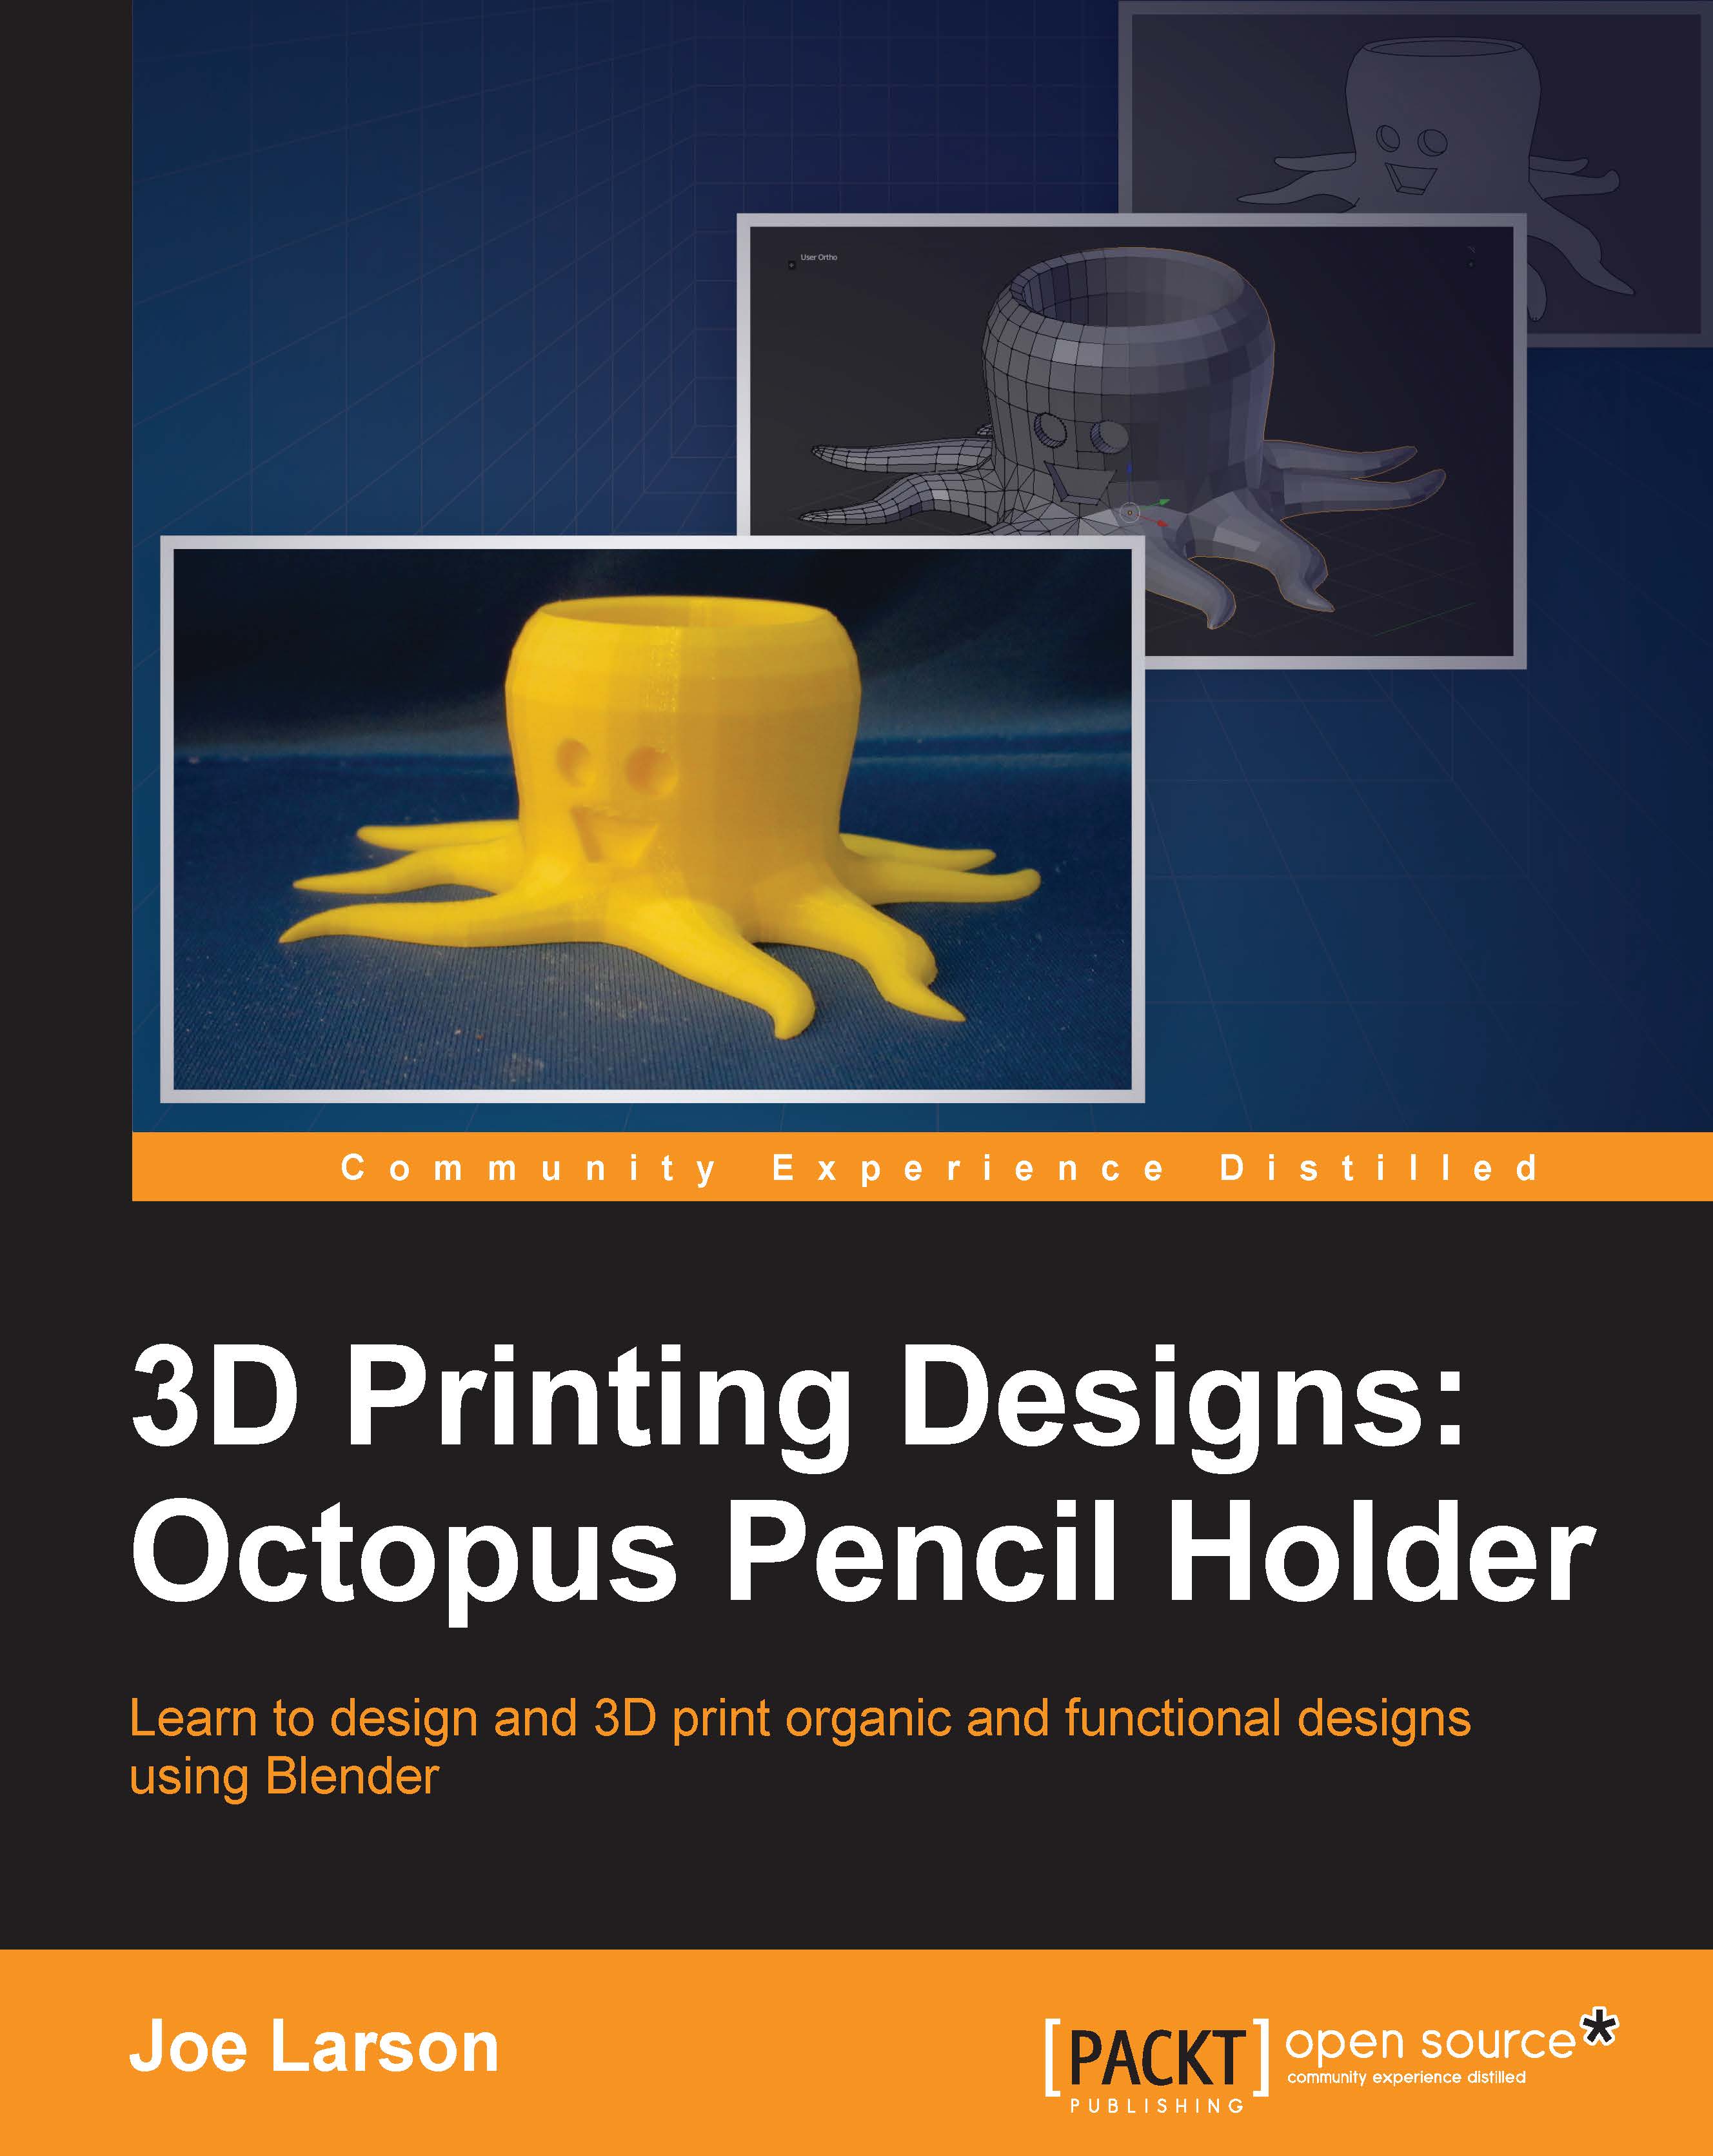
3D Printing Designs: Octopus Pencil Holder: A fast paced guide to designing and printing organic 3D shapes.

eBook
$9.99 $17.99
Paperback
$21.99
Subscription
Free Trial
Renews at $19.99p/m

What do you get with eBook?

Product feature icon Instant access to your Digital eBook purchase
Product feature icon Download this book in EPUB and PDF formats
Product feature icon Access this title in our online reader with advanced features
Product feature icon DRM FREE - Read whenever, wherever and however you want
OR
Modal Close icon
Payment Processing...
tick Completed

Billing Address

Table of content icon View table of contents Preview book icon Preview Book

3D Printing Designs: Octopus Pencil Holder

Chapter 1. Octopus Pencil Holder

3D printing makes it easy to combine forms and functions. Why have just a pencil holder when you can have a pencil holder that looks like, say, a cute octopus? This project is an excellent starting project because it demonstrates a simple but versatile modeling technique that involves editing a simple mesh and smoothing it in order to go into more detail.

This project will involve simple selection techniques that are unique to the Edit Mode, modification commands in the edit mode, and applying modifiers to soften and combine shapes. This technique alone can be used to created unlimited cool things once mastered.

In this book, we will cover the following topics:

  • Planning the project
  • The first basic shape
  • Smoothing the mesh with modifiers
  • Bending the tentacles
  • Flattening the bottom
  • Renaming objects
  • Adding a pencil cup
  • Adding a face
  • Finishing touches

Planning the project

A pencil holder is basically a cup with a sturdy base that can be used to hold objects taller than itself, such as pens, pencils, and other items that might otherwise clutter up a desk. A cute cartoony octopus' tentacles will provide the perfect base and prevent the cup from tipping over.

The hole in the cup should be roughly cylindrical, and about 40-50 mm wide at the base. The whole thing should stand at least 80 mm tall. And, of course, it needs a cute and friendly face; something like this:

Planning the project

The basic shape

Let's get ready; it's time to get to work:

  1. Open Blender, select everything (A) in the default scene and clear (X) the scene:
    The basic shape
  2. Next, add a cylinder and an object to the scene. For this, add (Shift + A) a new object by navigating to Mesh | Cylinder:
    The basic shape
  3. Immediately after adding the cylinder and before clicking on anything else, in the Tool Shelf operator, add parameters for Add Cylinder and change the number of Vertices from 32 to 8. Change the Radius field to 25 and the Depth to 15:
    The basic shape

Editing the basic shape

This project is going to take advantage of several powerful editing tools that Blender provides. The first one is going to be the Extrude operator. Extruding takes its name from the process of creating things in real life, but in 3D modeling, extruding takes a selected part of an existing model and creates new geometry on the edge of the selected parts so that the original can be moved away but remain attached to where it came from. The result is a new shape that can then be edited.

Extruding is a very powerful tool that's used to alter the shape of an object and create new faces that can be extruded themselves:

  1. Enter Edit Mode (Tab) and switch to face the Select Mode (Ctrl + Tab):
    Editing the basic shape
  2. Deselect all faces (A). Then, select one of the vertical sides of the cylinder.
  3. Extrude it either by navigating to Mesh | Extrude | Region in the 3D View menu or pressing E on the keyboard.
  4. Extrude the face about 40 mm by moving the mouse or typing 40 on the keyboard:
    Editing the basic shape
  5. Press Enter or click on the select mouse button to complete the Extrude action.

    Note

    Like all actions in Blender, if a mistake is made in the process of extruding, press Esc or click on the right mouse button to cancel the action. If a mistake is made after this, undoing the action with Ctrl + Z is always possible.

  6. Then, scale the face (S) down to about 20% (0.2) in order to create a tentacle:
    Editing the basic shape
  7. Repeat the extruding and scaling process with the other seven vertical faces of the cylinder to create all eight tentacles:
    Editing the basic shape
  8. Select the top face of the cylinder and extrude (E) it about 30 mm:
    Editing the basic shape
  9. Then, scale (S) it up just a little bit to make the head bulbous:
    Editing the basic shape
  10. Extrude (E) the top again—this time, about 20 mm and—and scale (S) it in order to give the top a more rounded shape:
    Editing the basic shape

Now, the cylinder has been changed into something more of an octopus-like shape. And it was mostly accomplished with the Extrude command, a truly powerful tool used to modify the shape of an object.

Smoothing the mesh with modifiers

This blocky octopus is fine for editing, but it needs to be much smoother for the final result. Fortunately, there's a way to increase the smoothness of the model while retaining the simple geometry, which is easy to edit. This is done by adding a Subdivision Surface modifier to the object:

  1. To add a Subdivision Surface modifier, click on the Modifiers tab in the Properties panel (the one that looks like a wrench):
    Smoothing the mesh with modifiers
  2. Click on the Add Modifier button, and in the menu that appears, choose Subdivision Surface from the list:
    Smoothing the mesh with modifiers

    With the Subdivision Surface modifier, the shape looks much smoother. While in the edit mode, it's clear that the original geometry is still there and acts as sort of a cage that defines the shape of the smoothed mesh. As long as the modifier isn't applied, the simple geometry can be kept for editing.

    Tip

    Changing the View setting in the modifier will affect how smooth the mesh will be. Higher values will create more complex geometry that will look smoother, but they will slow down the computer more. There comes a point where increasing this setting won't have any noticeable effect. Generally, it's best to keep this setting high enough to have a good effect on the shape but low enough to not slow down the computer.

  3. For now, set View to 2; then, the object will look like what's shown in the following screenshot:
    Smoothing the mesh with modifiers

This isn't the final form, but it will get better. If looking at the smoothed mesh while working on the simpler mesh is confusing, the modifier can be temporarily turned off by pressing the eyeball icon on the modifier.

Bending the tentacles

Now, it's time to begin adding some details to the tentacles and give the model some personality.

Before moving ahead, let's take a look at another powerful tool when editing meshes, which is called loop cut or loop subdivide, which will be used while bending the tentacles. Loop cut adds points in the middle of an edge and all around a portion of the geometry. These points can then be transformed. Loop cut only works with edges or vertexes' select mode and will automatically switch modes when using them.

To perform a loop cut, execute the following steps:

  1. Navigate to Mesh | Edges | Loop Subdivide from the 3D View menu, or press Ctrl + R.
  2. Then, move the mouse pointer near an edge, and the loop cut suggestion will be suggested.
  3. When the loop cut is where desired, click on the select mouse button or press Enter. At this point, the loop isn't set and can still be slid back and forth in order to decide an exact location.
  4. When it is where desired, press Enter or the select mouse button again in order to finish the operation. At any time, the operation can be canceled by pressing the right mouse button or pressing the Esc key.
  5. Now that we know how to perform a loop cut, let's go for why we are here, that is, bending the tentacles.
  6. While still in the edit mode, switch to the vertex edit mode (Ctrl + Tab). Add a loop cut (Ctrl + R) to one of the tentacles. Place the cut at the default location in the middle of the tentacle:
    Bending the tentacles
  7. After setting the loop cut, change the operator settings at the bottom of Tool Box and then change Number of Cuts to 2:
    Bending the tentacles
  8. Deselect all points (A) and select the points at the end of the tentacle. Rotate (R) the points around the z axis (Z) and move (G) them along the x and y axes (Shift + Z) to bend the tentacle a bit:
    Bending the tentacles
  9. Expand the selection (Ctrl + NumPad + the (+) sign). Again, rotate (R) the selection around the z axis (Z) and move (G) it along the x and y axes (Shift + Z) to bend the tentacle a bit more:
    Bending the tentacles
  10. Expand the selection again. Rotate (R) and move (G) the tentacle, being careful to constrain the movement:
    Bending the tentacles
  11. Check your tentacle. Adjust your view and make sure that from the front or side views, the twisty tentacle is still on the same level as the other tentacles and not twisted up and down. If it isn't, then your movements weren't constrained properly:
    Bending the tentacles
  12. If not correct, then undo (Ctrl + Z) your movements and try again. There's a way to ensure that the movements are constrained properly. You can do this easily by doing all your transformation while in the top view (NumPad 7). It may be necessary to select points in the Wireframe view (Z) to get all the points and not just the ones on top.
  13. Move to the next tentacle and cut it through loops. This time, while the loop location is being displayed, before clicking on the mouse or pressing Enter the first time, try to press the 2 key to quickly change the number of cuts to 2. This is a shortcut method that can be used optionally instead of changing the parameters after the cut:
    Bending the tentacles
  14. Work around, cutting, selecting, moving, and rotating each tentacle. Give each one a different twist, being careful not to overlap them. If the tentacles overlap, the model won't print properly when exported:
    Bending the tentacles

Your octopus doesn't need to look exactly like this. Make it your own. When all the tentacles have been detailed, it should look much more like an octopus.

Tip

Some 3D printers won't be able to print this model if it's too big, so keep those tentacles tucked in and don't let them fly too far. The smaller 3D printer build areas are about 150 mm or 6 inches across. If the total width of your model is more than that, you'll need to think about the printer you're designing this for.

Flattening the bottom

A friendly 3D print needs to have a solid, flat base. There is more than one way the bottom of a model can be flattened. For one, the geometry can be edited to be flat. Alternatively, a floor object can be created and cut out of the object using a Boolean modifier. Since this project is using the subdivision surface modifier, editing the geometry can be complicated. So, the floor method will be used in this project.

Looking at the model from the front orthographic view (NumPad 1 and NumPad 5), it's clear that the parts of the tentacles that sit below the x and y axes (the red or green line depending on the view) is where the model needs to be cut off in order to create a flat, printable base:

Flattening the bottom

So, let's get started:

  1. First, exit the Edit Mode (Tab).
  2. Ensure that the 3D cursor is at the 3D View origin point (Shift + C). Then, create a cube (Shift + A) by navigating to Mesh | Cube:
    Flattening the bottom
  3. The cube cannot be seen in the solid view because it's completely inside the octopus, so with the cube still selected, switch to the local view (NumPad /) to view the cube by itself:
    Flattening the bottom

    The cube is half above and half below the origin. Fortunately, there's an easy way to create a floor and ensure that no matter how it's scaled, the top remains on the XY plane.

  4. In the Edit Mode (Tab), with all points selected (which should be selected by default; A is the hotkey if they're not), move (G) along the z axis (Z) by 1 unit (-1).
    Flattening the bottom
  5. Then, exit the Edit Mode (Tab) and scale (S) the cube. Note that the top remains on the XY plane. This is because object transformations are made in relation to the object's origin. When the points were all moved in the Edit Mode, the origin wasn't affected. So now, when scaling the top, because it's in line with the cube's origin, it remains on the same plane:
    Flattening the bottom
  6. Exit the local view (NumPad /) and scale (S) the cube until it covers the bottom of the octopus body:
    Flattening the bottom

    In the Solid view (Z), it may look like the octopus has a flat bottom, but in the Wireframe View, (Z), it is clear that the cube is only hiding the bottom part. For the final model, the bottom needs to actually be flat:

    Flattening the bottom
  7. Select the octopus body again, and in the Modifier tab, add a Boolean modifier:
    Flattening the bottom

    Note

    The Boolean modifier has the option of combining the selected object with another object in a number of ways; Intersect, Union, and Difference. Union joins the two object, so that they become one. Difference cuts the second object out of the first, and Intersect leaves only the part where the two objects overlapped. Boolean is a powerful tool and it's good to be aware of how to use it.

The following screenshot shows the three ways to combine selected objects with other objects:

Flattening the bottom
  1. Change the Operation value of the Boolean modifier to Difference. Click on the Object text field and choose Cube from the list that pops up:
    Flattening the bottom
  2. Now the octopus body actually has a flat bottom that's suitable for 3D printing. This can be confirmed in the Wireframe view (Z):
    Flattening the bottom

The Boolean modifier is one of the most important tools in Blender that's used to create 3D printable objects. However, it can also be one of the most frustrating to use. The Boolean modifier demands that a mesh be clean and free from holes or problems. Even things that aren't obvious while looking at the mesh, such as duplicate points or flipped faces, can cause problems with the Boolean operation. If your Boolean operation isn't working, here are a few steps you can perform in order to try to fix it:

  1. In the Edit Mode, select all the points (A), and in Tool Shelf (T), locate the Remove Doubles button in the Tools tab and click on it.
  2. With all points still selected, switch to the Shading/UV tab, locate the Recalculate button, and click on it:
    Flattening the bottom
  3. Now, exit the Edit Mode, and the Boolean modifier may work in many cases. If these fixes don't make the Boolean modifier work, then the best option may be to start over again, making sure that you perform all the steps correctly.

Renaming objects

Now that there is more than one object in the scene, leaving the objects' names as the names of the basic shapes they started as can be confusing, especially when other objects enter the scene. It's best practice to name objects as something more descriptive. Let's see how to rename an object.

Objects can be renamed in the Object tab in the Properties panel, the one marked with an orange cube icon, as shown in the following screenshot:

Renaming objects
  1. Select Octopus Body in 3D View (or Cylinder in the Outliner panel). In the Objects menu, click on the Name, currently Cylinder, and change it to Octopus Body:
    Renaming objects
  2. Now, select the cube, and in the Objects menu, change its name to Floor.
  3. Since the floor has served its purpose, in order to avoid it getting in the way or getting accidently transformed, hide it from the view by selecting it, and then, in the 3D View menu, navigating to Object | Show/Hide | Hide or pressing H. The object is still in the outliner view but hidden in the 3D view:
    Renaming objects

Hidden objects can be unhidden by navigating to Object | Show/Hide | Show All, pressing Alt + H, or pressing the eye icon next to the object in the Outliner panel.

Adding a pencil cup

The octopus model looks appealing so far, but it can be functional as well. The plan for this project was a cup holder, so it needs to have the shape changed so that things can be put inside it:

  1. To start, temporarily turn off the subdivision surface modifier by locating the Subsurf modifier in the Modifiers tab and clicking the eye icon in it. Now, the simplified geometry is easier to work with:
    Adding a pencil cup
  2. Go to the Face Select mode (Ctrl + Tab) in the Edit Mode (Tab). Now, select the topmost face of the octopus:
    Adding a pencil cup
  3. Switch to Wireframe (Z) and the Front Ortho view (NumPad 1) and extrude (E) the top face into the body. Stop just a little above the red x axis line:
    Adding a pencil cup

    Note

    It may be necessary to scale (S) the bottom of the cup a little so that it fits inside the body.

    After scaling the body will look this:

    Adding a pencil cup
  4. Now, the shape is generally right for a pencil holder. Turn the subdivision surface modifier back on by clicking on the eye icon in the Subsurf modifier in the Modifiers tab. You'll notice that the cup bottom is a bit too round to be a space-efficient cup:
    Adding a pencil cup

    In the Edit Mode, edges can be marked with Crease to indicate to the Subsurf modifier that they should be sharpened.

  5. With no points selected (A) in edge or point, select the mode (Ctrl + Tab), hold down Alt on the keyboard, and select and click on one of the edges around the top lip of the cup in order to select all the points in a loop around the top of the mug:
    Adding a pencil cup
  6. From the 3D View menu, navigate to Mesh | Edges | Edge Crease or press Ctrl + E on the keyboard. Move the mouse pointer up or down in order to increase or decrease the amount of crease applied to the edge until it looks good:
    Adding a pencil cup
  7. Hold Alt and select and click on one of the edges at the bottom of the cup to loop and select all the points around the bottom of the cup. It may help to switch to the Wireframe mode (Z) or temporarily turn off the Subsuf modifier:
    Adding a pencil cup
  8. This time, set the crease value by finding the Mean Crease setting in Properties (N). This setting can be any decimal number between 0.0 (off) and 1.0 (maximum). Click on the setting and enter 1, and then press Enter to set the value. Now, the bottom of the cup is flat:
    Adding a pencil cup

This sort of edge creasing is a powerful way to control the Subsurf modifier. Note that the bottom of the cup is still circular even though the original mesh is an octagon. Subsuf smoothens out the other edges even if it's told to crease others. It's very smart!

Adding a face

Functionally, the design is complete, but it's the little details that really make it. This little octopus would be much cuter with a face:

  1. To start making a cute face, make sure the Edit Mode is off (Tab) and make sure the 3D cursor is at the origin (Shift + C). Now, create a circle (Shift + A) by navigating to Mesh | Circle:
    Adding a face
  2. The circle is hidden inside the octopus, so with the circle still selected, switch to the local view (Numpad /). Since this circle will become the face, it's good to name it Face using the same method to rename the object as the one used earlier.

    The circle is a flat object that has no face and is just a ring of points and lines. That's easy enough to fix:

    Adding a face
  3. Switch to the Edit Mode (Tab). Now, with all the points or edges selected (A) from the 3D View menu, navigate to Mesh | Faces | Make Edge/Face or press F on the keyboard:
    Adding a face

    The Make Edge/Face command attempts to make a connected face from the selected vertices or lines. It can be quite intelligent, but if the points are not all flat, the edges may twist unexpectedly.

  4. While still in the Edit Mode, switch to the top view (Numpad 7), and with all the points still selected, move (G) them to the left of the green y axis:
    Adding a face

    Duplicating an object outside of the Edit Mode creates a new object. However, duplicating points in the Edit Mode doesn't technically create a new object. Whatever is selected is duplicated while remaining a part of the same object. Objects in Blender can have many parts to them, all inside the same object.

  5. Duplicate (Shift + D) all the points and place the duplicated points on the opposite side of the green y axis line:
    Adding a face

    In this way, objects created while in the Edit Mode are just points, lines, and faces added to the existing object, even if they're not connected.

  6. While still in the Edit Mode (making sure the 3D cursor is still at the origin), add (Shift + A) a plane to the face object by navigating to Mesh | Plane:
    Adding a face
  7. Move (G) the plane down along the y axis (Y) about 3 units:
    Adding a face
  8. Deselect all the points (A) and select the two points at the top of the plane. Then, scale (S) them up about twice in order to create a smiling mouth:
    Adding a face
  9. The shapes now look like a face but only in two dimensions. To give it the additional dimension required, select all the points (A twice) and extrude them (E) about 4 or 5 units.
    Adding a face
  10. Exit the Edit Mode (Tab). The face template is now complete, and it just needs to be scaled and positioned.
  11. Rotate (R) the face object around the x axis (X) by 90 degrees (90):
    Adding a face
  12. Exit the local view (Numpad /). The face is hidden inside the body, so move (G) it in the z and y axes (Shift + X) until it's outside the octopus body:
    Adding a face
  13. In front of the Ortho view (NumPad 1), scale the face (S) and move (G) it in the z axis (Z) until it's positioned properly:
    Adding a face
  14. In the side Ortho view (Numpad 3), move (G) the face along the y axis (Y) until it's partway into the body:
    Adding a face

    It may help to use the Wireframe view to ensure that the face is deep enough but not too deep. About four or five small squares (or 0.4 or 0.5 real-world millimeters) is perfect. If the face is too deep, it may cut all the way through into the cup space and may create an overhang problem. The top of the mouth will rely on some bridging during printing, and that's okay.

  15. Now, select the body, and in the Modifier tab, add a Boolean modifier. Change the settings of the Boolean modifier to be a Difference operation with the Face Object.
    Adding a face
  16. The effect of this new modifier won't be visible immediately, so select the face object and hide it (H):
    Adding a face

    Your octopus pencil holder is now complete.

  17. Select the body, and in the Info panel menu (at the top of the screen), navigate to File | Export | Stl (.stl) to view the 3D-print-ready octopus holder. Ensure that you choose a directory where you can find the file later in order to send it to the printer:
    Adding a face

Finishing touches

Now, the octopus is done, but don't stop here. Use your imagination to make this design your own. Add accessories and personality, change the base shape, and come up with your own design to make this something you'll want to share. Just remember the rules about overhangs in your design and the sky is the limit:

Finishing touches

Summary

This project was functional but also cute. The techniques of vertex editing basic shapes in the Edit Mode with extrusion and loop cuts and then using the mesh smooth modifier and Boolean modifier in combination to further modify them can be used to create endless projects of any type and shape. Not all designs need to be cute, but they also don't all need to be purely practical. Combine a practical design with an aesthetic element in order to add personality and really take advantage of what 3D printing can offer.

Happy designing!

Left arrow icon Right arrow icon

Key benefits

  • Learn how to make complex shapes by editing basic ones
  • Make printable objects from multiple shapes and parts
  • Learn how to design from scratch, without a reference to physical objects

Description

This book will cover the very basic but essential techniques you need to model an organic and functional object for 3D printing using Blender. Starting with pen and paper and then moving on to the computer, you will create your first project in Blender, add basic geometric shapes, and use techniques such as extruding and subdividing to transform these shapes into complex meshes. You will learn how modifiers can automatically refine the shape further and combine multiple shapes into a single 3D printable model. By the end of the book, you will have gained enough practical hands-on experience to be able to create a 3D printable object of your choice, which in this case is a 3D print-ready octopus pencil holder.

Who is this book for?

You should have basic knowledge of Blender and 3D printing and be interested in printing your first object.

What you will learn

  • -- Get to know the guiding principles required to create 3D printer-friendly models
  • -- Understand material characteristics, printing specifications, tolerances, and design tips
  • -- Master the art of modifying basic shapes with Blender s powerful editing tools: extrude, loop cuts, and other transformations
  • -- Learn techniques of editing complex meshes, smoothing, combining shapes, and exporting them into STL files for printing

Product Details

Country selected
Publication date, Length, Edition, Language, ISBN-13
Publication date : Feb 29, 2016
Length: 104 pages
Edition : 1st
Language : English
ISBN-13 : 9781785887437
Concepts :
Tools :

What do you get with eBook?

Product feature icon Instant access to your Digital eBook purchase
Product feature icon Download this book in EPUB and PDF formats
Product feature icon Access this title in our online reader with advanced features
Product feature icon DRM FREE - Read whenever, wherever and however you want
OR
Modal Close icon
Payment Processing...
tick Completed

Billing Address

Product Details

Publication date : Feb 29, 2016
Length: 104 pages
Edition : 1st
Language : English
ISBN-13 : 9781785887437
Concepts :
Tools :

Packt Subscriptions

See our plans and pricing
Modal Close icon
$19.99 billed monthly
Feature tick icon Unlimited access to Packt's library of 7,000+ practical books and videos
Feature tick icon Constantly refreshed with 50+ new titles a month
Feature tick icon Exclusive Early access to books as they're written
Feature tick icon Solve problems while you work with advanced search and reference features
Feature tick icon Offline reading on the mobile app
Feature tick icon Simple pricing, no contract
$199.99 billed annually
Feature tick icon Unlimited access to Packt's library of 7,000+ practical books and videos
Feature tick icon Constantly refreshed with 50+ new titles a month
Feature tick icon Exclusive Early access to books as they're written
Feature tick icon Solve problems while you work with advanced search and reference features
Feature tick icon Offline reading on the mobile app
Feature tick icon Choose a DRM-free eBook or Video every month to keep
Feature tick icon PLUS own as many other DRM-free eBooks or Videos as you like for just $5 each
Feature tick icon Exclusive print discounts
$279.99 billed in 18 months
Feature tick icon Unlimited access to Packt's library of 7,000+ practical books and videos
Feature tick icon Constantly refreshed with 50+ new titles a month
Feature tick icon Exclusive Early access to books as they're written
Feature tick icon Solve problems while you work with advanced search and reference features
Feature tick icon Offline reading on the mobile app
Feature tick icon Choose a DRM-free eBook or Video every month to keep
Feature tick icon PLUS own as many other DRM-free eBooks or Videos as you like for just $5 each
Feature tick icon Exclusive print discounts

Frequently bought together


Stars icon
Total $ 76.97
3D Printing Designs: Octopus Pencil Holder
$21.99
3D Printing Designs: Design an SD Card Holder
$21.99
3D Printing Designs: Fun and Functional Projects
$32.99
Total $ 76.97 Stars icon
Banner background image

Table of Contents

3 Chapters
1. Octopus Pencil Holder Chevron down icon Chevron up icon
2. Prologue Chevron down icon Chevron up icon
Index Chevron down icon Chevron up icon

Customer reviews

Rating distribution
Full star icon Full star icon Full star icon Full star icon Half star icon 4.5
(4 Ratings)
5 star 75%
4 star 0%
3 star 25%
2 star 0%
1 star 0%
Peter T. Phelps Jul 08, 2016
Full star icon Full star icon Full star icon Full star icon Full star icon 5
I'll start by saying that I am perhaps not the most unbiased reviewer since I have followed Joe Larson (the 3D Printing Professor)'s 3D Printing Workbench YouTube videos (nearly religiously) and own a copy of his 3D Printing Blueprints book. This is a highly affordable lesson into creating organic shapes in Blender (something that can be quite difficult to do in CAD programs). The cute little holder is a great way to get your feet wet in 3D printing design with Blender. I'll be definitely posting pictures of my version of the Octopus Pencil Holder to my website!
Amazon Verified review Amazon
Marcus Mar 10, 2016
Full star icon Full star icon Full star icon Full star icon Full star icon 5
This short book takes the reader through a simple, fun project as a way to learn to use Blender for 3D printing. As a technical reviewer of the pre-print book who has never used Blender, I learned how to begin a project with a hand drawn sketch, import the image into Blender, and trace over it to create the beginning of a model. Joe takes you meticulously through each step, leaving some room for - and encouraging - customization of the final model that is as cute as it is functional.I liked the project and teaching style. Although the book is short - only one project - it demonstrates the most important design principles of 3D printing for home printers like wall thickness, overhangs, and minimum detail size. I recommend this book to any Blender beginner!
Amazon Verified review Amazon
Russell Allen Feb 20, 2019
Full star icon Full star icon Full star icon Full star icon Full star icon 5
Excellent book with tons of great information!! Definitely will recommend to others!!! Well written, easy to follow..
Amazon Verified review Amazon
R. Garrett Jun 28, 2016
Full star icon Full star icon Full star icon Empty star icon Empty star icon 3
This e-book was apparently a pre-release version of the final publication. This represents chapter 3 of several chapters. There were some issues with using a different version of Blender which is expected so no issues there. The building of the Octopus Pencil Holder went much slower due to a much steeper learning curve due to the first two chapters missing. I had to do much more hunting through menus or even googling for the way to follow the steps of the tutorial. Overall, I guess this forced me to learn more during the process but it is still a bit disappointing that I didn't get what the Author intended to publish.I enjoyed the teaching style of the Author and have watched several of his videos on his YouTube channel which is where I found out about this book. Even though this e-book was far from ideal, I would still consider a future publication if I could first ensure that I wasn't getting a pre-release subset of what was written.I would say if you want to learn Blender, this would be a really good beginners guide if you can get the full e-book or printed book rather than the single chapter I received.
Amazon Verified review Amazon
Get free access to Packt library with over 7500+ books and video courses for 7 days!
Start Free Trial

FAQs

How do I buy and download an eBook? Chevron down icon Chevron up icon

Where there is an eBook version of a title available, you can buy it from the book details for that title. Add either the standalone eBook or the eBook and print book bundle to your shopping cart. Your eBook will show in your cart as a product on its own. After completing checkout and payment in the normal way, you will receive your receipt on the screen containing a link to a personalised PDF download file. This link will remain active for 30 days. You can download backup copies of the file by logging in to your account at any time.

If you already have Adobe reader installed, then clicking on the link will download and open the PDF file directly. If you don't, then save the PDF file on your machine and download the Reader to view it.

Please Note: Packt eBooks are non-returnable and non-refundable.

Packt eBook and Licensing When you buy an eBook from Packt Publishing, completing your purchase means you accept the terms of our licence agreement. Please read the full text of the agreement. In it we have tried to balance the need for the ebook to be usable for you the reader with our needs to protect the rights of us as Publishers and of our authors. In summary, the agreement says:

  • You may make copies of your eBook for your own use onto any machine
  • You may not pass copies of the eBook on to anyone else
How can I make a purchase on your website? Chevron down icon Chevron up icon

If you want to purchase a video course, eBook or Bundle (Print+eBook) please follow below steps:

  1. Register on our website using your email address and the password.
  2. Search for the title by name or ISBN using the search option.
  3. Select the title you want to purchase.
  4. Choose the format you wish to purchase the title in; if you order the Print Book, you get a free eBook copy of the same title. 
  5. Proceed with the checkout process (payment to be made using Credit Card, Debit Cart, or PayPal)
Where can I access support around an eBook? Chevron down icon Chevron up icon
  • If you experience a problem with using or installing Adobe Reader, the contact Adobe directly.
  • To view the errata for the book, see www.packtpub.com/support and view the pages for the title you have.
  • To view your account details or to download a new copy of the book go to www.packtpub.com/account
  • To contact us directly if a problem is not resolved, use www.packtpub.com/contact-us
What eBook formats do Packt support? Chevron down icon Chevron up icon

Our eBooks are currently available in a variety of formats such as PDF and ePubs. In the future, this may well change with trends and development in technology, but please note that our PDFs are not Adobe eBook Reader format, which has greater restrictions on security.

You will need to use Adobe Reader v9 or later in order to read Packt's PDF eBooks.

What are the benefits of eBooks? Chevron down icon Chevron up icon
  • You can get the information you need immediately
  • You can easily take them with you on a laptop
  • You can download them an unlimited number of times
  • You can print them out
  • They are copy-paste enabled
  • They are searchable
  • There is no password protection
  • They are lower price than print
  • They save resources and space
What is an eBook? Chevron down icon Chevron up icon

Packt eBooks are a complete electronic version of the print edition, available in PDF and ePub formats. Every piece of content down to the page numbering is the same. Because we save the costs of printing and shipping the book to you, we are able to offer eBooks at a lower cost than print editions.

When you have purchased an eBook, simply login to your account and click on the link in Your Download Area. We recommend you saving the file to your hard drive before opening it.

For optimal viewing of our eBooks, we recommend you download and install the free Adobe Reader version 9.