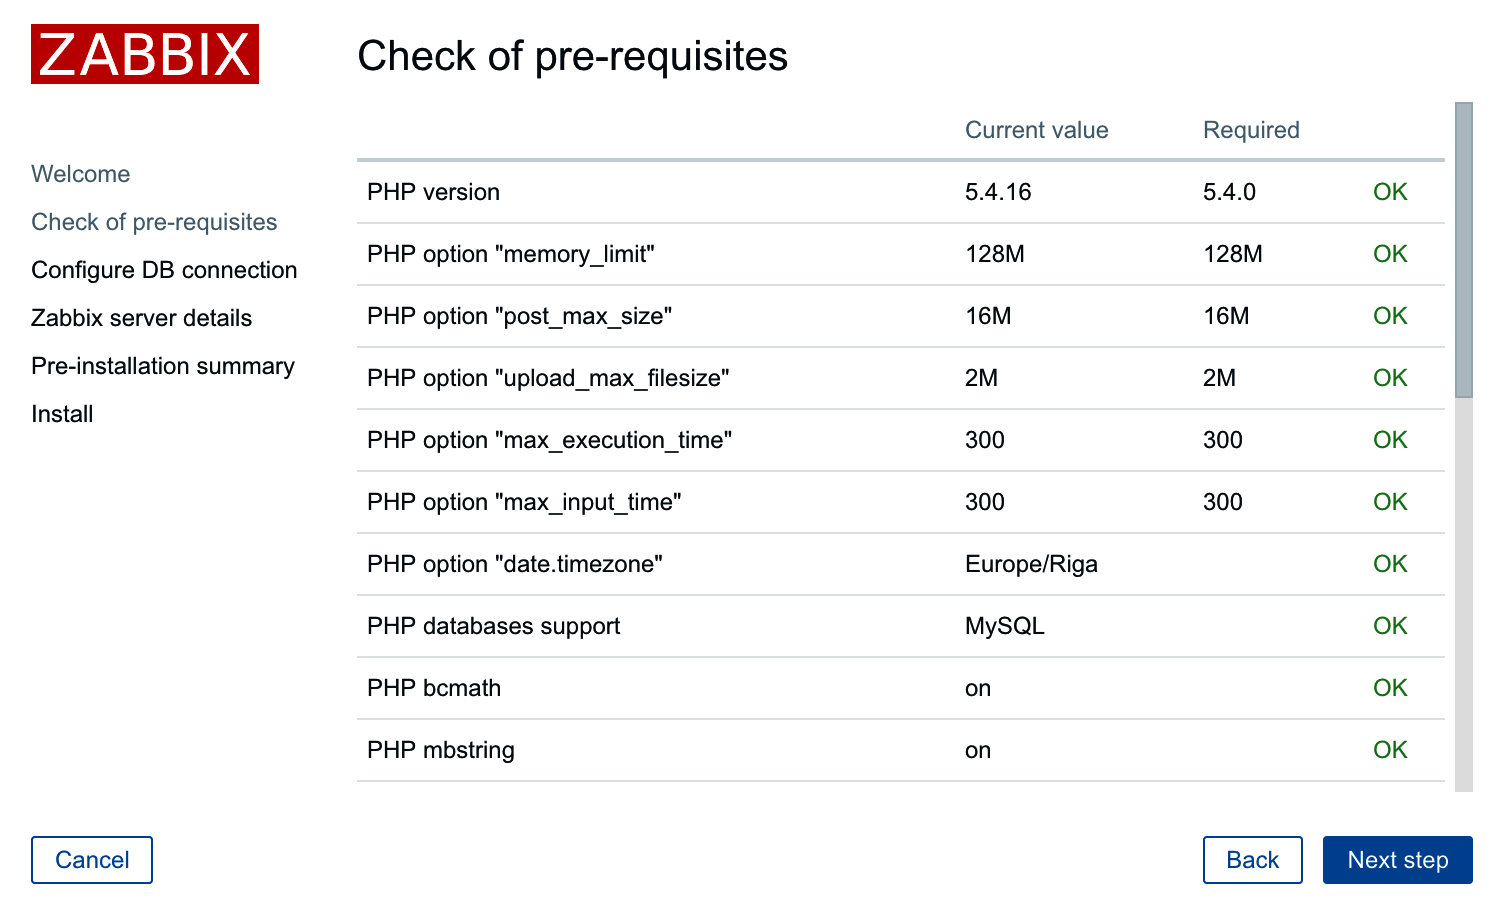
In this step, the installation wizard checks PHP-related prerequisites. If you are lucky, all will have been satisfied, and you will be greeted with all green entries:
If so, just click on the Next step button to continue to Step 3 – database access.
However, more often than not, one or more entries will have a red Fail warning listed next to them. This is where things get more interesting. Problems at this point fall into two categories—PHP installation or configuration.
Entries such as PHP version, PHP databases support, PHP bcmath, PHP mbstring, PHP gd, PHP gd PNG/JPEG/FreeType support, and others that are not listed as an option are PHP installation problems. To solve these, either install the appropriate distribution packages (sometimes called php5-bcmath, php5-gd, php5-mysql, and so on), or recompile PHP with the corresponding options.
PHP option "memory_limit", PHP option "post_max_size", PHP option "upload_max_filesize", PHP option "max_execution_time", PHP option "max_input_time", and PHP time zone are configuration issues that are all set in the php.ini configuration file. This file is usually located at /etc/php5 or similar for distribution packages and /usr/local/lib for PHP source installations. Set the following options:
max_execution_time 300
memory_limit 128M
post_max_size 16M
upload_max_filesize 2M
max_input_time 300
always_populate_raw_post_data -1
date.timezone Europe/Riga
For the time zone, set the date.timezone option to a time zone that best matches your environment. The default for Zabbix is Europe/Riga, and you can see valid options at http://www.php.net/manual/en/timezones.php.
Make sure you restart Apache after changing the PHP configuration file. If you can't find php.ini, or you make changes but the installation wizard does not pick them up, create a file named test.php in the htdocs directory with only this content:
<?php phpinfo() ?>
Navigate to this file using your browser and check the value for a Configuration File (php.ini) Path entry—this is where you should look for php.ini.
Once everything is fixed, click on the Next step button to continue.
If you install from packages then you only have to edit the zabbix config file in your web server's config folder and after applying the correct changes restart your web server:
CentOS/Red Hat
# /etc/httpd/conf.d/zabbix.conf
Debian/Ubuntu
#/etc/apache2/conf-enabled/zabbix.conf


