


Creating a login screen with Qt
In this recipe, we will learn how put our knowledge to use and create a functional login screen using Qt and SQLite.
How to do it…
Create your first functional login screen by following these steps:
- Open a web browser and go to SQLiteStudio. We will create a new data table called
user, which looks like this:
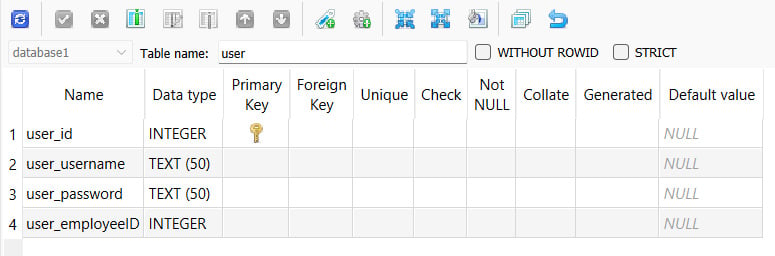
Figure 12.14 – Create a new user table
- Let’s insert our first item of data into the newly created table and set
user_employeeIDto the ID of an existing employee. In this way, the user account we create will be linked to the data of one of the employees:

Figure 12.15 – The user_employeeID column is linked to the employee’s emp_id column
- Open Qt Creator and create a new Qt Widgets Application project. We will start off with
mainwindow.ui. Place a stacked widget on the canvas and make sure it contains two pages. Then, set up...


