Installing the FLARE VM package
Before the critical step of isolating our VM from the outside world can be undertaken, tools that require the internet to be downloaded must first be loaded on the VM. Our brand-new VM would be largely useless to us without the requisite tools utilized by malware analysts to glean information, of which there are a multitude.
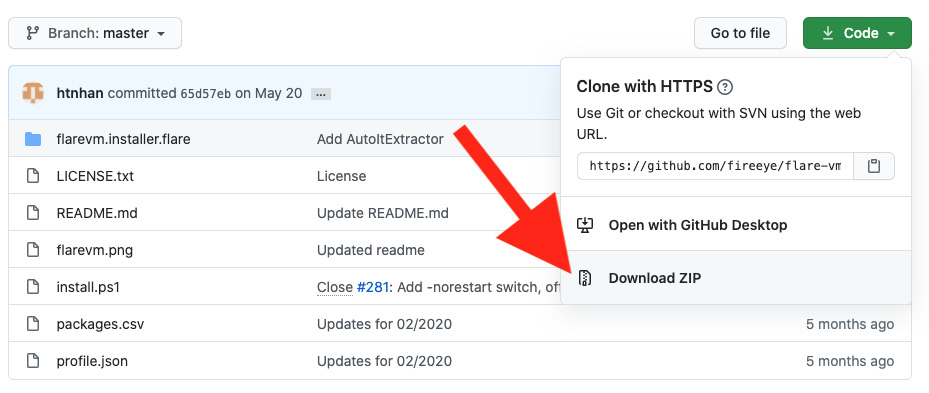
Thankfully, the folks at FireEye have created a wonderful installation package called FLARE VM, a PowerShell script that can automatically download and install nearly every tool a malware analyst would need. The script is publicly available on GitHub at the following address: https://github.com/fireeye/flare-vm. This script will save a great deal of tedium and allow us to instantly install the necessary tooling:

Figure 1.15 – Downloading the FLARE VM package from GitHub
Once you have downloaded the ZIP file containing the repository for FLARE VM, right-click the ZIP archive and extract it. Once extracted, you'll be presented with a directory containing several files, including a .ps1 script. From here, we can begin the tooling installation process.
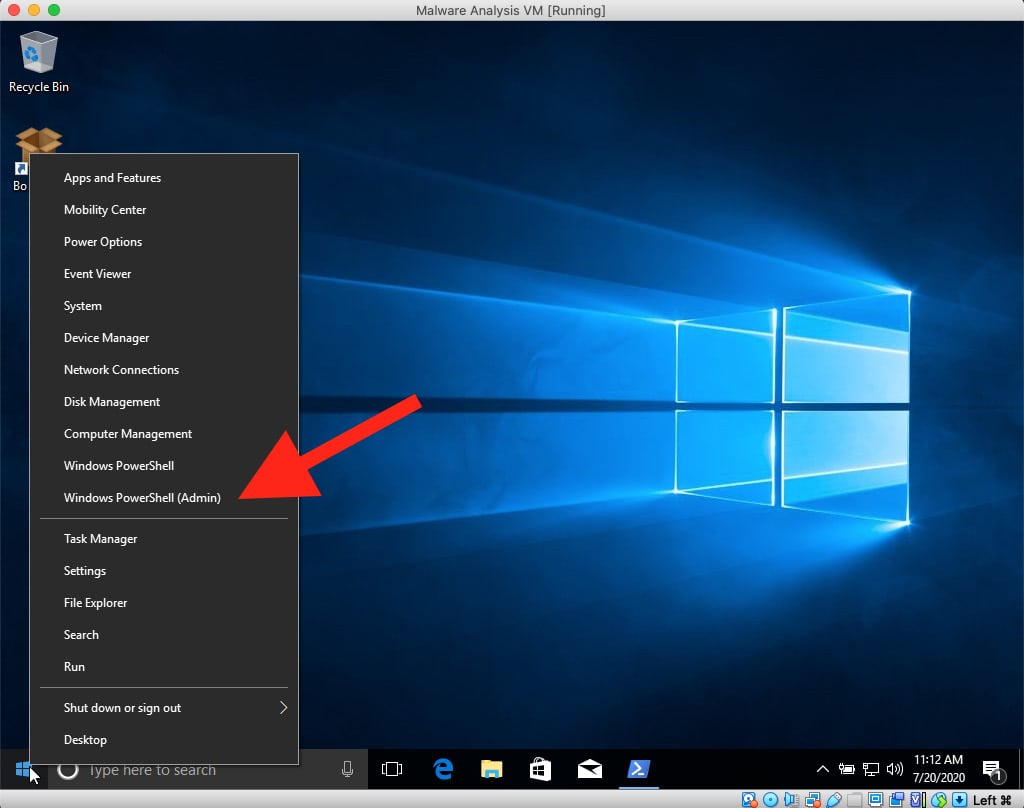
To begin the tooling installation process, it is first necessary that we obtain an administrative console in PowerShell. To do so, we can utilize WinKey + X, which presents the option to open a Windows PowerShell prompt as an administrator:

Figure 1.16 – Administrative PowerShell option in the Start menu
Once the administrative shell has been obtained, starting the installation is a matter of two commands issued in a single line:
cd C:\Users\$Your_Username\Downloads\flare-vm-master\flare-vm-master; powershell.exe -ExecutionPolicy Bypass -File .\Install.ps1
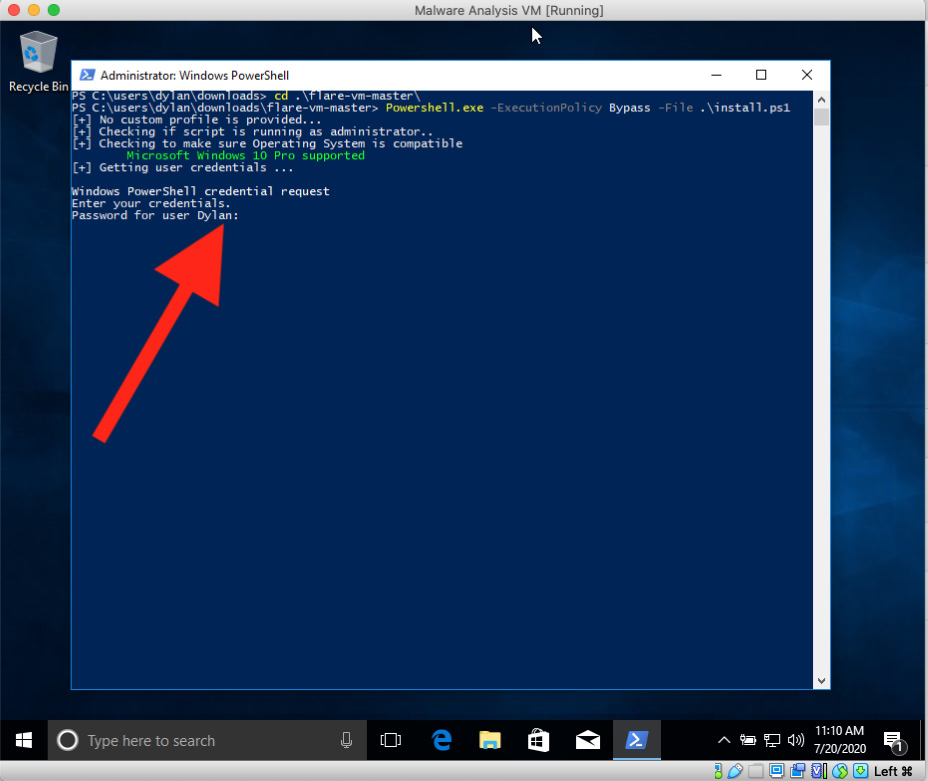
With these commands issued, FLARE's Chocolatey-based installer will take over and prompt for credentials stored as secure strings. Once these credentials are entered, the installation will proceed, rebooting the VM several times, and logging in automatically following each reboot. No further action is required on our part during the installation:

Figure 1.17 – FLARE's install.ps1 prompting for credentials
Analysis tip
FLARE installs a lot of tools. It may take quite a while to install, depending on the speed of your internet connection. It would be wise to utilize this time to make a sandwich, relax, or catch up on your favorite TV show.
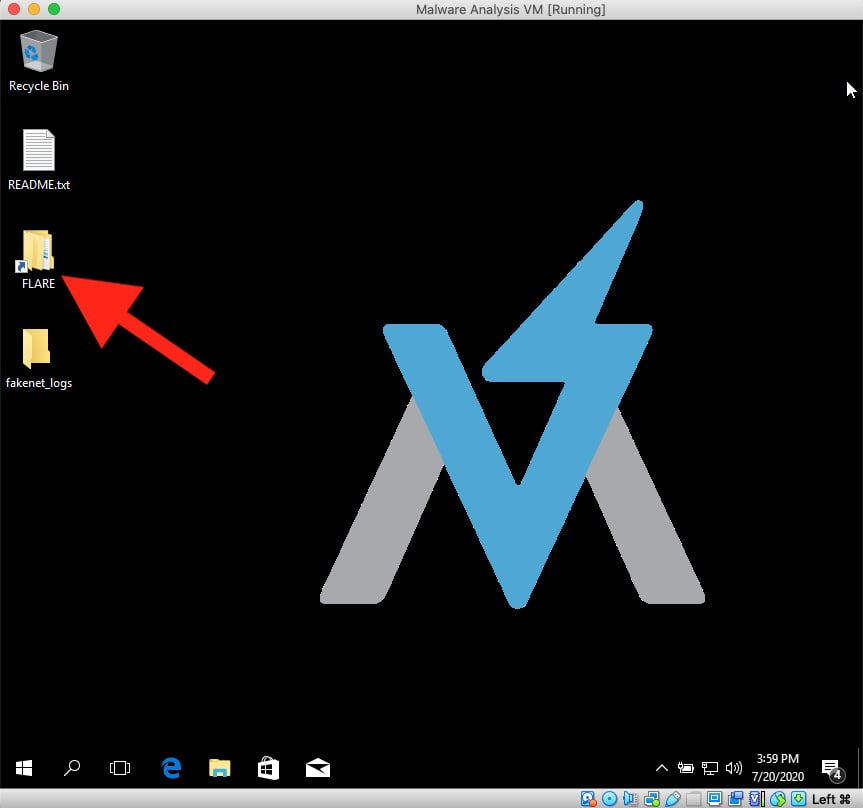
Once the entire process has been completed, you'll be presented with the following desktop:

Figure 1.18 – The FLARE VM desktop
Several changes are apparent here. First, we have a FLARE folder, which is chock full of great malware analysis and dissection tools.
Additionally, you have the official FLARE VM wallpaper. Our malware analysis workstation is now set up and very nearly ready to go!


