Chapter 4. Using Templates
In Chapter 2, Serving and Routing, we explored how to take URLs and translate them to different pages in our web application. In doing so, we built URLs that were dynamic and resulted in dynamic responses from our (very simple) net/http handlers.
We've presented our data as real HTML, but we specifically hard-coded our HTML directly into our Go source. This is not ideal for production-level environments for a number of reasons.
Luckily, Go comes equipped with a robust but sometimes tricky template engine for both text templates, as well as HTML templates.
Unlike a lot of other template languages that eschew logic as a part of the presentation side, Go's template packages enable you to utilize some logic constructs, such as loops, variables, and function declarations in a template. This allows you to offset some of your logic to the template, which means that it's possible to write your application, but you need to allow the template side to provide some extensibility to your product without rewriting the source.
We say some logic constructs because Go templates are sold as logic-less. We will discuss more on this topic later.
In this chapter, we'll explore ways to not only present your data but also explore some of the more advanced possibilities in this chapter. By the end, we will be able to parlay our templates into advancing the separation of presentation and source code.
We will cover the following topics:
- Introducing templates, context, and visibility
- HTML templates and text templates
- Displaying variables and security
- Using logic and control structures
Introducing templates, context, and visibility
It's worth noting very early that while we're talking about taking our HTML part out of the source code, it's possible to use templates inside our Go application. Indeed, there's nothing wrong with declaring a template as shown:
tpl, err := template.New("mine").Parse(`<h1>{{.Title}}</h1>`)If we do this, however, we'll need to restart our application every time the template needs to change. This doesn't have to be the case if we use file-based templates; instead we can make changes to the presentation (and some logic) without restarting.
The first thing we need to do to move from in-application HTML strings to file-based templates is create a template file. Let's briefly look at an example template that somewhat approximates to what we'll end up with later in this chapter:
<!DOCTYPE html>
<html>
<head>
<title>{{.Title}}</title>
</head>
<body>
  <h1>{{.Title}}</h1>

  <div>{{.Date}}</div>

  {{.Content}}
</body>
</html>
Very straightforward, right? Variables are clearly expressed by a name within double curly brackets. So what's with all of the periods/dots? Not unlike a few other similarly-styled templating systems (Mustache, Angular, and so on), the dot signifies scope or context.
The easiest way to demonstrate this is in areas where the variables might otherwise overlap. Imagine that we have a page with a title of Blog Entries and we then list all of our published blog articles. We have a page title but we also have individual entry titles. Our template might look something similar to this:
{{.Title}}
{{range .Blogs}}
  <li><a href="{{.Link}}">{{.Title}}</a></li>
{{end}}
The dot here specifies the specific scope of, in this case, a loop through the range template operator syntax. This allows the template parser to correctly utilize {{.Title}} as a blog's title versus the page's title.
This is all noteworthy because the very first templates we'll be creating will utilize general scope variables, which are prefixed with the dot notation.
HTML templates and text templates
In our first example of displaying the values from our blog from our database to the Web, we produced a hardcoded string of HTML and injected our values directly.
Following are the two lines that we used in Chapter 3, Connecting to Data:
  html := `<html><head><title>` + thisPage.Title + `</title></head><body><h1>` + thisPage.Title + `</h1><div>` + thisPage.Content + `</div></body></html>
  fmt.Fprintln(w, html)
It shouldn't be hard to realize why this isn't a sustainable system for outputting our content to the Web. The best way to do this is to translate this into a template, so we can separate our presentation from our application.
To do this as succinctly as possible, let's modify the method that called the preceding code, ServePage, to utilize a template instead of hardcoded HTML.
So we'll remove the HTML we placed earlier and instead reference a file that will encapsulate what we want to display. From your root directory, create a templates subdirectory and blog.html within it.
The following is the very basic HTML we included, feel free to add some flair:
<html>
<head>
<title>{{.Title}}</title>
</head>
<body>
  <h1>{{.Title}}</h1>
  <p>
    {{.Content}}
  </p>
  <div>{{.Date}}</div>
</body>
</html>
Back in our application, inside the ServePage handler, we'll change our output code slightly to leave an explicit string and instead parse and execute the HTML template we just created:
func ServePage(w http.ResponseWriter, r *http.Request) {
  vars := mux.Vars(r)
  pageGUID := vars["guid"]
  thisPage := Page{}
  fmt.Println(pageGUID)
  err := database.QueryRow("SELECT page_title,page_content,page_date FROM pages WHERE page_guid=?", pageGUID).Scan(&thisPage.Title, &thisPage.Content, &thisPage.Date)
  if err != nil {
    http.Error(w, http.StatusText(404), http.StatusNotFound)
    log.Println("Couldn't get page!")
    return
  }
  // html := <html>...</html>

  t, _ := template.ParseFiles("templates/blog.html")
  t.Execute(w, thisPage)
}
If, somehow, you failed to create the file or it is otherwise not accessible, the application will panic when it attempts to execute. You can also get panicked if you're referencing struct values that don't exist—we'll need to handle errors a bit better.
Note
Note: Don't forget to include html/template in your imports.
The benefits of moving away from a static string should be evident, but we now have the foundation for a much more extensible presentation layer.
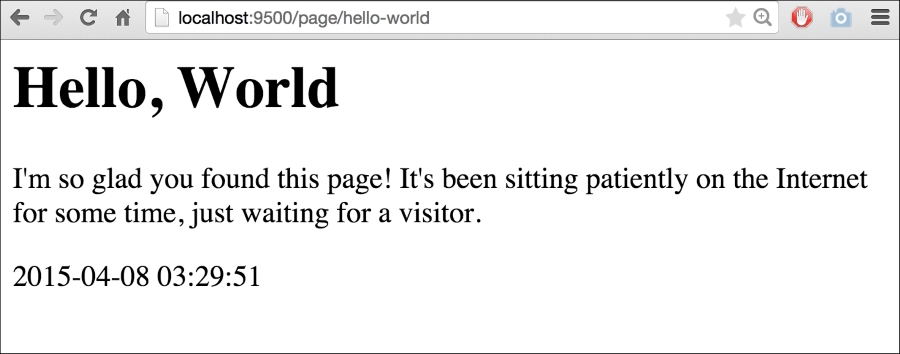
If we visit http://localhost:9500/page/hello-world we'll see something similar to this:
Displaying variables and security
To demonstrate this, let's create a new blog entry by adding this SQL command to your MySQL command line:
INSERT INTO `pages` (`id`, `page_guid`, `page_title`, page_content`, `page_date`)
VALUES:
(2, 'a-new-blog', 'A New Blog', 'I hope you enjoyed the last blog! Well brace yourself, because my latest blog is even <i>better</i> than the last!', '2015-04-29 02:16:19');
Another thrilling piece of content, for sure. Note, however that we have some embedded HTML in this when we attempt to italicize the word better.
Debates about how formatting should be stored notwithstanding, this allows us to take a look at how Go's templates handle this by default. If we visit http://localhost:9500/page/a-new-blog we'll see something similar to this:
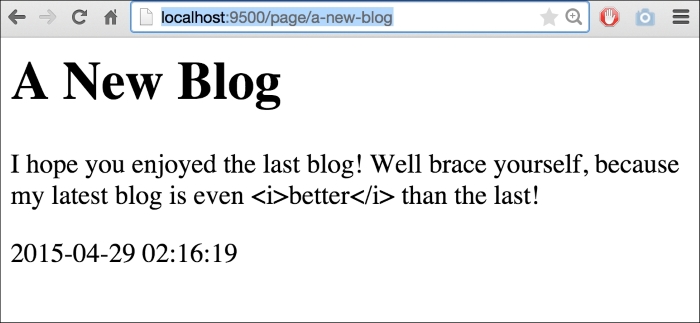
As you can see, Go automatically sanitizes our data for output. There are a lot of very, very wise reasons to do this, which is why it's the default behavior. The biggest one, of course, is to avoid XSS and code-injection attack vectors from untrusted sources of input, such as the general users of the site and so on.
But ostensibly we are creating this content and should be considered trusted. So in order to validate this as trusted HTML, we need to change the type of template.HTML:
type Page struct {
  Title   string
  Content template.HTML
  Date   string
}
If you attempt to simply scan the resulting SQL string value into a template.HTML you'll find the following error:
sql: Scan error on column index 1: unsupported driver -> Scan pair: []uint8 -> *template.HTML
The easiest way to work around this is to retain the string value in RawContent and assign it back to Content:
type Page struct {
  Title    string
  RawContent string
  Content    template.HTML
  Date    string
}
  err := database.QueryRow("SELECT page_title,page_content,page_date FROM pages WHERE page_guid=?", pageGUID).Scan(&thisPage.Title, &thisPage.RawContent, &thisPage.Date)
  thisPage.Content = template.HTML(thisPage.RawContent)
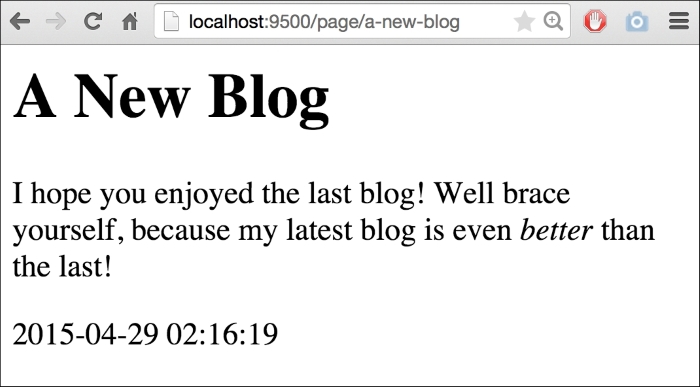
If we go run this again, we'll see our HTML as trusted:
Using logic and control structures
Earlier in this chapter we looked at how we can use a range in our templates just as we would directly in our code. Take a look at the following code:
{{range .Blogs}}
  <li><a href="{{.Link}}">{{.Title}}</a></li>
{{end}}
You may recall that we said that Go's templates are without any logic, but this depends on how you define logic and whether shared logic lies exclusively in the application, the template, or a little of both. It's a minor point, but because Go's templates offer a lot of flexibility; it's the one worth thinking about.
Having a range feature in the preceding template, by itself, opens up a lot of possibilities for a new presentation of our blog. We can now show a list of blogs or break our blog up into paragraphs and allow each to exist as a separate entity. This can be used to allow relationships between comments and paragraphs, which have started to pop up as a feature in some publication systems in recent years.
But for now, let's use this opportunity to create a list of blogs in a new index page. To do this, we'll need to add a route. Since we have /page we could go with /pages, but since this will be an index, let's go with / and /home:
  routes := mux.NewRouter()
  routes.HandleFunc("/page/{guid:[0-9a-zA\\-]+}", ServePage)
  routes.HandleFunc("/", RedirIndex)
  routes.HandleFunc("/home", ServeIndex)
  http.Handle("/", routes)
We'll use RedirIndex to automatically redirect to our /home endpoint as a canonical home page.
Serving a simple 301 or Permanently Moved redirect requires very little code in our method, as shown:
func RedirIndex(w http.ResponseWriter, r *http.Request) {
  http.Redirect(w, r, "/home", 301)
}
This is enough to take any requests from / and bring the user to /home automatically. Now, let's look at looping through our blogs on our index page in the ServeIndex HTTP handler:
func ServeIndex(w http.ResponseWriter, r *http.Request) {
  var Pages = []Page{}
  pages, err := database.Query("SELECT page_title,page_content,page_date FROM pages ORDER BY ? DESC", "page_date")
  if err != nil {
    fmt.Fprintln(w, err.Error)
  }
  defer pages.Close()
  for pages.Next() {
    thisPage := Page{}
    pages.Scan(&thisPage.Title, &thisPage.RawContent, &thisPage.Date)
    thisPage.Content = template.HTML(thisPage.RawContent)
    Pages = append(Pages, thisPage)
  }
  t, _ := template.ParseFiles("templates/index.html")
  t.Execute(w, Pages)
}
And here's templates/index.html:
<h1>Homepage</h1>

{{range .}}
  <div><a href="!">{{.Title}}</a></div>
  <div>{{.Content}}</div>
  <div>{{.Date}}</div>
{{end}}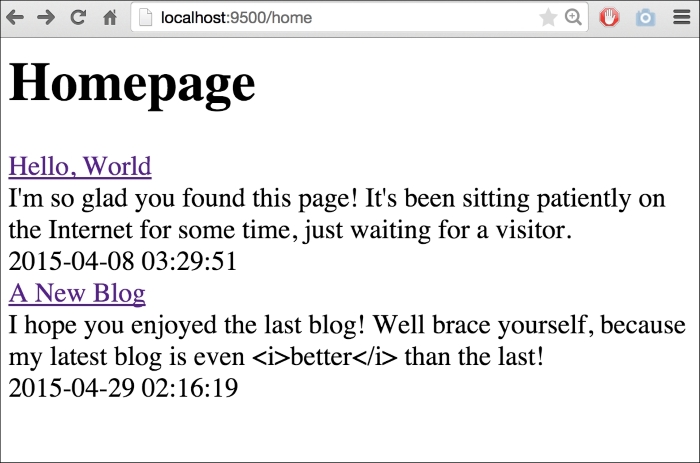
We've highlighted an issue with our Page struct here—we have no way to get the reference to the page's GUID. So, we need to modify our struct to include that as the exportable Page.GUID variable:
type Page struct {
  Title  string
  Content  template.HTML
  RawContent  string
  Date  string
  GUID   string
}
Now, we can link our listings on our index page to their respective blog entries as shown:
  var Pages = []Page{}
  pages, err := database.Query("SELECT page_title,page_content,page_date,page_guid FROM pages ORDER BY ? DESC", "page_date")
  if err != nil {
    fmt.Fprintln(w, err.Error)
  }
  defer pages.Close()
  for pages.Next() {
    thisPage := Page{}
    pages.Scan(&thisPage.Title, &thisPage.Content, &thisPage.Date, &thisPage.GUID)
    Pages = append(Pages, thisPage)
  }
And we can update our HTML part with the following code:
<h1>Homepage</h1>

{{range .}}
  <div><a href="/page/{{.GUID}}">{{.Title}}</a></div>
  <div>{{.Content}}</div>
  <div>{{.Date}}</div>
{{end}}
But this is just the start of the power of the templates. What if we had a much longer piece of content and wanted to truncate its description?
We can create a new field within our Page struct and truncate that. But that's a little clunky; it requires the field to always exist within a struct, whether populated with data or not. It's much more efficient to expose methods to the template itself.
So let's do that.
First, create yet another blog entry, this time with a larger content value. Choose whatever you like or select the INSERT command as shown:
INSERT INTO `pages` (`id`, `page_guid`, `page_title`, `page_content`, `page_date`)
VALUES:
(3, 'lorem-ipsum', 'Lorem Ipsum', 'Lorem ipsum dolor sit amet, consectetur adipiscing elit. Maecenas sem tortor, lobortis in posuere sit amet, ornare non eros. Pellentesque vel lorem sed nisl dapibus fringilla. In pretium...', '2015-05-06 04:09:45');
Note
Note: For the sake of brevity, we've truncated the full length of our preceding Lorem Ipsum text.
Now, we need to represent our truncation as a method for the type Page. Let's create that method to return a string that represents the shortened text.
The cool thing here is that we can essentially share a method between the application and the template:
func (p Page) TruncatedText() string {
  chars := 0
  for i, _ := range p.Content {
    chars++
    if chars > 150 {
      return p.Content[:i] + ` ...`
    }
  }
  return p.Content
}
This code will loop through the length of content and if the number of characters exceeds 150, it will return the slice up to that number in the index. If it doesn't ever exceed that number, TruncatedText will return the content as a whole.
Calling this in the template is simple, except that you might be expected to need a traditional function syntax call, such as TruncatedText(). Instead, it's referenced just as any variable within the scope:
<h1>Homepage</h1>

{{range .}}
  <div><a href="/page/{{.GUID}}">{{.Title}}</a></div>
  <div>{{.TruncatedText}}</div>
  <div>{{.Date}}</div>
{{end}}
By calling .TruncatedText, we essentially process the value inline through that method. The resulting page reflects our existing blogs and not the truncated ones and our new blog entry with truncated text and ellipsis appended:
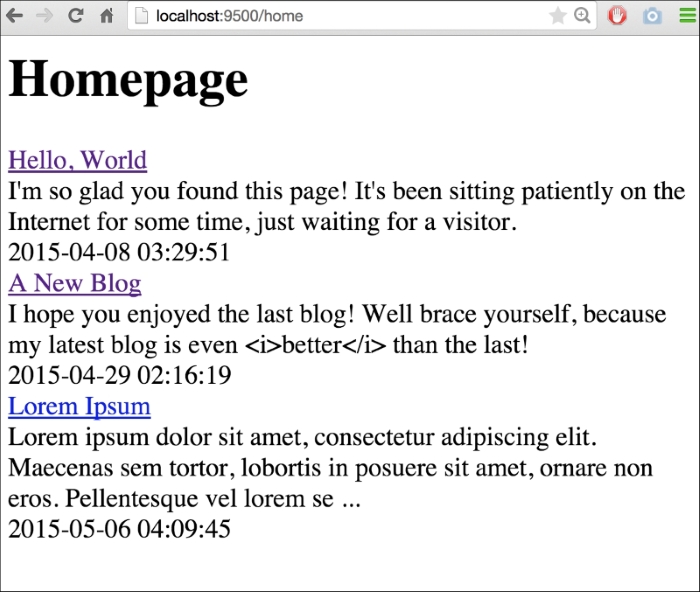
I'm sure you can imagine how being able to reference embedded methods directly in your templates can open up a world of presentation possibilities.
Summary
We've just scratched the surface of what Go's templates can do and we'll explore further topics as we continue, but this chapter has hopefully introduced the core concepts necessary to start utilizing templates directly.
We've looked at simple variables, as well as implementing methods within the application, within the templates themselves. We've also explored how to bypass injection protection for trusted content.
In the next chapter, we'll integrate a backend API for accessing information in a RESTful way to read and manipulate our underlying data. This will allow us to do some more interesting and dynamic things on our templates with Ajax.


