Building and running a test scene
Before moving on and building an AR project, it is prudent to verify your project has been set up properly so far by trying to build and run it on your target device. For this, we'll create a minimal AR scene and verify that it satisfies the following checklist:
- You can build the project for your target platform.
- The app launches on your target device.
- When the app starts, you see a video feed from its camera on the screen.
- The app scans the room and renders depth points on your screen.
I'll walk you through this step by step. Don't worry if you don't understand everything; we will go through this in more detail together in Chapter 2, Your First AR Scene. Please do the following in your current project, which should be open in Unity:
- Create a new scene named BasicTest by selecting File | New Scene, then Basic (Built-In) template, then File | Save As. From here, navigate to your
Scenesfolder, call itBasicTest, and click Save. - In the Hierarchy window, delete the default Main Camera (right-click and select Delete, or use the Del keyboard key).
- Add an AR Session object by selecting GameObject | XR | AR Session.
- Add an AR Session Origin object by selecting GameObject | XR | AR Session Origin.
- Add a point cloud manager to the Session Origin object by clicking Add Component in the Inspector window. Then, enter
ar pointin the search field and select AR Point Cloud Manager.
You will notice that the Point Cloud Manager has an empty slot for a Point Cloud Prefab, which is used for visualizing the detected depth points. A prefab is a GameObject saved as a project asset that can be added to the scene (instantiated) at runtime. We'll create a prefab using a very simple Particle System. Again, if this is new to you, don't worry about it – just follow along:
- Create a Particle System by selecting GameObject | Effects | Particle System.
- In the Inspector window, rename it
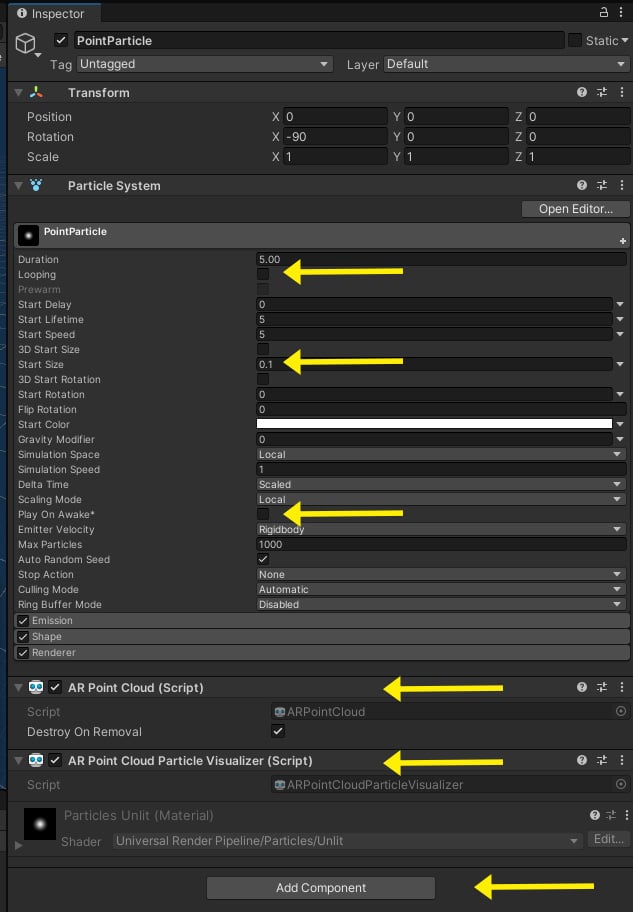
PointParticle. - On the Particle System component, uncheck the Looping checkbox.
- Set its Start Size to
0.1. - Uncheck the Play on Awake checkbox.
- Click Add Component, enter
ar pointin the search field, and select AR Point Cloud. - Likewise, click Add Component and select AR Point Cloud Visualizer.
- Drag the PointParticle object from the Hierarchy window to the Prefabs folder in the Project window (create the folder first if necessary). This makes the GameObject into a prefab.
- Delete the PointParticle object from the Hierarchy window using right-click | Delete or press the Del key.
The Inspector window of the PointParticle object should now look as follows:

Figure 1.16 – Inspector view of our PointParticle prefab with the settings we're using highlighted
We can now apply the PointParticle prefab to the AR Point Cloud Manager, as follows:
- In the Hierarchy window, select the AR Session Origin object.
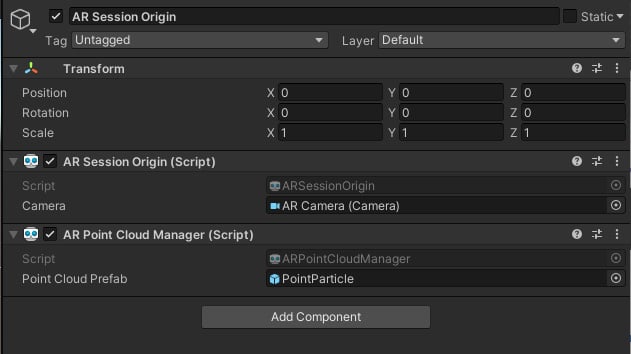
- From the Project window, drag the PointParticle prefab into the AR Point Cloud Manager | Point Cloud Prefab slot. (Alternatively, click the "doughnut" icon to the right of the slot to open the Select GameObject window, select the Assets tab, and choose PointParticle).
- Save the scene using File | Save.
The resulting AR Session Origin should look as follows:

Figure 1.17 – Session Origin with a Point Cloud Manager component populated with the PointParticle prefab
Now, we are ready to build and run the scene. Perform the following steps:
- Open the Build Settings window using File | Build Settings.
- Click the Add Open Scenes button to add this scene to the build list.
- In the Scenes in Build list, uncheck all scenes except the BasicTest one.
- Ensure your device is connected to your computer via USB cable.
- Press the Build And Run button to build the project and install it on your device. It will prompt you for a save location; I like to create a folder in my project root named
Builds/. Give it a filename (if required) and press Save. It may take a while to complete this task.
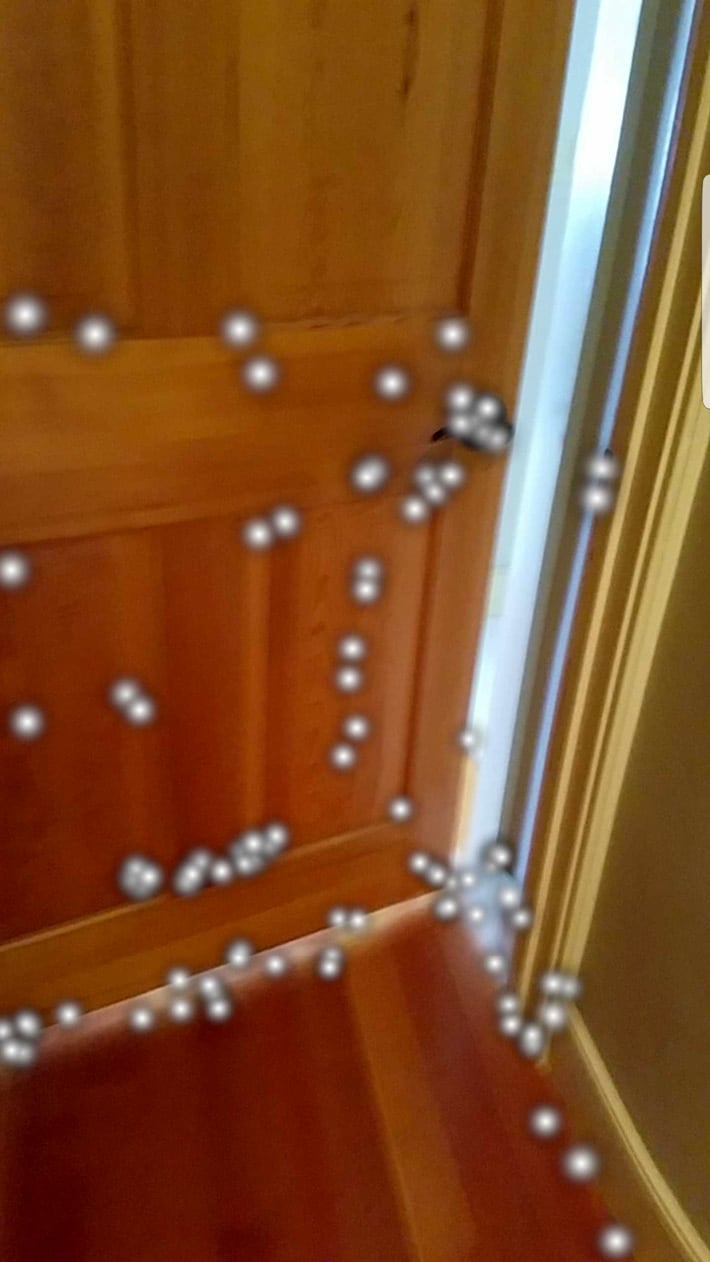
If all goes well, the project will build, install on your device, and launch. You should see a camera video feed on your device's screen. Move the phone slowly in different directions. As it scans the environment, feature points will be detected and rendered on the screen. The following screen capture shows my office door with a point cloud rendered on my phone. As you scan, the particles in the environment that are closer to the camera appear larger than the ones further away, contributing to the user's perception of depth in the scene.

Figure 1.18 – Point cloud rendered on my phone using the BasicTest scene
If you encounter errors while building the project, look at the Console window in the Unity Editor for messages (in the default layout, it's a tab behind the Project window). Read the messages carefully, generally starting from the top. If that doesn't help, then review each of the steps detailed in this chapter. If the fix is still not apparent, do an internet search for the message's text, as you can be certain you're probably not the first person to have a similar question!
Tip – Build Early and Build Often
It is important to get builds working as soon as possible in a project. If not now, then certainly do so before the end of the next chapter, as it does not make a lot of sense to be developing an AR application without having the confidence to build, run, and test it on a physical device.
With a successful build, you're now ready to build your own AR projects. Congratulations!


