VMs can only be added to an an Availability Set by creation. When you want to add existing VMs to an Availability Set, this will result in recreating your VMs. This is something to be aware of when designing your solutions.
Creating highly available virtual machines
Creating highly available virtual machines from the Azure Portal
Follow the given steps to create a VM from the Azure Portal:
- Navigate to the Azure Portal by opening https://portal.azure.com/.
- Click on New and, on the right-hand side, choose an image (or you can type an image name in the search bar). For this demo, we have selected the Windows Server 2016 VM image:
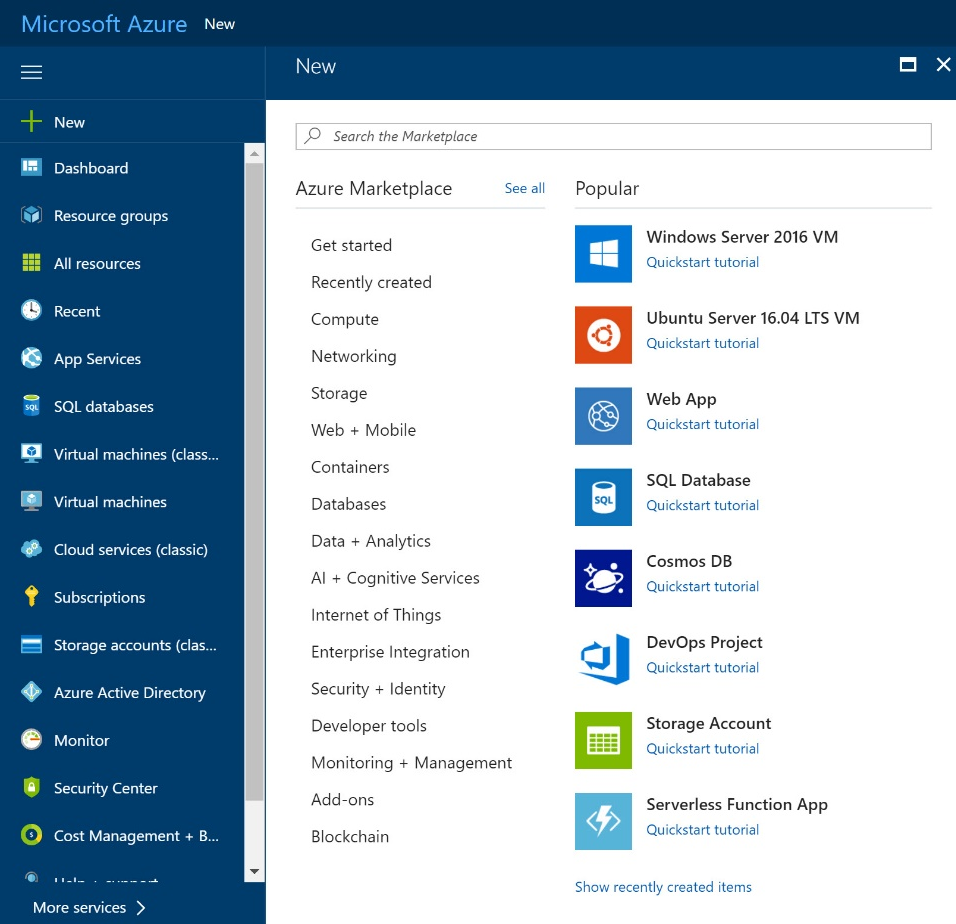
Creating an Azure VM
- A new blade opens up where you can fill in the basic settings of the VM. Add the following details and click on OK:

Filling in the basic settings
- A new blade will open where you can choose the VM type and size. By default, only the recommended VMs are displayed, but you can choose to display all VMs by clicking on View all and then clicking on Select, as shown in the following screenshot:
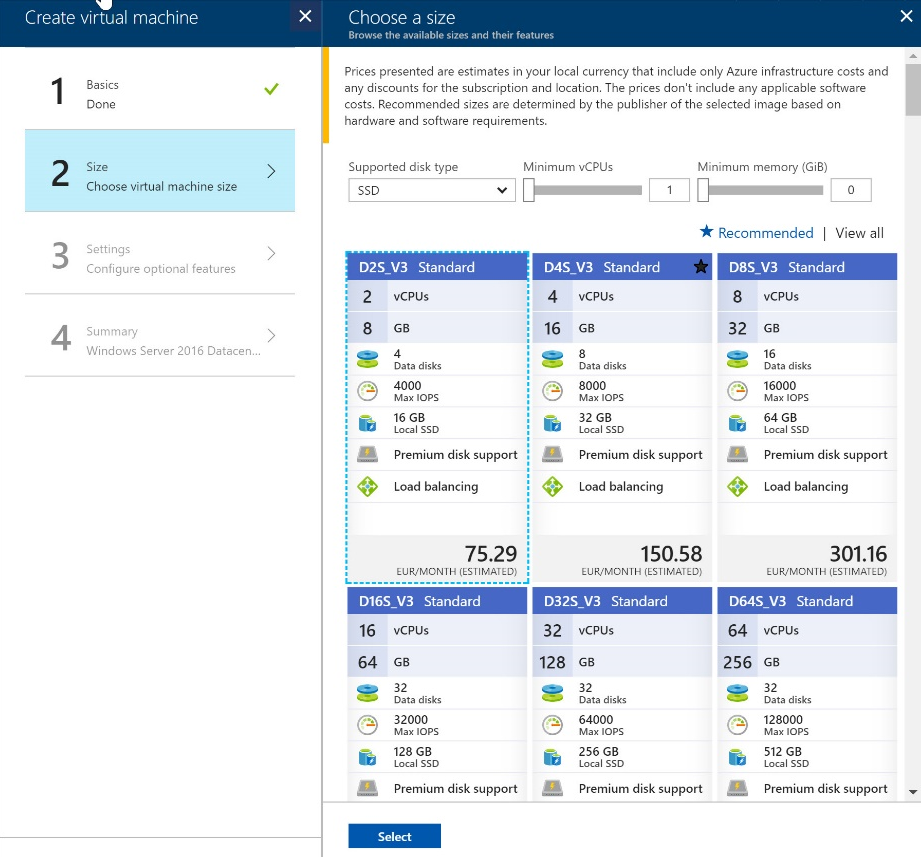
Choosing your VM size
- A new blade opens up where you can configure additional options. Here, select Availability set and then click Create new:
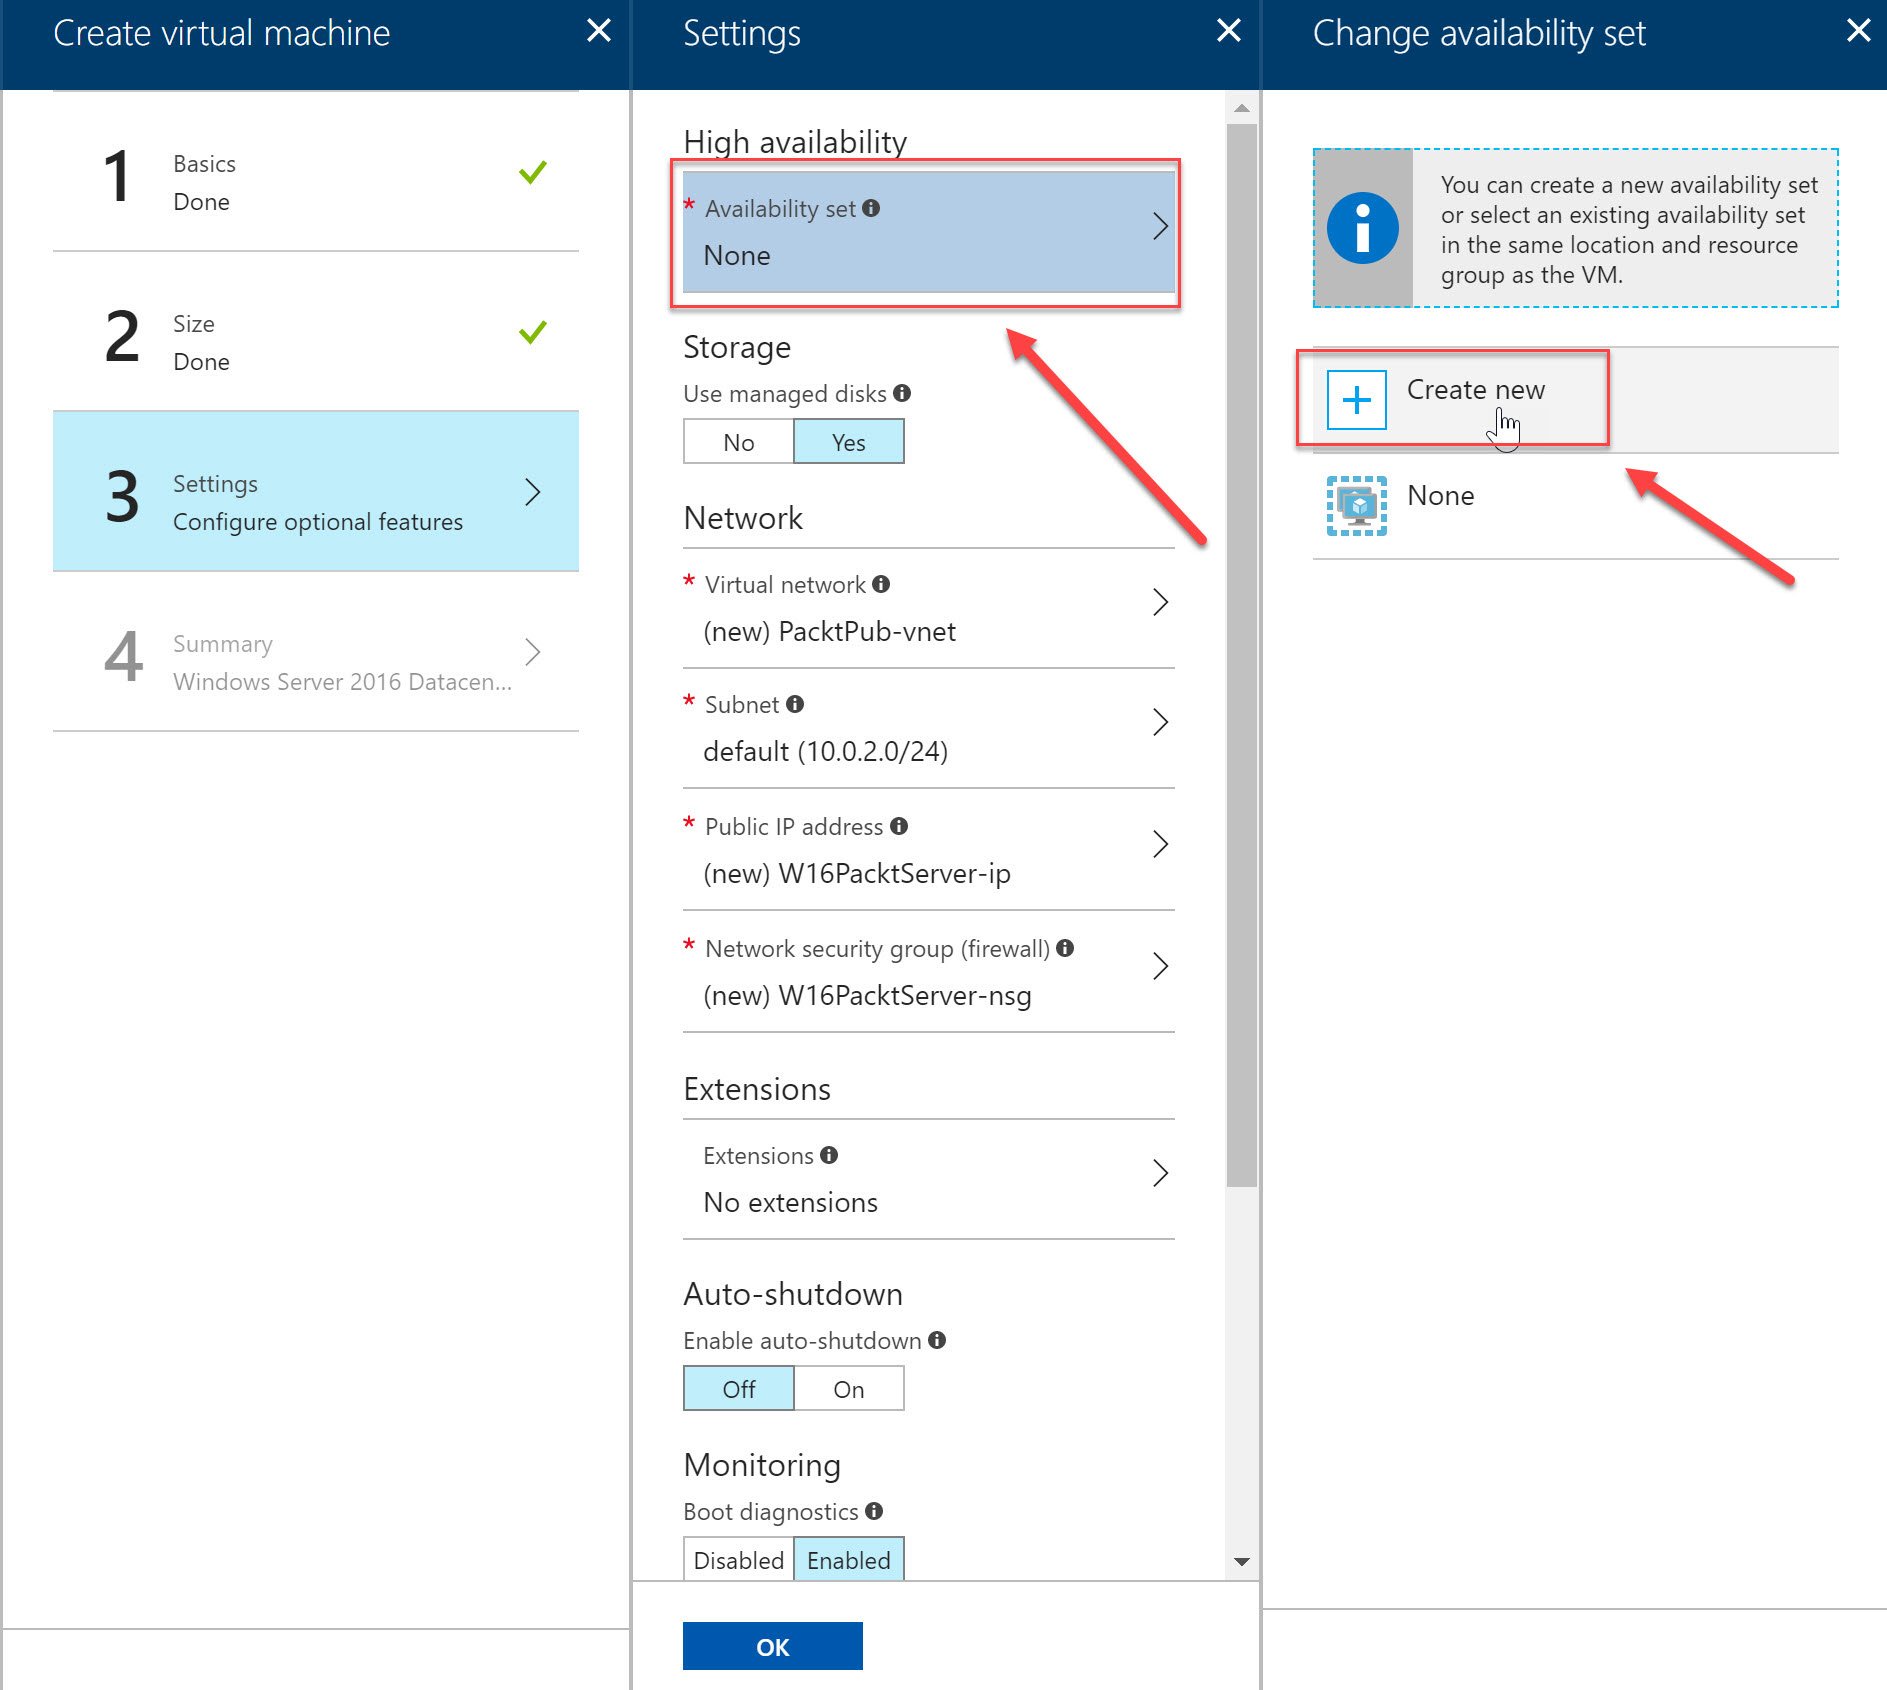
Creating a high Availability Set
- By default, your VMs are assigned two fault domains and five update domains. Accept the default settings here and click on OK twice when prompted.
- The last blade opens up, which provides a summary with all the settings you've entered. Check the permission box.
- Click on Create and your VM is now created. Next to the Create button, you should see a link where you can download the ARM template of this virtual machine.
- Create the second VM and, instead of creating a new Availability Set, add the second VM to the Availability Set that we have already created using the previous steps.
You can download the ARM template of the configuration of the VM. This template can be used to deploy the second VM as well. There are a lot of templates available on GitHub that have been created by Microsoft and the community: https://azure.microsoft.com/en-us/resources/templates/.
Creating highly available virtual machines from PowerShell
VMs and Availability Sets can be created using PowerShell as well. Besides the traditional PowerShell, you can also use the Azure Cloud Shell to create your Availability Set. By using the Azure Cloud Shell, you are basically using PowerShell from inside the browser. Inside the Azure Cloud Shell, Windows users can opt for PowerShell and Linux users can opt for Bash. You can open the Azure Cloud Shell from the Azure Portal, as shown in the following screenshot:
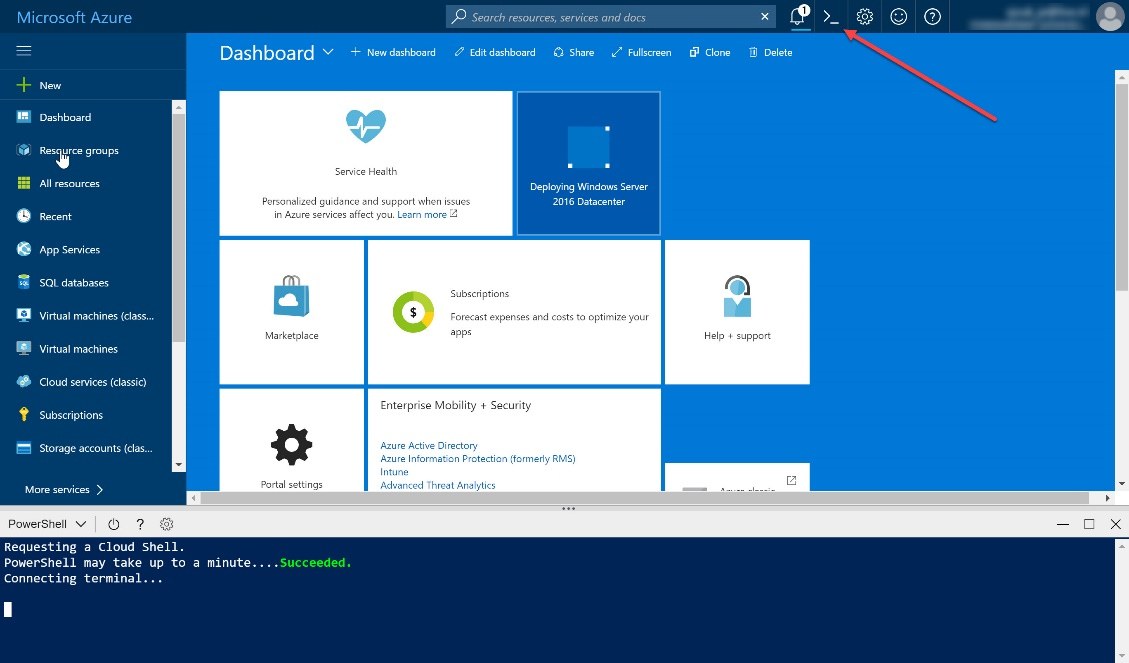
Azure Cloud Shell
To create two VMs and add them to an Availability Set, add the following PowerShell statements to Azure Cloud Shell or Windows PowerShell (note that when using the Azure Cloud Shell, you don't have to log in):
Login-AzureRmAccount
If necessary, select the right subscription, shown as follows:
Select-AzureRmSubscription -SubscriptionId "********-****-****-****-***********"
Create a resource group:
New-AzureRmResourceGroup -Name PacktPubPS -Location WestEurope
Now, create an Availability Set:
New-AzureRmAvailabilitySet -Location WestEurope -Name AvailabilitySet02 -ResourceGroupName PacktPubPS -Sku Aligned -PlatformFaultDomainCount 2 -PlatformUpdateDomainCount 2
Next, we need to create the two VMs and add them to the Availability Set. This is done by setting the -AvailabilitySetId parameter to the ID of the Availability Set. When running this script, you will be prompted for the username and password for your VM, as shown in the following snippet:
$availabilitySet = Get-AzureRmAvailabilitySet -ResourceGroupName PacktPubPS -Name AvailabilitySet02

$cred = Get-Credential -Message "Enter a username and password for the virtual machine."

$subnetConfig = New-AzureRmVirtualNetworkSubnetConfig -Name PacktSubnet -AddressPrefix 192.168.1.0/24
$vnet = New-AzureRmVirtualNetwork -ResourceGroupName PacktPubPS -Location WestEurope -Name PacktVnet -AddressPrefix 192.168.0.0/16 -Subnet $subnetConfig

$nsgRuleRDP = New-AzureRmNetworkSecurityRuleConfig -Name PacktNetworkSecurityGroupRuleRDP -Protocol Tcp -Direction Inbound -Priority 1000 -SourceAddressPrefix * -SourcePortRange * -DestinationAddressPrefix * -DestinationPortRange 3389 -Access Allow

$nsg = New-AzureRmNetworkSecurityGroup -Location WestEurope -Name PacktSecurityGroup -ResourceGroupName PacktPubPS -SecurityRules $nsgRuleRDP

# Apply the network security group to a subnet
Set-AzureRmVirtualNetworkSubnetConfig -VirtualNetwork $vnet -Name PacktSubnet -NetworkSecurityGroup $nsg -AddressPrefix 192.168.1.0/24

# Update the virtual network
Set-AzureRmVirtualNetwork -VirtualNetwork $vnet


for ($i=1; $i -le 2; $i++)
{
 $pip = New-AzureRmPublicIpAddress -ResourceGroupName PacktPubPS -Location WestEurope -Name "$(Get-Random)" -AllocationMethod Static -IdleTimeoutInMinutes 4

 $nic = New-AzureRmNetworkInterface -Name PacktNic$i -ResourceGroupName PacktPubPS -Location WestEurope -SubnetId $vnet.Subnets[0].Id -PublicIpAddressId $pip.Id -NetworkSecurityGroupId $nsg.Id

 # Specify the availability set
 $vm = New-AzureRmVMConfig -VMName PacktVM$i -VMSize Standard_D2_v3 -AvailabilitySetId $availabilitySet.Id

 $vm = Set-AzureRmVMOperatingSystem -ComputerName myVM$i -Credential $cred -VM $vm -Windows -EnableAutoUpdate -ProvisionVMAgent
 $vm = Set-AzureRmVMSourceImage -VM $vm -PublisherName MicrosoftWindowsServer -Offer WindowsServer -Skus 2016-Datacenter -Version latest

 $vm = Add-AzureRmVMNetworkInterface -VM $vm -Id $nic.Id
 New-AzureRmVM -ResourceGroupName PacktPubPS -Location WestEurope -VM $vm
}