Creating 2D space plan items
A large part of the programming phase in interior design includes space planning, which influences how people interact, communicate, move, work, play, and feel (mentally). It also ensures that a room can be used to its maximum potential when incorporating Furniture, Fixtures, and Equipment (FFE).
Creating space plan items in the 3D SketchUp world makes it easier to visualize how the items will interact while considering the volume of the space. Space planning in 2D CAD programs is fine but does not allow for a quick 3D view to determine spatial equity. Additionally, going between CAD and SketchUp can ultimately be a waste of time if most of the work will be done in SketchUp anyway.
For this example, we will create a 90” L x 33” D sofa to use for space planning; this is the kind of item that can be used over and over again:
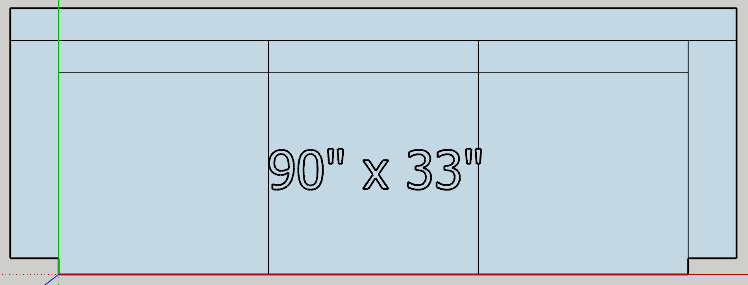
Figure 1.14: Completed sofa
To create any 2D Space Planning Objects in SketchUp, follow these steps:
- Set the Camera view to Top view.
- Zoom in to the origin point of the model, where all three axes meet.
SketchUp basics reminder
We should always begin modeling close to the origin point and then outward from that point to avoid future issues, such as clipping planes.
- We will first create the seat or base of the sofa, which is
78"L x29"D:- Activate your Rectangle tool by either clicking on the icon or tapping the shortcut R on your keyboard. Your cursor will change to a pencil with a little rectangle attached (another one of those awesome SketchUp inferences!).
- Lock in the blue/z-axis by tapping the up arrow key.
- Click once on the origin point and lift up your finger (do not hold down the mouse button).
- Move your mouse up to the right, diagonally from where you started.
- Now, remember how you should always keep an eye on your Measurements box? The text in the box has now changed to read Dimensions. This means it wants us to type in the dimensions of the rectangle. You do not need to click inside the Measurements box; in fact, you cannot. Instead, type
78,29and hit Enter/Return. In top view, the first number is the red/x-axis, and the second is the green/y-axis.
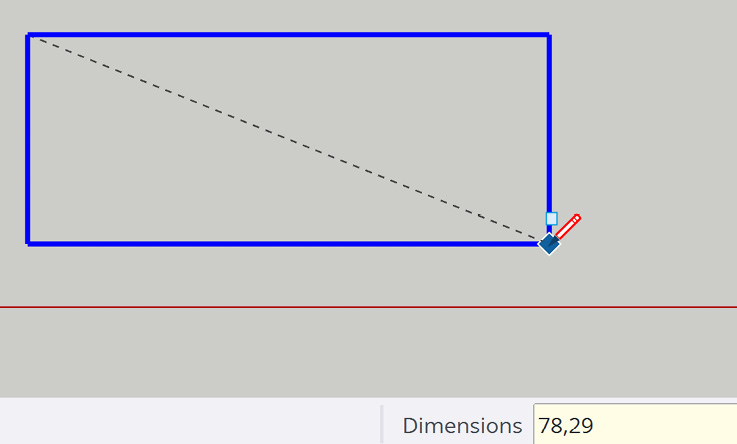
Figure 1.15: Create a Rectangle in Top view
Note regarding measurements
This exercise uses the inches template/units. Because we used a template that is in inches, we do not need to type the inch marks (") after each number set. If you are not using an inches template, you must type " after each number set.
- End your command by hitting the spacebar or clicking the Select tool icon.
- Next, immediately make the rectangle a group by double-clicking on the face (to pick up the face and the edges that created it), right-clicking on the shape, and choosing Make Group.
Important note regarding groups
Every object in your model should be grouped so that the geometry does not stick together. You can make an object a group before you started creating it, by right-clicking a blank area in your model and selecting Make Group, or immediately after you create the object. Make one of these options a habitual part of your workflow.
- We will now create the arms for the sofa, which are
6"W x27"D:- Activate the Rectangle tool, click the top-right endpoint of the rectangle group we made in the last step, release your mouse, and move it down the right. Type
6,27and hit Enter/Return on your keyboard.
- Activate the Rectangle tool, click the top-right endpoint of the rectangle group we made in the last step, release your mouse, and move it down the right. Type

Figure 1.16: Create the first sofa arm
- Make that arm a group (or a component because it is a repeated object), then copy it over to the opposite side of the sofa, endpoint to endpoint:

Figure 1.17: Copy the sofa arm to the opposite side
- Now let’s create the back of the sofa, which is
90"L x4"D:- This time, let’s change it up by creating a group first. Right-click in the blank modeling window and choose Make Group. By doing this step first when drawing a shape, we will already be creating a group within edit mode, which is one less step to remember:
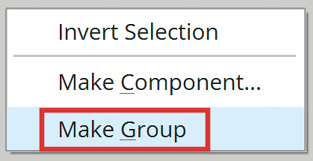
Figure 1.18: Right-click in the modeling window and choose Make Group
- Activate the Rectangle tool and lock in the blue/z-axis (using the up arrow key). Then, click an Endpoint on the sofa, move the mouse to the opposite corner, type
90,4, and tap Enter:
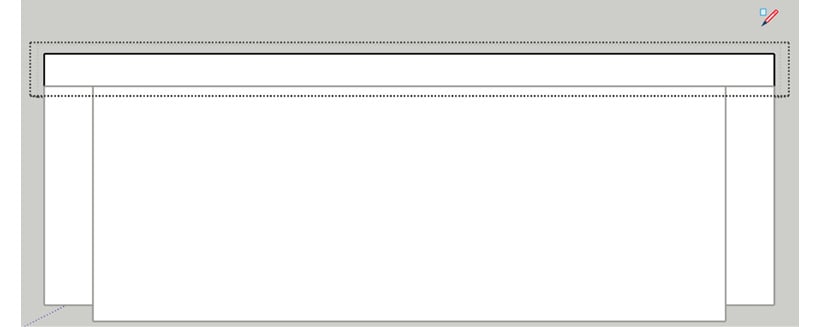
Figure 1.19: While already in Edit mode of a group, create the sofa back
- Now, check the dimensions by using the Tape Measure tool. To accomplish this, use the following steps:
- Activate the tool by clicking the Tape Measure icon or using shortcut T.
- Find an endpoint inference by hovering around the square until you see an inference point and/or the yellow ScreenTip that says Endpoint; then, click that point. (As mentioned in the Using a three-button mouse section, zoom in! That way your measurements will be accurate.)
- Hover over the opposite endpoint and look at your Measurements box, or the ScreenTip, for the correct length.
- From here, you can add lines for cushions or other details or leave it as-is.
- When you are done, select all the sofa pieces (groups and geometry) and make them one overall group:
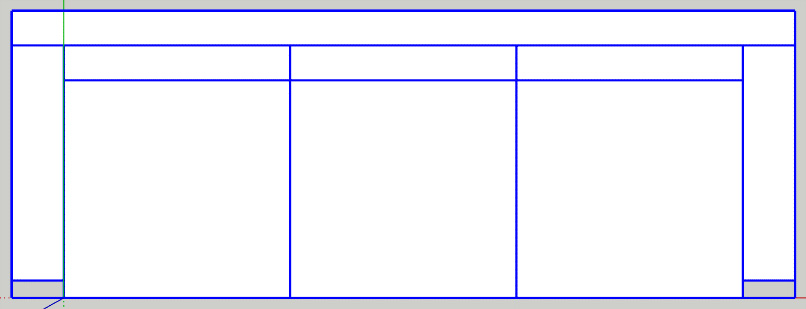
Figure 1.20: The completed and grouped sofa
- Now, we will add 3D text to the shape so you can easily distinguish the variety of space plan items you will create in the model:
- In the Tools menu or Large Tool Set, choose 3D Text.
- There are many options inside the Place 3D Text dialog box. Here, you can choose the font, size, color, and extrusion:
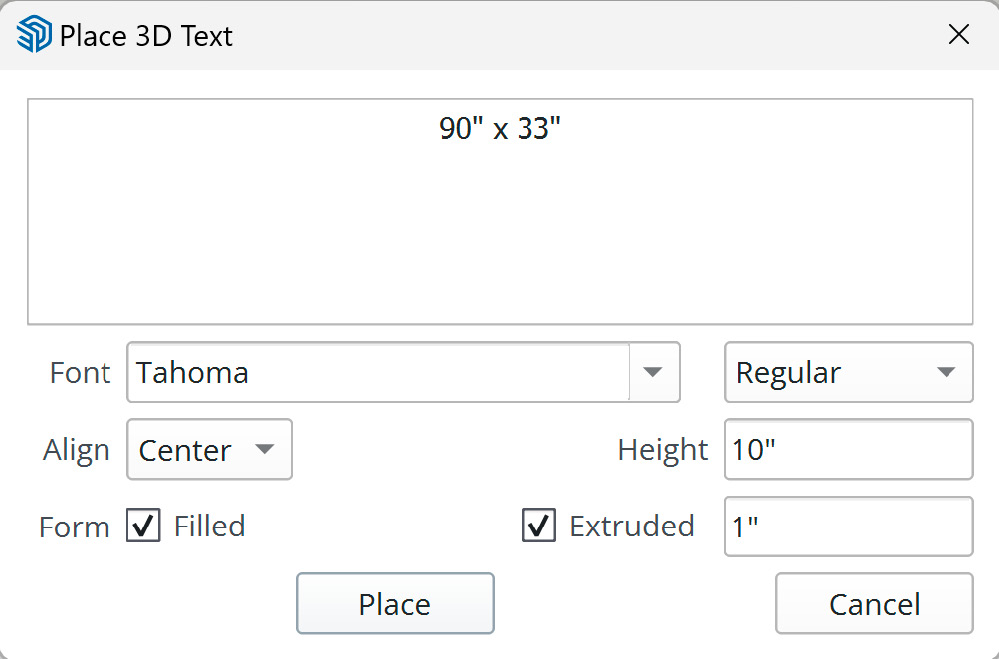
Figure 1.21: 3D Text dialog box
- Once you have filled out the options, click Place and move the text on top of your 2D shape.
- You can use the Scale tool (shortcut S) to quickly size up or down the 3D text after placing it.
- Plus, you can get into Edit mode to add color to the text.
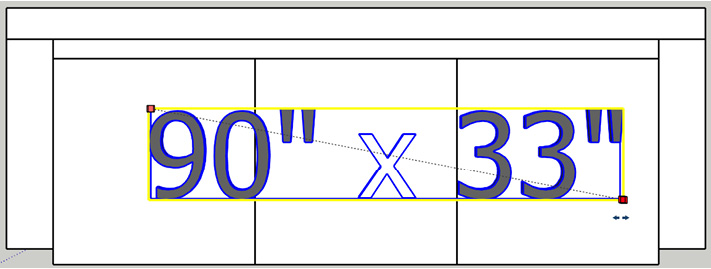
Figure 1.22: 3D Text and 2D shapes
We cover 3D Text a bit more in Chapter 6.
In 3D Warehouse, we uploaded a SketchUp file called Space Plan Items, which you can download (https://3dwarehouse.sketchup.com/model/82259125-3bbd-40d1-a569-ae2c65af12a7/Space-Plan-Items) to use as a reference for creating your own shapes (or use them for your design needs).

Figure 1.23: Becca’s 2D Space Plan Items model in 3D Warehouse
You are now equipped with the knowledge to create 2D space planning shapes. The method outlined in this section is versatile and can be utilized for various design elements such as 2 x 4s, doors, windows, and columns.
In the final section of this chapter, we will discuss situations in which you should use components instead of groups and review the functionality of components.


