Getting started – creating an MVC template
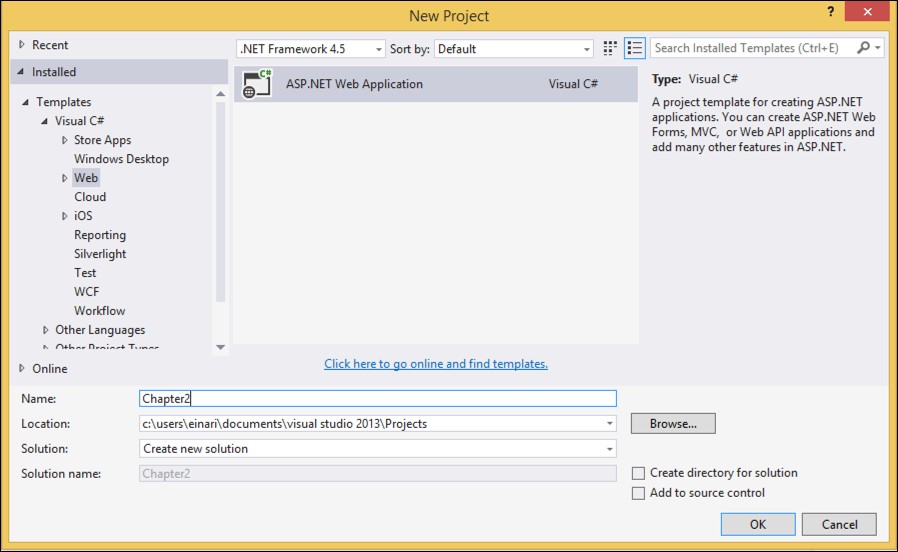
Firstly, you'll need to open up your Visual Studio installation and create a new project by clicking on New Project from the File menu. The following dialog box will show up. Click on Web from the left-hand side menu and then select ASP.NET Web Application. Enter Chapter2 in the Name textbox and select your location, as shown in the following screenshot:

As we want to create an MVC app, select the MVC template from the template selector and make sure you deselect the Host in the cloud option. Before clicking on OK, click on the Change Authentication button, as shown in the following screenshot:

As you can see from the following screenshot, a dialog box will pop up. Make sure the Individual User Accounts option is selected and click on OK, followed by OK in the template selector dialog box you came from:

You now have your MVC template created, which enables authentication with its own user database. The foundation has been set!


