Navigating in AutoCAD
To navigate in AutoCAD, a three-button mouse with left-click, right-click, and the middle scroll wheel is recommended. The laptop touchpad can be used but with a few limitations.
To follow along, access the lesson files, and then open drawing 1.1 in AutoCAD. If you don’t have lesson files, you can open any drawing file to follow along. This is a sample drawing by Autodesk AutoCAD that is available as a read-only file when you launch the software for the first time.
Selecting and panning
To select any object in the drawing, hover your cursor over it and left-click. The object will be selected and blue rectangular dots, called a multi-function grip, will show up.
The selected object will also be highlighted:
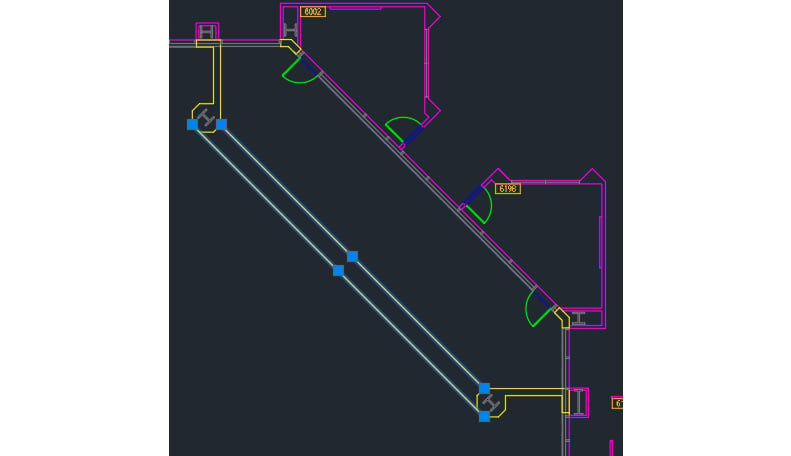
Figure 1.13: Selected lines highlighted in the drawing
To remove the object from your selection, simply press the Esc key on your keyboard. If the selection is active, even after pressing the Esc key once, you can press the Esc key multiple times as well.
To select multiple objects, you can click on them one by one (you don’t need to press and hold the Shift key to make multiple selections). If you want to remove all the objects from your selection, you can press the Esc key, but if you only want to remove selected objects from your selection, press and hold the Shift key and then click on the objects you want to remove from the selection. Using this method, you will be able to keep the complete selection, and only selected objects will be removed from the selected group.
To pan the complete drawing in the drawing area, press and hold your middle mouse wheel so that the cursor changes into a hand icon, and then move your mouse. The complete drawing will pan in the drawing area and it will follow the movement of the mouse:
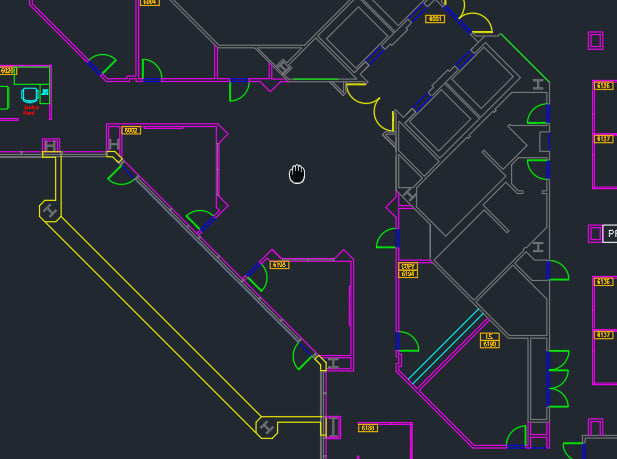
Figure 1.14: The hand type icon of the pan tool
You can also select the pan tool from the navigation bar and then left-click to pan the drawing.
Just like selecting and panning, zooming is also pretty easy and there are many ways we can zoom our drawing area. We will discuss this in the next section.
Zooming in and out
To zoom in and out, you can rotate the mouse wheel. Take your mouse pointer to the part of the drawing that you want to zoom in or out of and then rotate the wheel.
Rotating it in one direction will zoom in and in the other direction will zoom out. The point where you place your cursor will become the center of zoom.
If your drawing is very large, very small, or even off-screen, then simply zooming in or out may take time and a lot of zooming and panning will be required to fit the drawing to the visible space. To overcome this issue, you can use the Zoom Extents option, which fits all the objects in the drawing into the visible space. To use zoom extents, double-click the mouse wheel, and everything in your drawing will fit into the available space.
The zoom tool does not affect the actual size of the drawing; it only affects the scale. A line with a length of 1 mm will remain equal to 1 mm, no matter how big or small you make it using the zoom tool.
You can also use the navigation bar to use the zoom tools. To use the zoom tools from the navigation bar, click on the arrow underneath the zoom icon in the navigation bar and you will see a list of zoom options, as shown here:
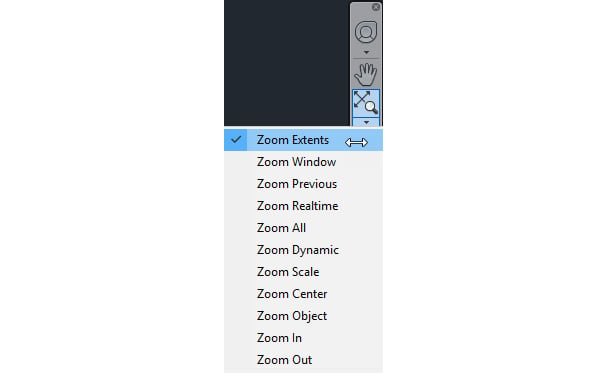
Figure 1.15: The zoom options in the navigation bar
Here is an explanation of some of the options available in the zoom menu:
- Zoom Extents: This option fits all the available objects in the visible drawing area. It can be used by double-clicking the scroll wheel.
- Zoom Window: This option lets you zoom a part of a drawing by making a window. To use this feature, click at a point in the drawing area and then let go of your cursor. Then, click again at another point to complete the window. It will zoom the drawing to fit the selected window.
- Zoom Previous: This option will take you to the previous zoomed state of your drawing. It’s like an undo option for the zoom command.
- Zoom Realtime: This option lets you zoom your entire drawing by moving your cursor. When you select the option, your cursor will look like a magnifying glass. Now, click anywhere in the drawing area and hold your cursor, then move up to zoom in and move down to zoom out.
- Zoom All: This option fits the drawing as per the limits set in the drawing. We will discuss limits in greater detail later in this book.
- Zoom Object: This option allows you to select the object(s) from the drawing and then only your selected object(s) is zoomed to fit the screen.
So, these are the zoom options available in AutoCAD. Although we have discussed lots of zoom tools here, you will primarily require the mouse wheel zoom in and out and the Zoom Extents tool, which is available by double-clicking the mouse wheel. Other zoom tools are not very frequently required but whenever you need them, you now know where to find them. In the next section, we will start learning about making selections using the different selection sets available in AutoCAD.
Making selections
There are many ways of making selections in an AutoCAD drawing and in this section, we will discuss most of these selection features. A drawing may contain lots of objects and making a precise selection will be key to quickly adding properties to the correct set of objects and making modifications to them. So, the selection tools are essential for quickly and efficiently designing and drafting a workflow in AutoCAD.
A simple selection
To make a simple selection, click on any object in a drawing and it will be highlighted, indicating that it is selected. To include multiple objects in this selection set, simply click on more objects and they will be added to your selection set.
If you want to disable the multiple selection feature, you can use the PICKADD system variable. Type PICKADD, press Enter, then type 0, and press Enter again.
Now, AutoCAD will allow you to make only one selection at a time. If you select another object, the previously selected one will be removed from the selection. To add multiple objects to the selection in this condition, you need to press and hold the Shift key and then click on the objects to add them to the selection set.
If you have added multiple objects to your selection and you want to remove some of them, press and hold the Shift key and click on the selected object again and it will be removed from the selection set.
For this book, we will keep the PICKADD system variable set to 2, so type PICKADD, press Enter, then type 2, and press Enter again to change the settings to the default.
The selection window
Click anywhere in the drawing area, then let go of your cursor, and move your mouse to the right. You will see a window with a solid boundary that is, by default, blue in color. This window is the selection window and all the objects that are completely inside this window will be added to the selection set. To finish making the selection, simply click again and the objects will be selected:
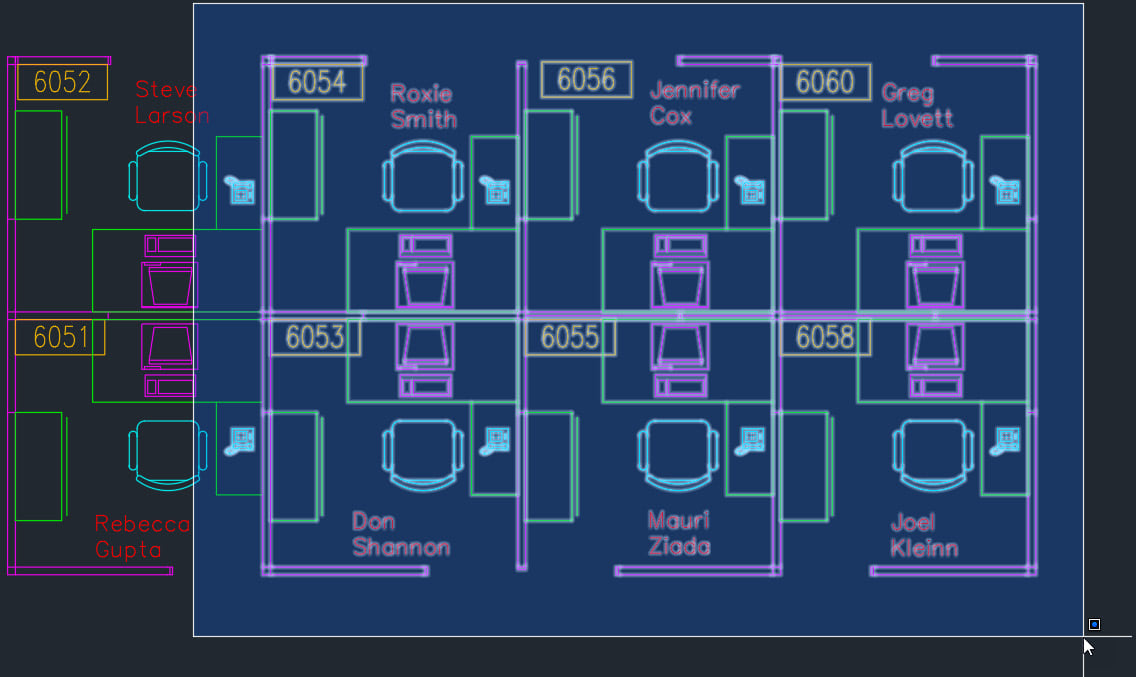
Figure 1.16: Objects selected with a selection window
In Figure 1.16, all objects that are completely inside the selection window are highlighted and will be selected, whereas objects that are partially inside and partially outside will not be included in the selection set.
The crossing window
Click anywhere in the drawing area, then let go of your cursor, and move it to the left. A window with a dotted boundary will be made, which is called the crossing window.
All the objects that are inside this window, as well as objects that just touch the boundary of the window, will be included in the selection set. In Figure 1.17, the same drawing and the same window have made different selections. As you can see, the chair, desk, and all the contents in the 6052 and 6051 cabins are also selected, along with all the objects that are completely inside the crossing window, even though they are partially outside the window:
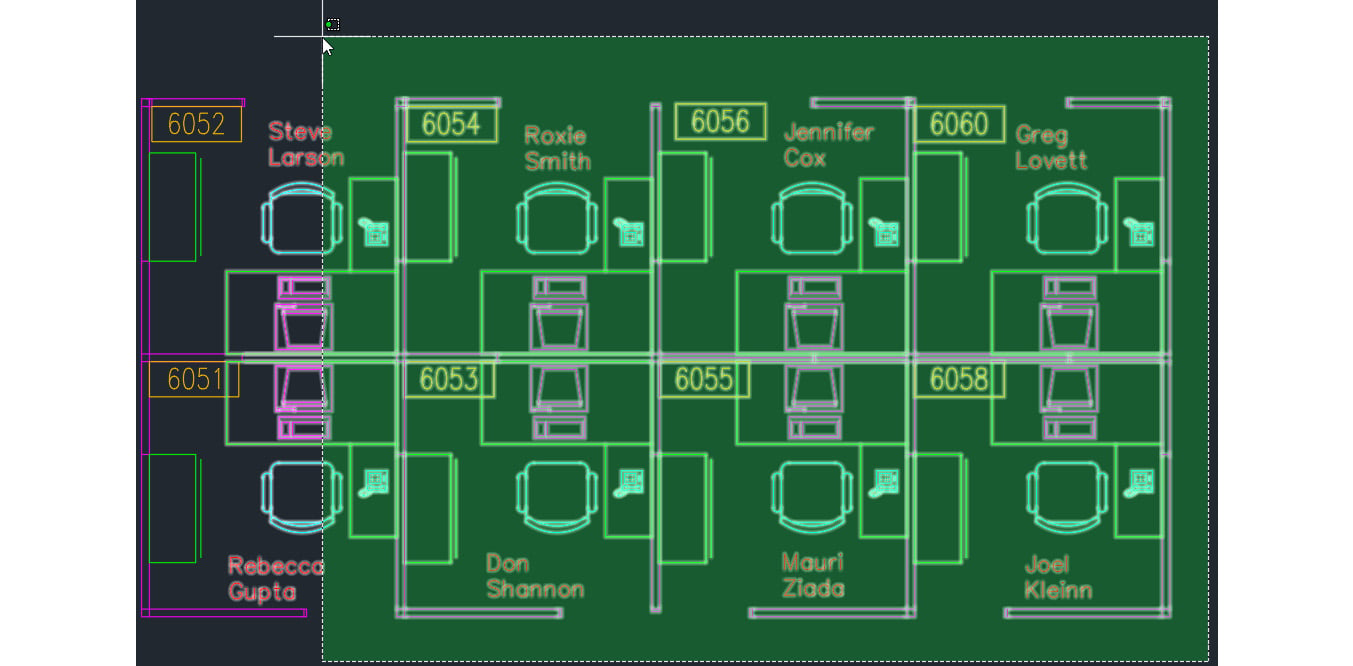
Figure 1.17: Objects selected with the crossing window
To make the selection, click again and the objects will be included in the section set.
The “window lasso” selection
This one is a relatively new selection set. To make a lasso selection, click anywhere in the drawing area, then hold down your cursor, and move to the right. You will get a freehand selection area with a solid boundary and all the objects completely inside this selection area will be selected:
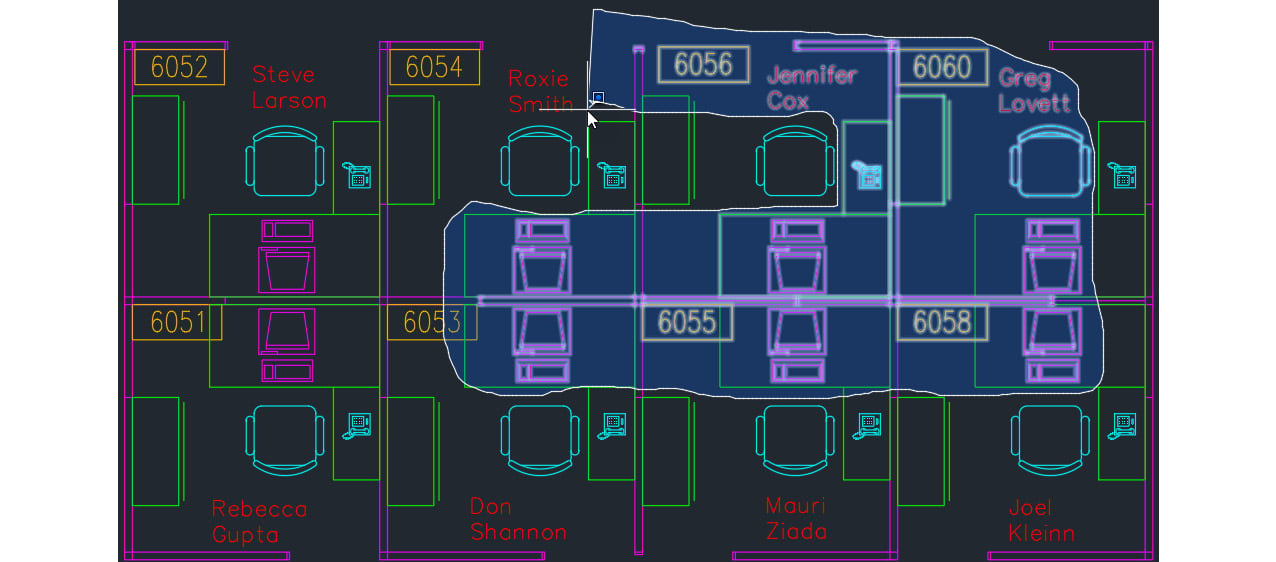
Figure 1.18: The “window lasso” selection
This selection set is like the selection window but in this case, instead of a rectangular window, you have the option of making a freehand selection, giving you more control.
The “crossing lasso” selection
To make this selection, click anywhere in the drawing area, hold down your cursor, and then move your mouse to the left. You will get a freehand selection area with a dotted boundary. This section set is called the crossing lasso selection and, in this selection, all objects that are completely inside the selected area, as well as objects on the boundary, will be selected:
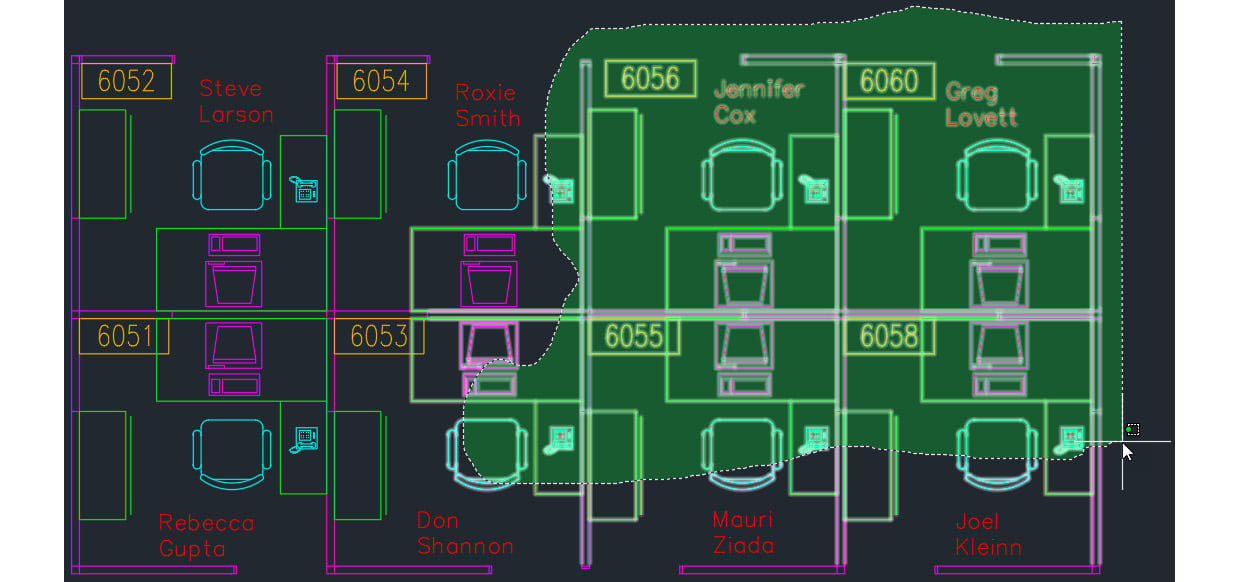
Figure 1.19: The “crossing lasso” selection
So, this was all about making selections in AutoCAD. In the next section, we will learn about setting the units and limits, which is essential to any drawing.


