


Adding multiple materials to an object
We will now learn how to add multiple materials to a single object. In the next few steps, we will split our cube in half and create a separate material for each half:
- In Edit Mode, add a loop cut with Ctrl + R to cut the cube into two parts.
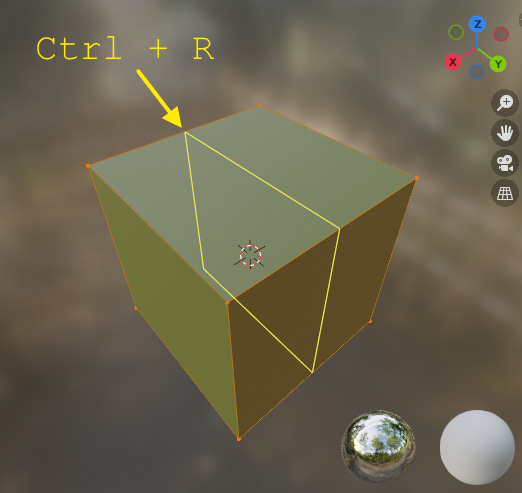
Figure 1.7 – Adding a loop cut to a cube
- Click on the plus button in the Material Properties tab to add a new material slot.
This will not create a new material; it will only create a new slot. We can use this slot to either create a new material or load an existing material from another object. This time, we need a new material.
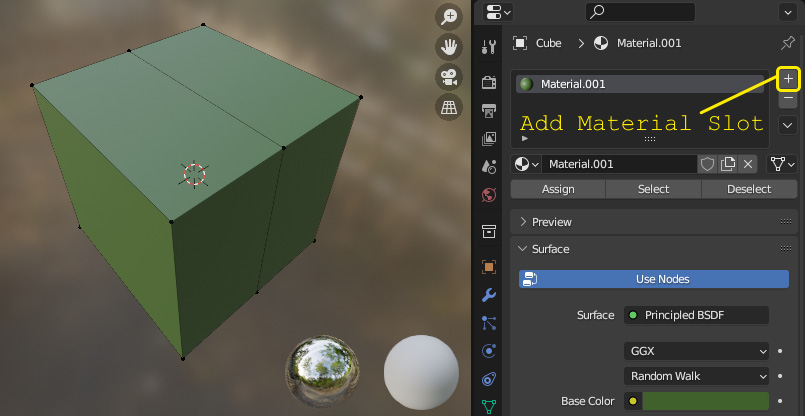
Figure 1.8 – Adding a new material slot
- Click on the New button to create a new material. The new material will be named Material.002 by default.
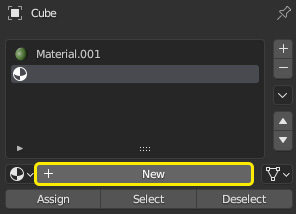
Figure 1.9 – Creating a new material
- Switch to Face Select mode by pressing 3, and select one...


