
Creating a simple transformation
Transformations and jobs are the main PDI artifacts. Transformations are data-flow oriented entities, while jobs are task-oriented. In this book, we will start by learning all about transformations, focusing on jobs later. To get a quick idea of what, exactly, a transformation is, we will start by creating a simple one. This will also allow you to see what it's like to work with Spoon.
Our first transformation will find out the current version of PDI (Kettle), and will print the value to the log. Proceed as follows:
- On the
Welcome page, click on the New transformation link, located under theWORKlink group. Alternatively, press Ctrl + N. - A new tab will appear, with the title
Transformation 1. It's in this tab that you will create your work. - To the left of the screen, under the
Designtab, you'll see a tree of folders. Expand theInputfolder by double-clicking on it.
Note
Note that if you work in macOS, a single click is enough.
- Then, left-click on the
Get System Infoicon, and, without releasing the button, drag and drop the selected icon to the work area (that is, the blank area that occupies almost all of the screen). You should see something like this:
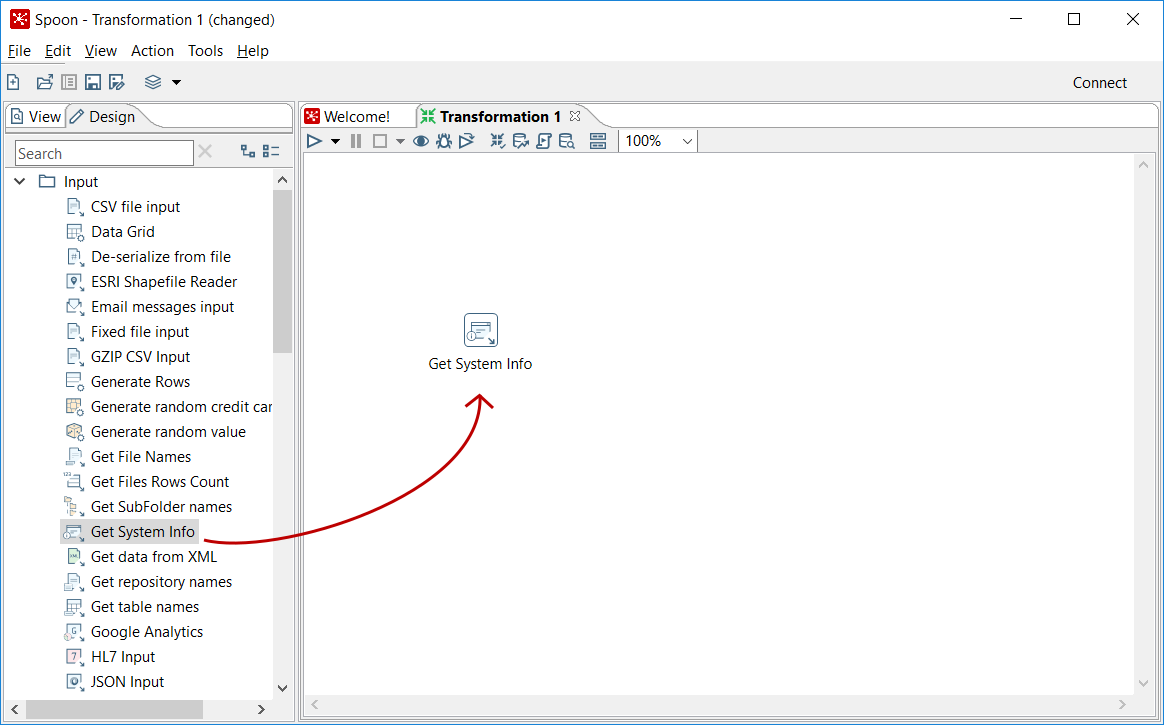
Dragging and dropping a step
- Double-click on the
Get System Infoicon. A configuration window will show up. Fill in the first row in the grid, as shown in the following screenshot. Note that you don't have to type theKettle version. Instead, you can choose it from a list of available options:
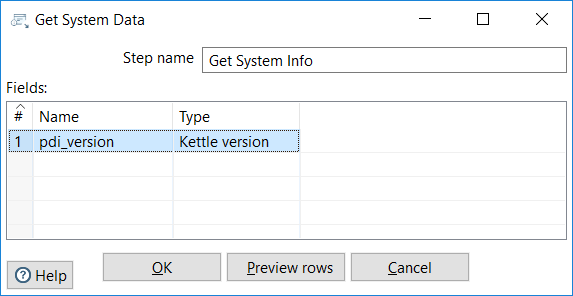
Configuring the Get System Info step
- In the
Designtab, double-click on theUtilityfolder, click on the Write to log icon, and drag and drop it to the work area. - Put the mouse cursor over the
Get System Infoicon and wait until a tiny toolbar shows up, as shown in the following screenshot:
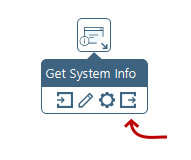
Mouseover assistance toolbar
- Click on the output connector (the icon highlighted in the preceding image) and drag it towards the Write to log icon. A greyed hop is displayed.
- When the mouse cursor is over the
Write to logstep, release the button. A link (a hop, from now on) is created, from the first step to the second one. The screen should look as follows:
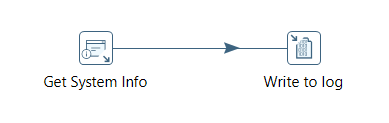
Connecting steps with a hop
Let's add some color note to our work, as follows:
- Right-click anywhere in the work area to bring up a contextual menu.
- In the menu, select the
New Note...option. A note editor will appear. - Type a description, such as
My first transformation. Select theFont styletab and choose a nice font and some colors for your note, and then click onOK. The following should be the final result:
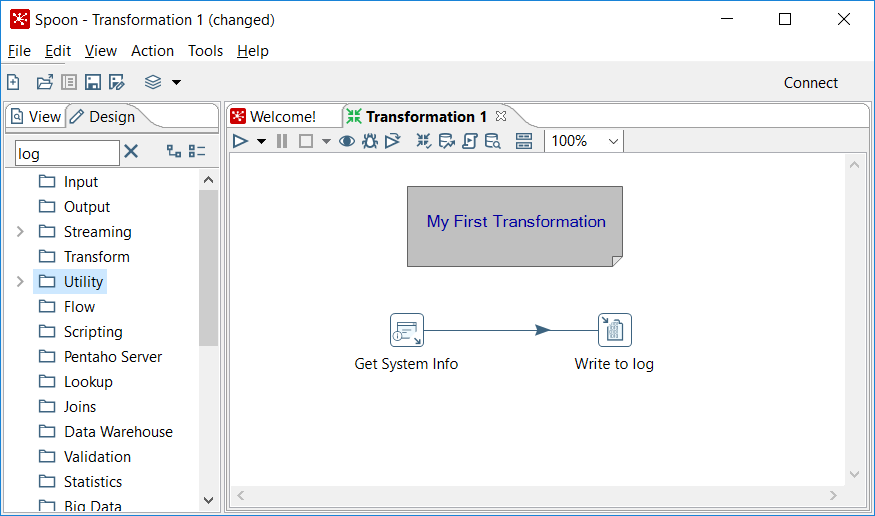
My first transformation
- Save the transformation by pressing Ctrl + S. PDI will ask for a destination folder. Select the folder of your choice, and give the transformation a name. PDI will save the transformation as a file with a
ktrextension (for example,sample_transformation.ktr).
Finally, let's run the transformation to see what happens:
- Click on the Run icon, located in the transformation toolbar:
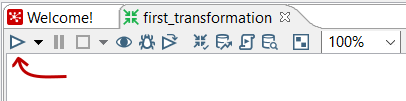
Run icon in the transformation toolbar
- A window named
Run Optionswill appear. Click onRun. - At the bottom of the screen, you should see a log with the results of the execution:
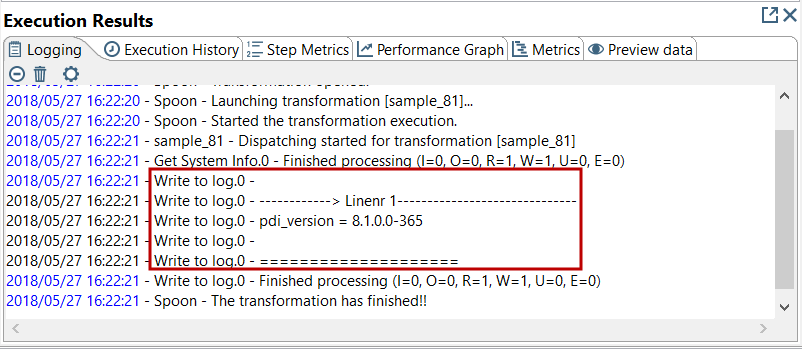
Execution Results