Search icon CANCEL
Subscription
0
Cart icon
Your Cart (0 item)
Close icon
You have no products in your basket yet
Arrow left icon
Explore Products
Best Sellers
New Releases
Books
Videos
Audiobooks
Learning Hub
Newsletter Hub
Free Learning
Arrow right icon
timer SALE ENDS IN
0 Days
:
00 Hours
:
00 Minutes
:
00 Seconds
Arrow up icon
GO TO TOP
Manga Studio EX 5 Cookbook

You're reading from   Manga Studio EX 5 Cookbook Over 90 hands-on recipes to help you create digital comics from page setup to exporting the final product

Arrow left icon
Product type Paperback
Published in Sep 2015
Publisher
ISBN-13 9781785881077
Length 300 pages
Edition 1st Edition
Arrow right icon
Author (1):
Arrow left icon
Liz Staley Liz Staley
Author Profile Icon Liz Staley
Liz Staley
Arrow right icon
View More author details
Toc

Table of Contents (13) Chapters Close

Preface 1. Creating and Manipulating Pages and Page Templates FREE CHAPTER 2. Customizing Brushes 3. Getting a Handle on Vectors 4. Using the Layer Modes 5. Making Selections and Layer Masks 6. Using New Rulers and Line Tools 7. Adding and Creating Tones and Materials 8. Playing with Color Palettes 9. Creating Special Effects 10. Using 3D Objects 11. Exporting the Finished Product Index

Breaking out with a broken glass brush


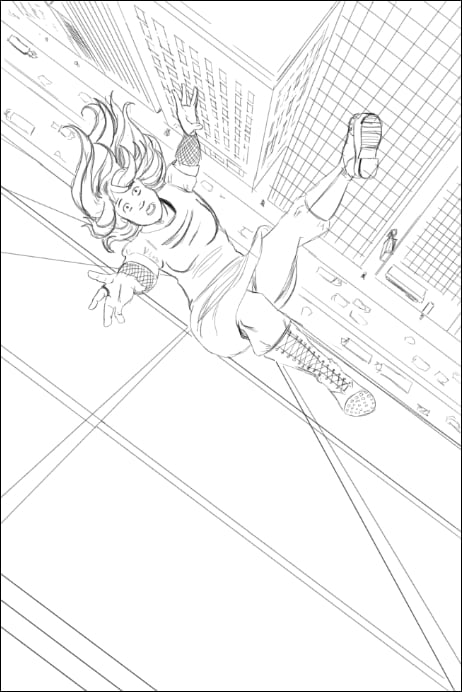
One of the great things about working digitally is that you can save time by utilizing the features of the software you use and making them work for you. In this case, we're going to add some broken glass around the falling figure in this drawing:
How to do it…

This recipe will walk us through creating a custom material and then using it to make our brush:

  1. Open a blank canvas, preferably of 300 to 600 dpi resolution.

  2. Using your preferred drawing tools on an empty layer, draw the outlines of several jagged shapes. These will be our shards of broken glass.

  3. Create a new layer beneath the outline layer. Select the glass shapes and fill them with solid white.

  4. Lower the opacity of the white layer to 50 percent.

  5. Merge the outline layer with the 50 percent transparent white layer.

  6. Make sure that the background of your image is transparent. Your image should look something like this:

  7. Go to Edit | Register Image as Material.

  8. In the Material property window, name your new...

lock icon The rest of the chapter is locked
Register for a free Packt account to unlock a world of extra content!
A free Packt account unlocks extra newsletters, articles, discounted offers, and much more. Start advancing your knowledge today.
Unlock this book and the full library FREE for 7 days
Get unlimited access to 7000+ expert-authored eBooks and videos courses covering every tech area you can think of
Renews at $19.99/month. Cancel anytime