Writing conditions for conditional tests
JavaScript obviously allows you to write conditions in programs. The condition is expressed through the if (condition) statement:
- If the condition is
true, the statement (or block in braces) that follows is executed. - If the condition is
false, the statement (or block) following theelsekeyword (if present) will be executed.
Forms of writing instructions
We can use the following forms to express the conditions:
Forms of conditional expressions with if (condition)
// condition followed by a statement
if (condition) statement;   // statement executed if condition is true
// condition followed by a block
if (condition) {
  // block of statements executed if condition is true
  statement 1;
  statement 2;
  statement 3;
}
Forms of conditional expressions with if (condition) … else …
// condition followed by a statement
if (condition) statement 1;   // statement 1 executed if
                              // condition is true
else statement 2;             // statement 2 executed if
                              // condition is false
// condition followed by a block
if (condition) {
  // block of statements executed if condition is true
  statement 1;
  statement 2;
  statement 3;
}
else {
  // block of statements executed if condition is false
  statement 5;
  statement 6;
  statement 7;
}
Note
If the process to be executed includes several instructions, these instructions are grouped together in a block surrounded by braces. A block can consist of only one statement, even if, as in this case, the block is optional (no need for braces).
Let’s write the following program in the testnode.js file, which we will execute using the node testnode.js command in a command interpreter, as follows:
testnode.js file
var a = 12;
console.log("a = " + a);
if (a == 12) console.log("a is 12");
else console.log("a is not 12");
In the preceding code, the condition is expressed in the form a == 12. Indeed, it is customary to test the equality between two values by means of the sign = repeated twice successively (hence ==).
Note
We use == for equality, != for difference, > or >= to check superiority, and < or <= to check inferiority.
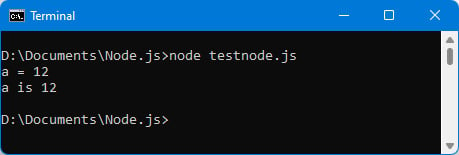
In the preceding code, since the variable a is 12, the following result can be seen:

Figure 1.11 – Using conditional tests
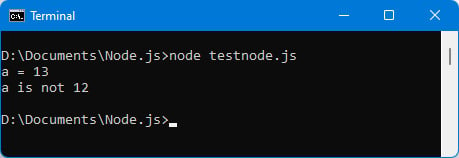
If we assign the value 13 to the variable a, the else part of the statement will be executed:

Figure 1.12 – Running the else part of the test
We have seen how to execute one part of the code or another depending on a condition. Let’s now study how to write more complex conditions than those written previously.
Expressions used to write conditions
The condition written previously is a simple test of equality between two values. But the test to write can sometimes be more complex. The goal is to have the final result of the condition, which is true or false, which will then make it possible for the system to decide the next course of action.
The condition is written in Boolean form with the OR keyword (written as ||) or with the AND keyword (written as &&). Parentheses between the different conditions may be necessary to express the final condition as follows:
Condition expressed with “or”
var a = 13;
var b = 56;
console.log("a = " + a);
console.log("b = " + b);
if (a == 12 || b > 50) console.log("condition a == 12 || b > 50 is true");
else console.log("condition a == 12 || b > 50 is false");
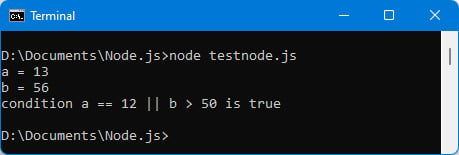
In the preceding code, since the variable b is greater than 50, the condition is true, as seen in Figure 1.13.
Note
In an OR condition, it suffices that one of the conditions is true for the final condition to be true.
In an AND condition, all the conditions must be true for the final condition to be true.

Figure 1.13 – Condition with or
By default, the condition expressed in if(condition) is compared with the value true. We can sometimes prefer to compare with the value false. In this case, it suffices to precede the condition with the sign !, which corresponds to a negation of the following condition.
It is sometimes necessary to chain several tests in a row, depending on the results of the previous tests. We then have a succession of tests, called cascade tests.
Nested test suites
It is possible to chain tests in the processes to be performed. Here is an example:
Test nesting
var a = 13;
var b = 56;
console.log("a = " + a);
console.log("b = " + b);
if (a == 12) console.log("condition a == 12 is true");
else {
  console.log("condition a == 12 is false");
  if (b > 50) console.log("condition b > 50 is true");
  else console.log("condition b > 50 is false");
}
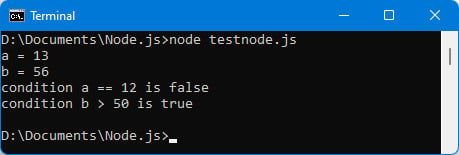
The else part is composed of several statements and is grouped in a block surrounded by braces:

Figure 1.14 – Test nesting
We learned about writing conditions in JavaScript programs. We are now going to learn how to write processing loops, which make it possible to write the instructions in the program only once. These instructions can, however, be executed as many times as necessary.


