Search icon CANCEL
Arrow left icon
Explore Products
Best Sellers
New Releases
Books
Videos
Audiobooks
Learning Hub
Conferences
Free Learning
Arrow right icon
Arrow up icon
GO TO TOP
Designing the Adobe InDesign Way

You're reading from   Designing the Adobe InDesign Way Explore 100+ recipes for creating stunning layouts with the leading desktop publishing software

Arrow left icon
Product type Paperback
Published in Aug 2023
Publisher Packt
ISBN-13 9781801074438
Length 564 pages
Edition 1st Edition
Concepts
Arrow right icon
Author (1):
Arrow left icon
Andy Gardiner Andy Gardiner
Author Profile Icon Andy Gardiner
Andy Gardiner
Arrow right icon
View More author details
Toc

Table of Contents (17) Chapters Close

Preface 1. Chapter 1: Customizing the InDesign Interface and New Document Settings 2. Chapter 2: Working with Text in InDesign FREE CHAPTER 3. Chapter 3: Creating and Using Tables 4. Chapter 4: Using the InDesign Frame Tools 5. Chapter 5: Adding Images to Your Documents 6. Chapter 6: Taking Images Further 7. Chapter 7: Creating and Applying Parent Pages 8. Chapter 8: Working with Colors and Gradients 9. Chapter 9: Formatting with Paragraph and Character Styles 10. Chapter 10: Generating and Updating a Table of Contents 11. Chapter 11: Creating Interactivity and PDF Forms 12. Chapter 12: Using and Collaborating with CC Libraries 13. Chapter 13: Preflighting and Outputting 14. Index 15. Other Books You May Enjoy Appendix: InDesign Tools Panel at a Glance

Placing images into InDesign

In this recipe, you will learn how to place images into InDesign. We will add individual images into a frame, learn how to add an image without a pre-existing frame, and even look at bringing in multiple images all at once.

Getting ready

In order to complete this recipe, simply open InDesign on your system and create a new document with 12 pages, as shown in the Creating a new document recipe from Chapter 1. You should be comfortable creating both single and multiple frames on your page, as covered in Chapter 4, Using the Frame Tools in InDesign.

How to do it…

In order to place images into your document, follow these steps:

  1. Using the Elliptical Frame tool, create an elliptical frame on your page. Then, with the frame still selected, go to the File menu and select Place (or press Ctrl (PC)/Cmd (Mac) + D) to bring up the Place dialog box, as seen in Figure 5.1:
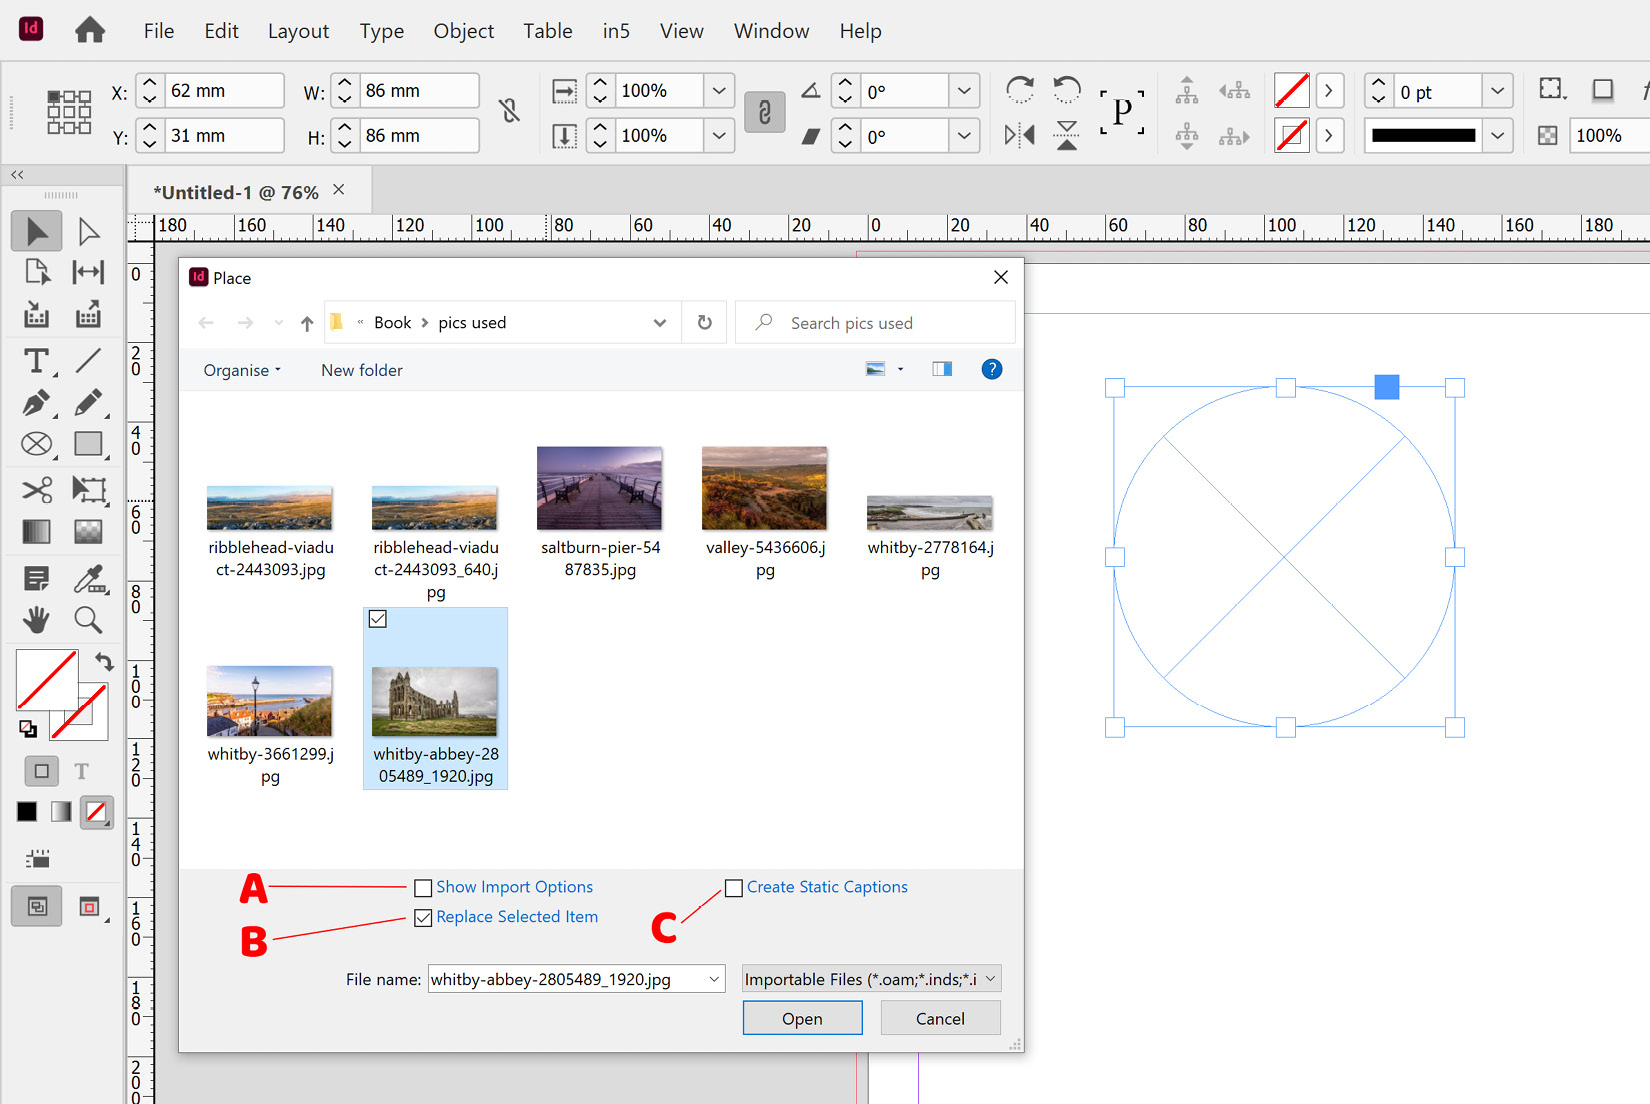
Figure 5.1: Placing an image into a frame in InDesign

Figure 5.1: Placing an image into a frame...

lock icon The rest of the chapter is locked
Register for a free Packt account to unlock a world of extra content!
A free Packt account unlocks extra newsletters, articles, discounted offers, and much more. Start advancing your knowledge today.
Unlock this book and the full library FREE for 7 days
Get unlimited access to 7000+ expert-authored eBooks and videos courses covering every tech area you can think of
Renews at €18.99/month. Cancel anytime