Optimizing After Effects’ performance
Now let’s look at how we can optimize After Effects’ performance. A dedicated option for the memory and performance of After Effects can be found in After Effects Preferences.
Go to After Effects | Preferences | Memory & Performance (macOS) or Edit | Preferences | Memory & Performance (Windows) to access it.

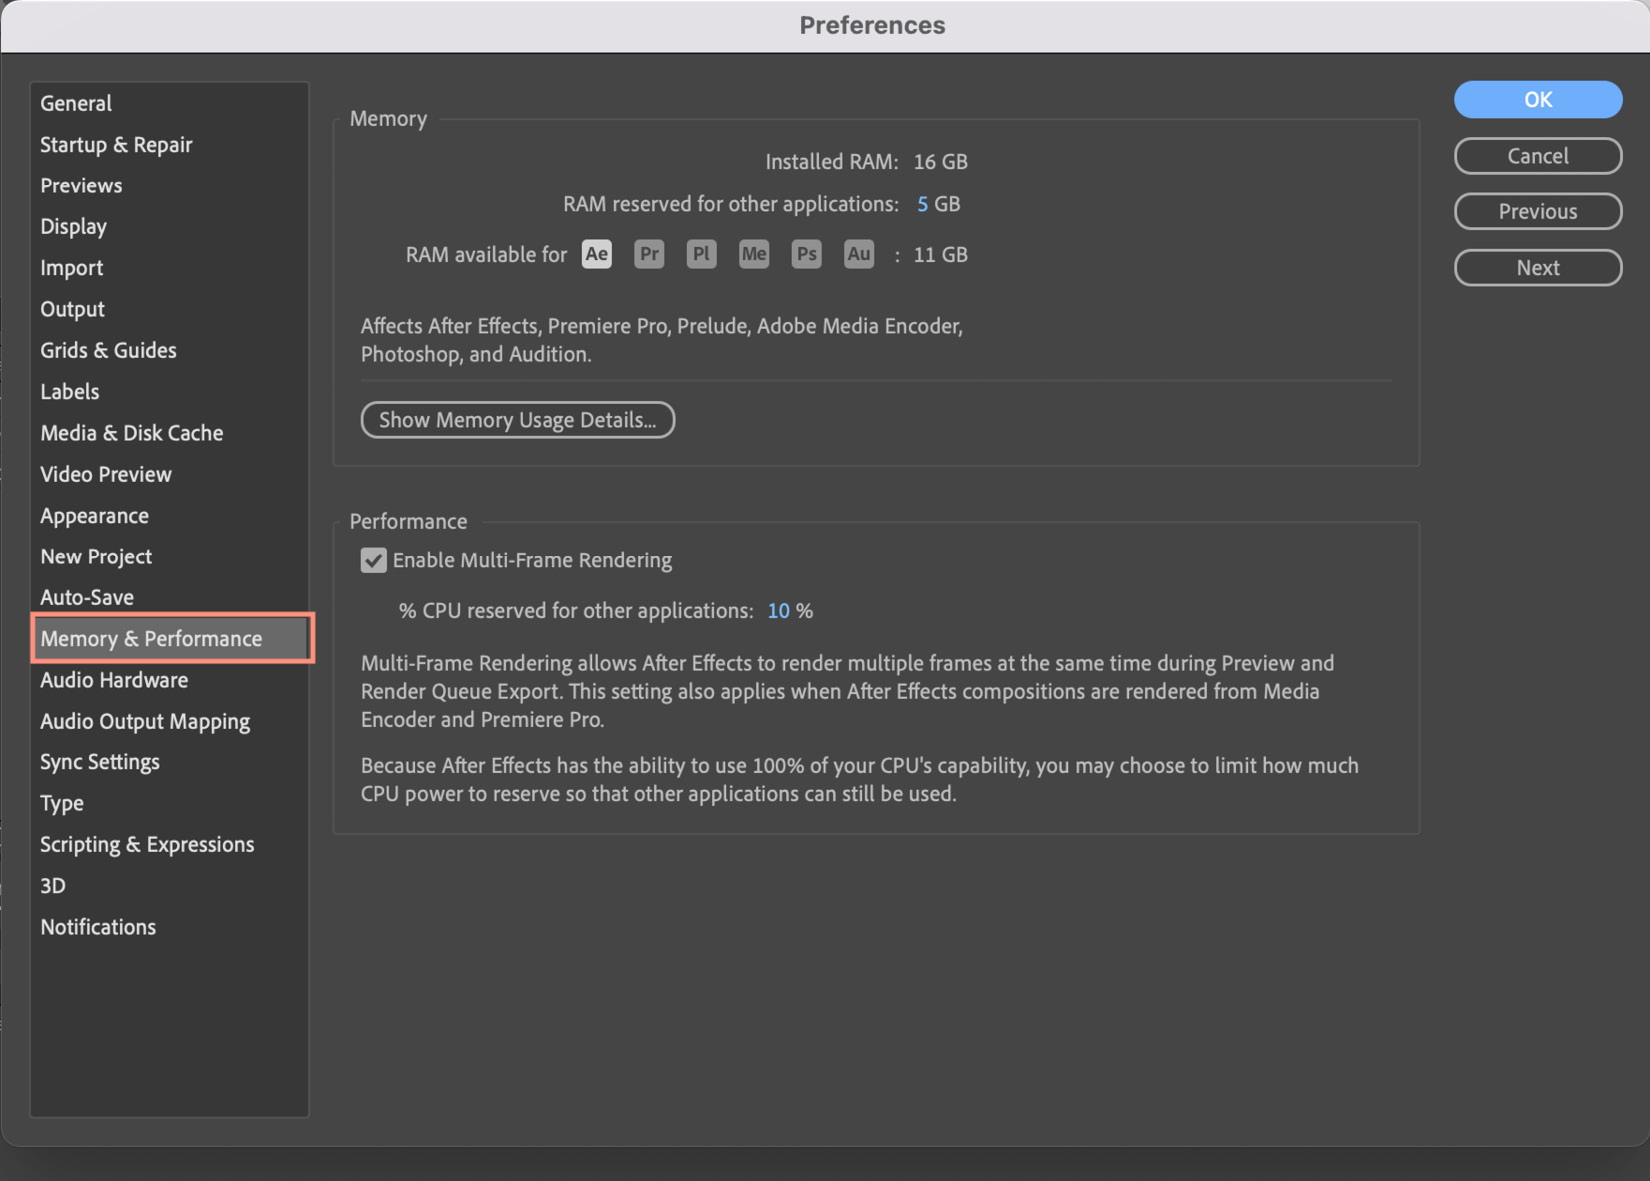
Figure 1.26: The Memory & Performance options
Figure 1.26 shows the following:
- You can see both the RAM installed on your device and the RAM allotted to After Effects in this window. You can adjust the RAM allocation to meet your needs.
- There’s also a feature called multi-framed rendering. This allows us to preview and export several frames at the same time.
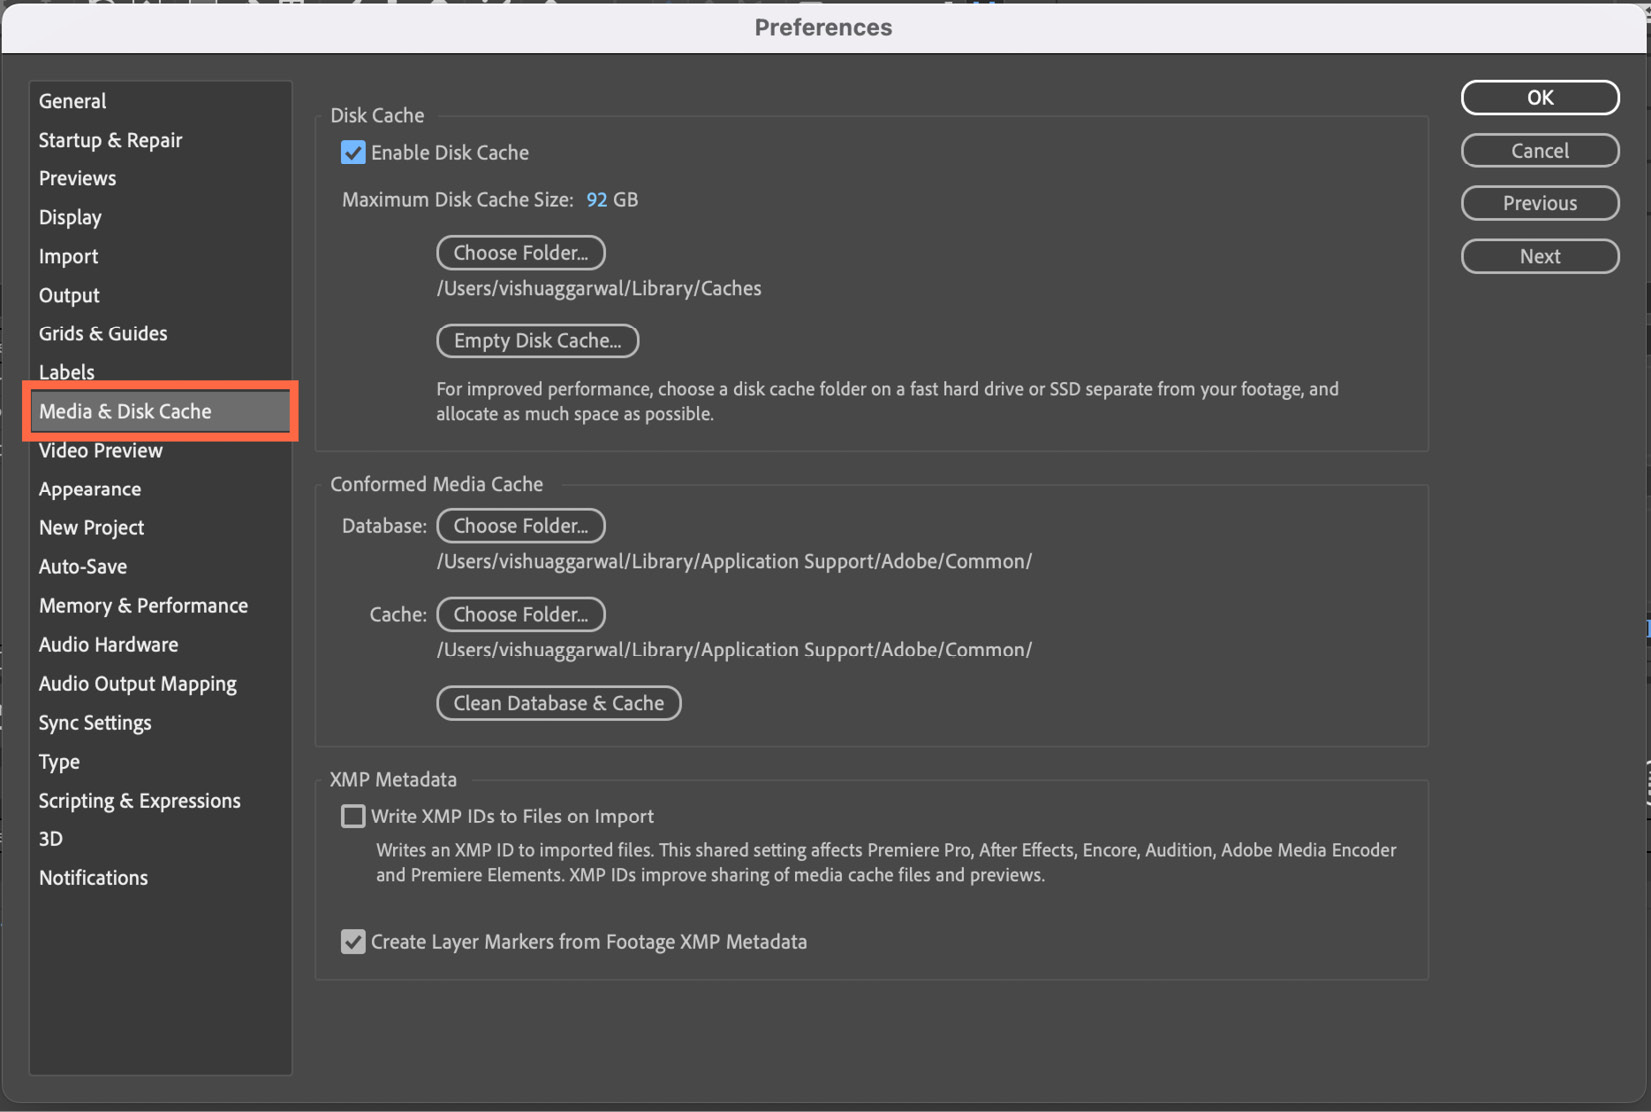
After Effects generates a significant amount of disk cache. The Media & Disk Cache option allows you to set a large quantity of storage for the cache folder, which gives you longer playbacks and smooth previews. It is suggested that you clear the disk cache at regular intervals to free up storage space. You can empty the disk cache by going to After Effects | Preferences | Media & Disk Cache (macOS) or Edit | Preferences | Media & Disk Cache (Windows).

Figure 1.27: The Media & Disk Cache options
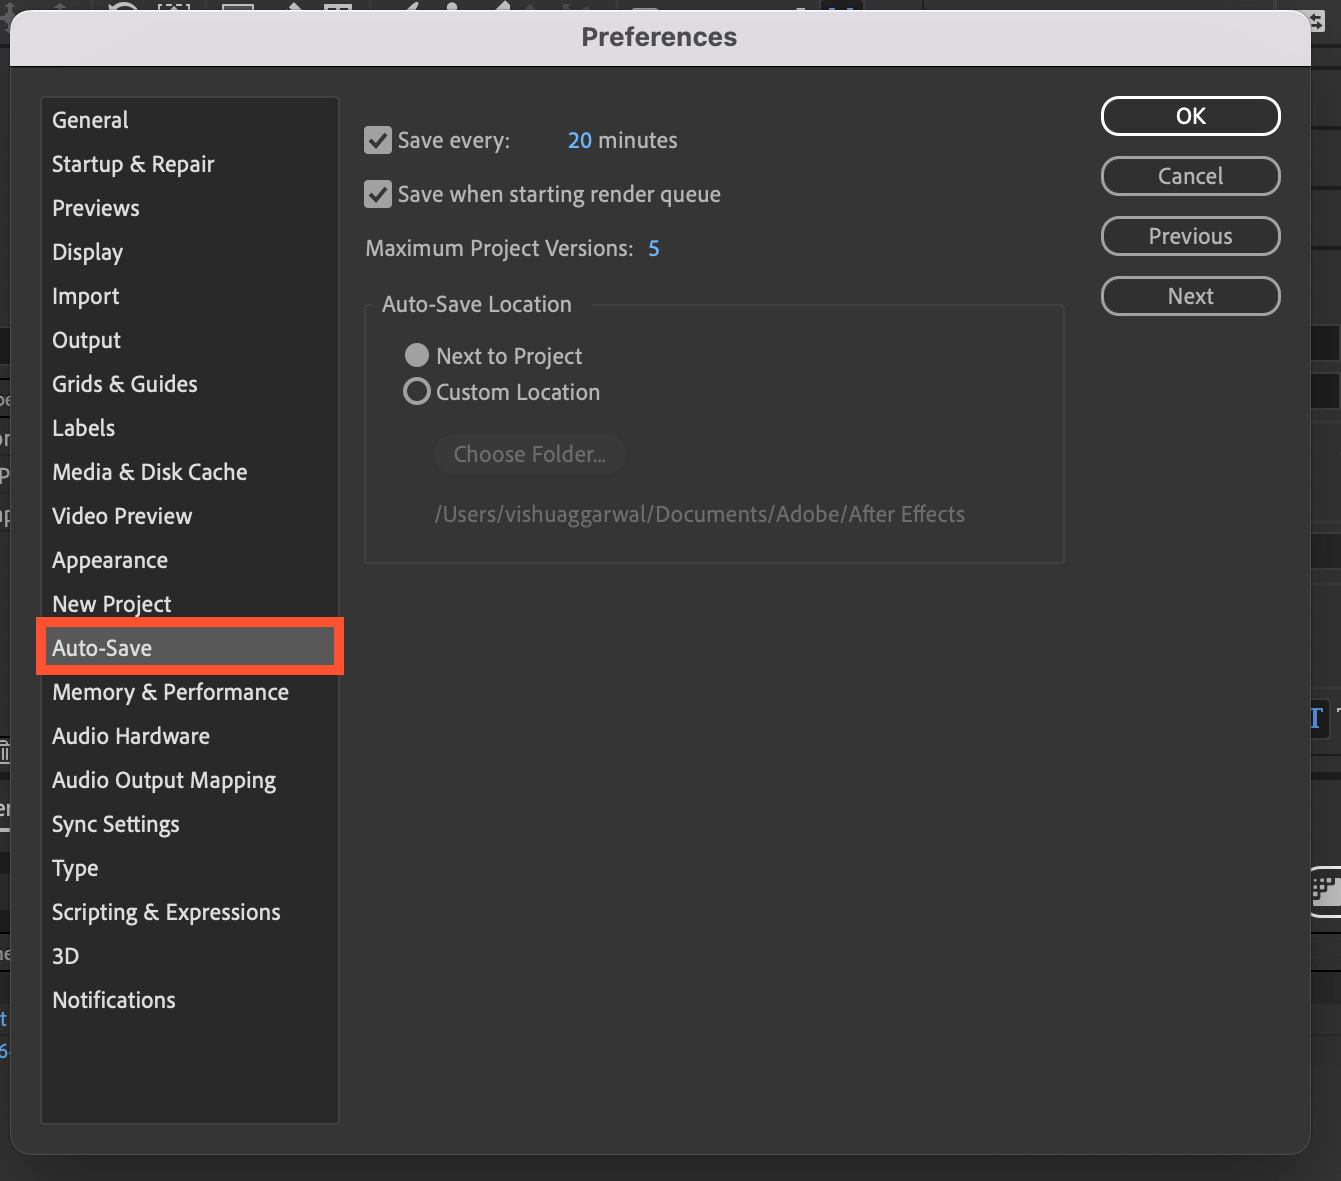
After Effects also saves the project you’re working on automatically. The autosave interval can be customized in the Auto-Save tab. If you select the Next to Project option, the project will be autosaved as a new file in the same folder as your current project. You can additionally choose the number of project versions that can be kept.

Figure 1.28: The Auto-Save options
In this section, you have learned how to optimize performance, use auto-save, and manage the disk cache in After Effects. These techniques will help you work efficiently in After Effects while saving disk space. Additionally, the auto-save feature allows you to recover your work in the case of a sudden crash.


