Time for action – rendering your first scene in Blender
Although Blender is very powerful and has a lot of features, it's easy to get started using it. Blender has a default scene all set up for you to render. The following steps will help you render your first scene in Blender:
- First, start your copy of Blender. You can either click on the Blender icon in the directory that you have installed it in, or use a shortcut or alias if you have created one. Blender will even run from a data stick, so you don't need to have it installed on a particular computer.
- When you've started it, you should see something similar to the following screenshot. You will also see a splash screen in the center, with an attractive image made in Blender and some links.

- Move the cursor over the big central window. Click the mouse to close the splash screen.
- Then, if you are running Windows or Linux, press the F12 button on your keyboard.
- If you have a Mac, click on where it says Render on the upper left, above the large 3D View window. Select Render Image from the drop-down menu. This is because Macs often have the F1 and F12 function keys already mapped to specific functions.
The following are the changes you should make to optimize your Mac for Blender. When you have made these changes, you will be able to use Blender in the same manner as Windows and Linux users, and you will be able to press the F12 button to start rendering:
- Go to System Preferences, select Keyboard, and then check Use all F1, F2, etc. keys as standard function keys. Don't worry, you can still get the regular functionality of the buttons by pressing the required button along with the fn function key.
- Next, in Keyboard Shortcuts under Dashboard & Dock, uncheck the Dashboard/F12 checkbox, so you can render by merely pressing F12.
- Then, uncheck Exposé Desktop/F11 under Exposé & Spaces. Now, you will be able to use the F11 key to bring back your most recent rendered image.
- Now, click on the left arrow at the top left of the System Preferences window to get back to the main System Preferences window. Now, select the Exposé & Spaces symbol in the top row above Keyboard. Select the Exposé button. Go down to the Dashboard section. Select the button that says Middle Mouse Button (MMB) when the menu pops up, and select the dash at the bottom of the pop-up menu. This will enable the MMB for use with Blender.
- Finally, click on the left arrow at the top left of the System Preferences window to get back to the main System Preferences window. Select the mouse symbol next to Keyboard. Uncheck where it says Zoom using scroll wheel while holding. This will activate the control key while using Blender.
What just happened?
Congratulations! You've now rendered your first scene in Blender. You can see the scene to be rendered in the preceding image. The cube is easy to guess. The dot surrounded by dashed lines is the lamp. The four-sided cone with a triangle on top is the camera, and there is a reference grid beneath the cube.
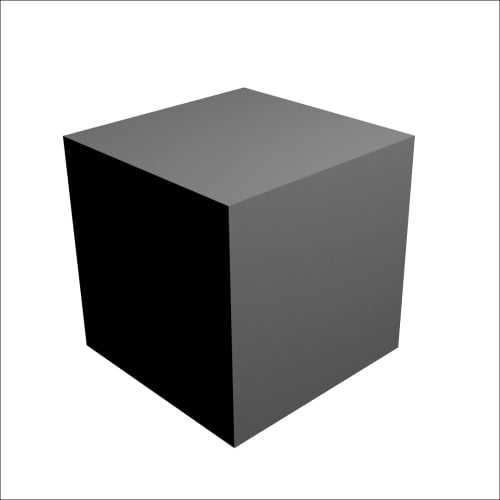
When the scene is rendered, as seen in the following screenshot, Blender shows you what the camera would see. The cube is colored gray because you haven't chosen a color. There is only one lamp in the scene, and Blender calculates where the lamp is and where the sides of the cube are. The lamp is not an object like a light bulb, so it is not seen in the rendered image, but its light is used to set the brightness of the scene.

While it's rendering, Blender figures out what portion of the light would bounce off a particular side of the cube and into the camera lens. Some sides point away from the lamp, so they appear darker. The sides facing towards the lamp appear to be brighter. Blender even does a trick that you don't see at all. Blender figures out which parts of the cube the camera does not see, and to save itself from additional work, it doesn't render what cannot be seen.
Rendering this image was simple for you. Blender doesn't get any more difficult to use; you just learn more things to do with Blender. In the following chapters, we will break down the sections into easy-to-do steps using Blender.
Mac users, thank you for making changes to the interface of your Mac. Now, you can use the standard Blender commands. These will pay off by making the using of Blender much easier and fun. You can still access the Dashboard via the Mac menu bar.


