Cleaning up the resources
If you don't intend to continue using the Azure AD tenant, you can easily delete it. If you are planning on using this tenant for the rest of the book, you can skip this part and come back to it when you are ready to delete the tenant.
To delete an Azure AD tenant in the Azure portal, you have to take the following steps:
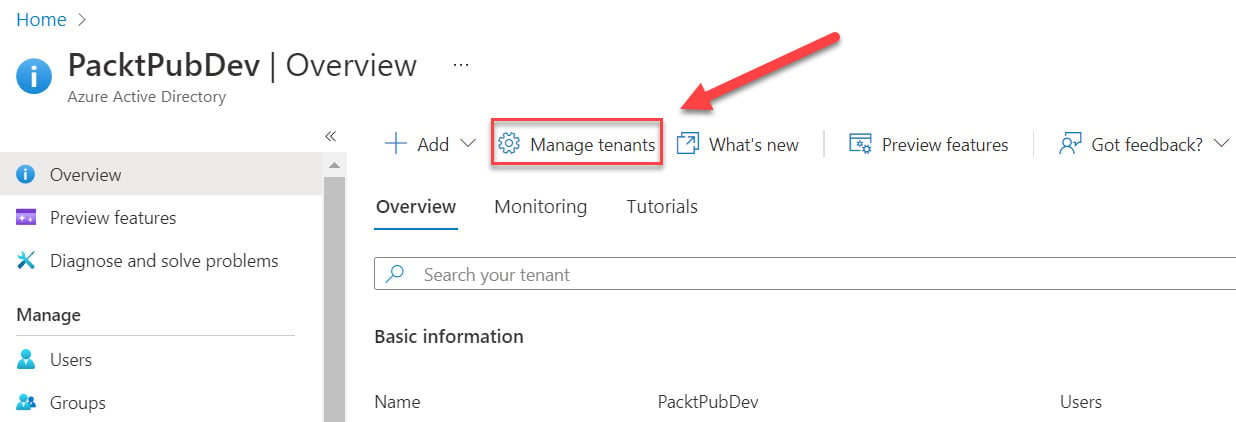
- On the Overview page of Azure AD, in the top menu, select Manage tenants:

Figure 1.10 – Managing tenants
- Then, select the Azure AD tenant that you want to delete from the list, and click on Delete in the top menu:

Figure 1.11 – Deleting a tenant
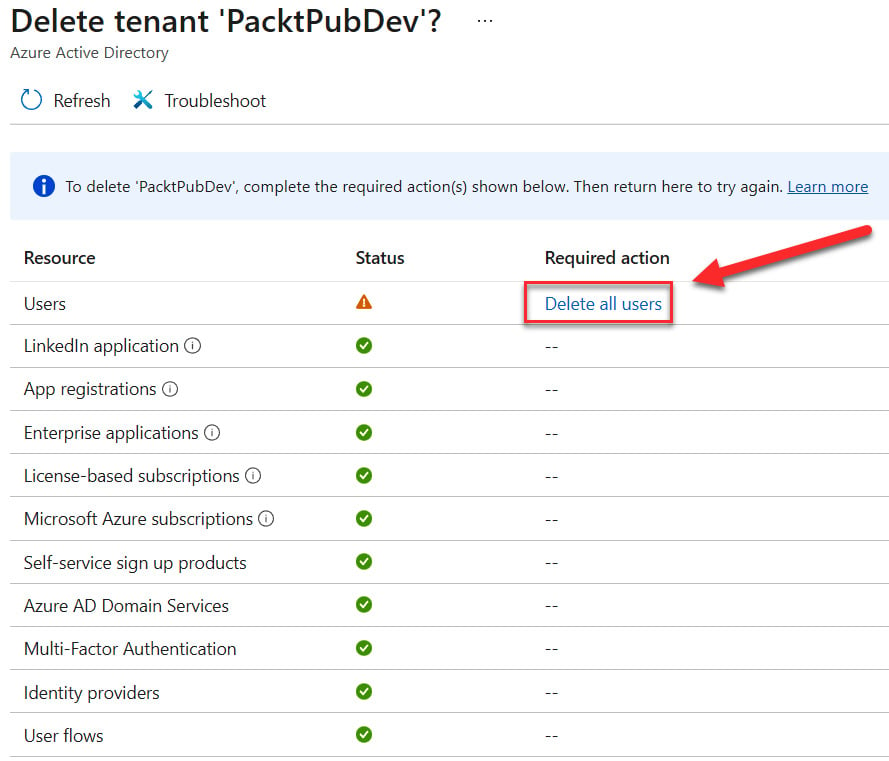
- Before you can delete the tenant, the users need to be deleted; therefore, under Required action, click Delete all users:

Figure 1.12 – Deleting tenant settings
- You will be redirected to the Users tab where you can delete all the users. Select the users and then in the top menu, click Delete user:

Figure 1.13 – Deleting users
- Click OK when you are asked if you want to delete the selected users.
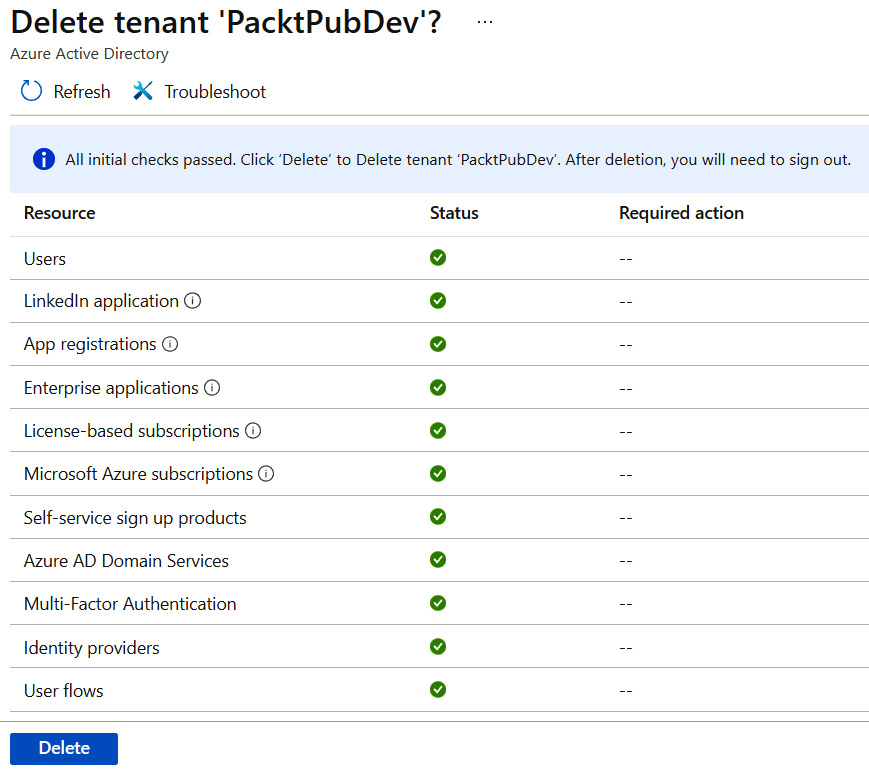
- You will notice that the Azure AD administrator cannot be deleted. Navigate back to the Azure AD Overview page and click on Delete tenant again. Now, you will see that there are no required actions, and you can delete the tenant by clicking the Delete button:

Figure 1.14 – Deleting an Azure AD tenant
We have now cleaned up our resources by deleting the Azure AD tenant. This concludes this chapter.


