Setting up self-hosted agents
After you’ve created a PAT, you can create a new self-hosted agent under a new agent pool. To do this, follow these steps:
- Click on PacktAzureDevOps | Agent pools | General:
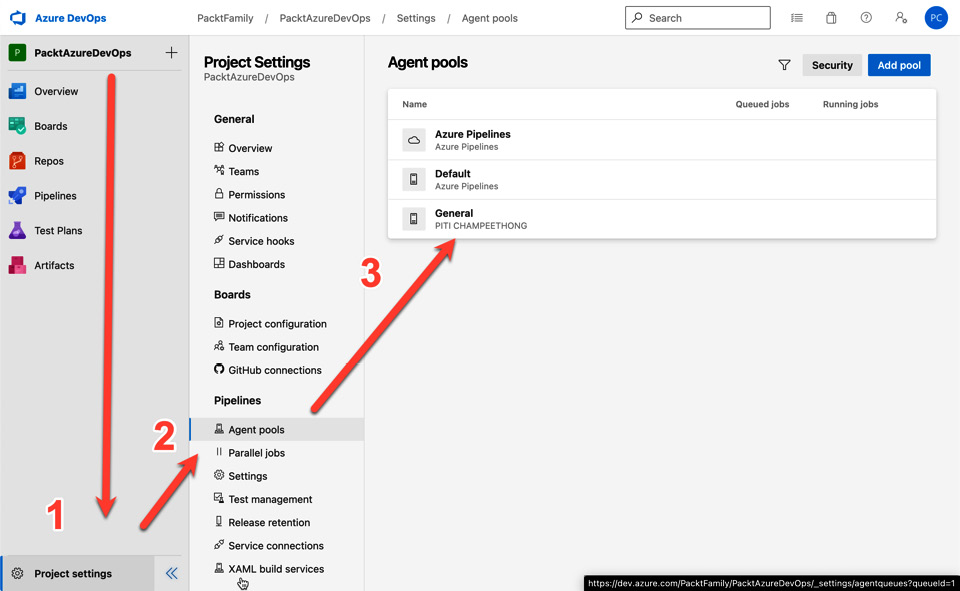
Figure 1.17 – Entering a new agent pool
- Click on New agent:
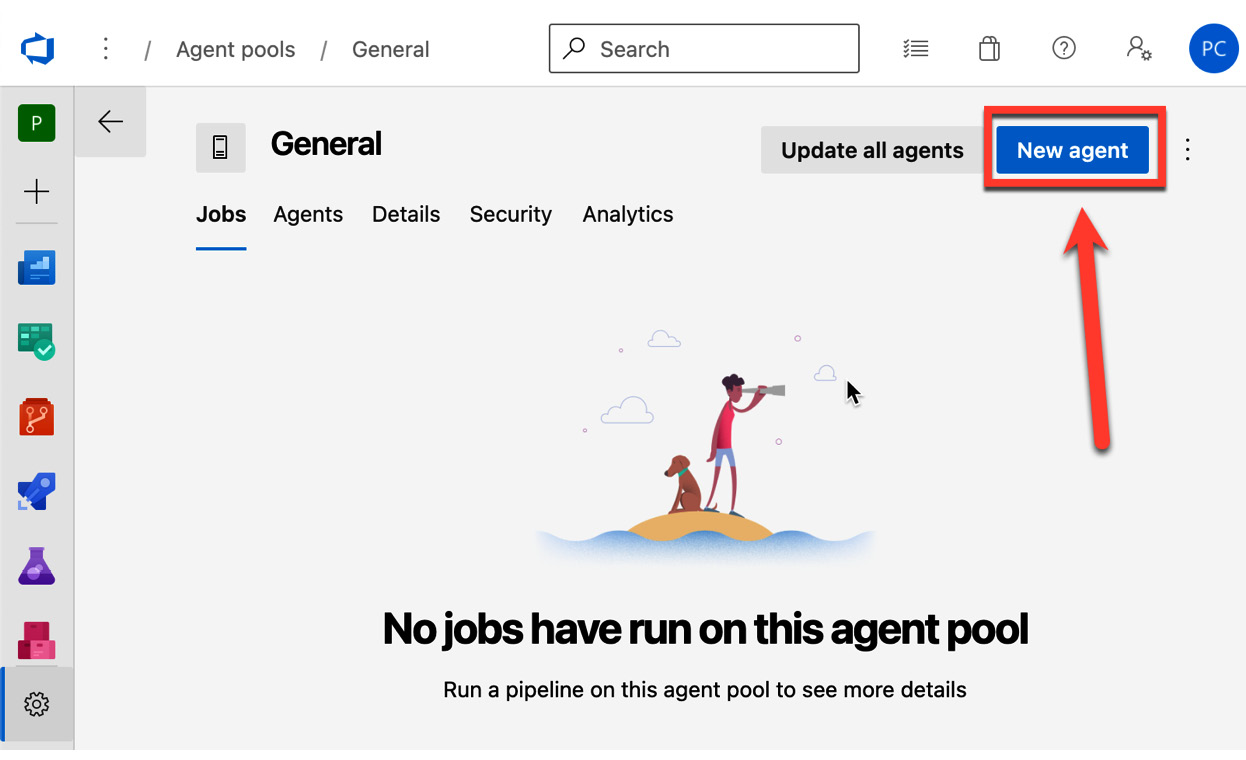
Figure 1.18 – Entering a new agent
- You can download a self-hosted agent based on your operating system. Three operating system options will show you how to download and set them up:
- Windows users can download build agent software from the Windows tab. There are two options, as shown in the following screenshot: Windows 64-bit (x64) and Windows 32-bit (x86):
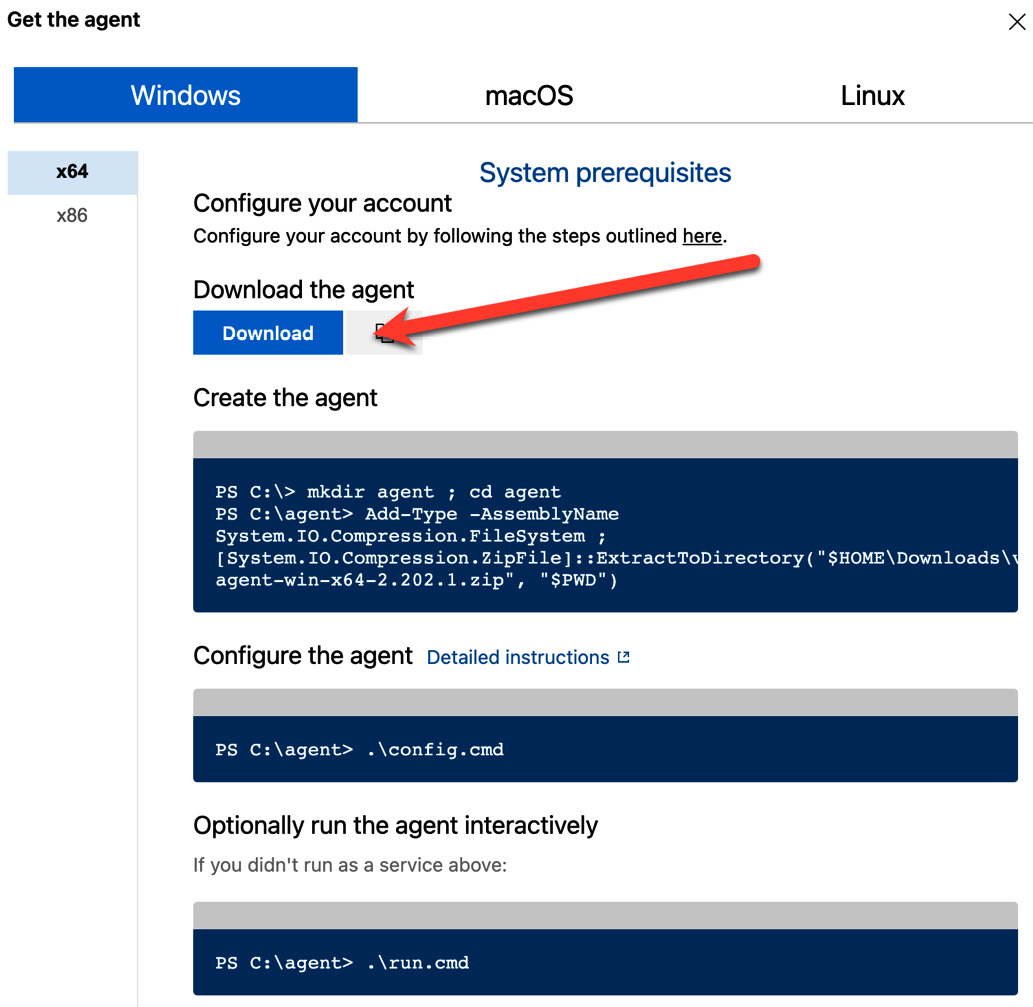
Figure 1.19 – The Windows agent for setting up a file
- To set up a Windows agent, you need to run on PowerShell as an administrator.
- Mac users can download build agent software from the macOS tab:
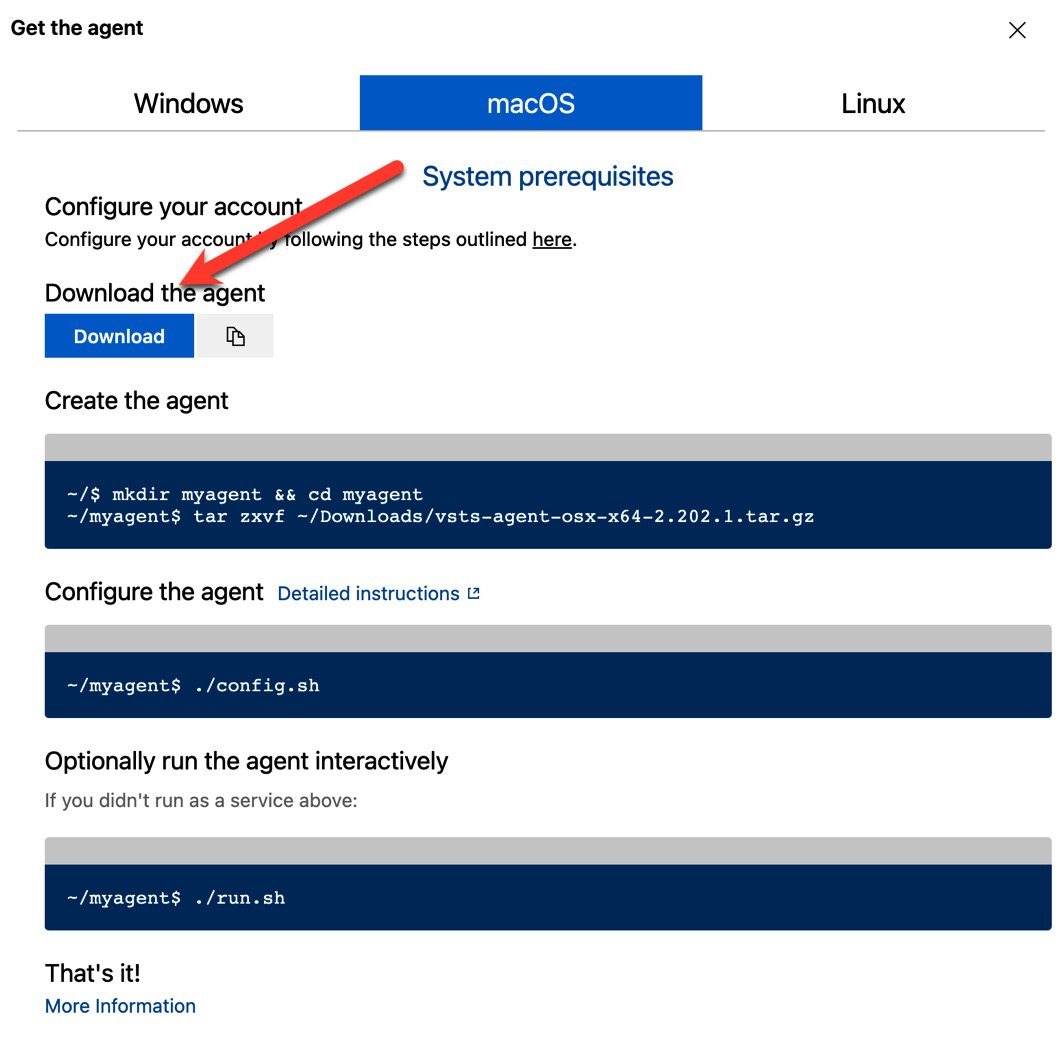
Figure 1.20 – macOS agent
- You don’t need to use the
bashcommand in the administrator role to set up the macOS agent. - Linux users can download build agent software from the Linux tab. There are four options for computer architecture – x64, ARM, ARM64, and RHEL6:
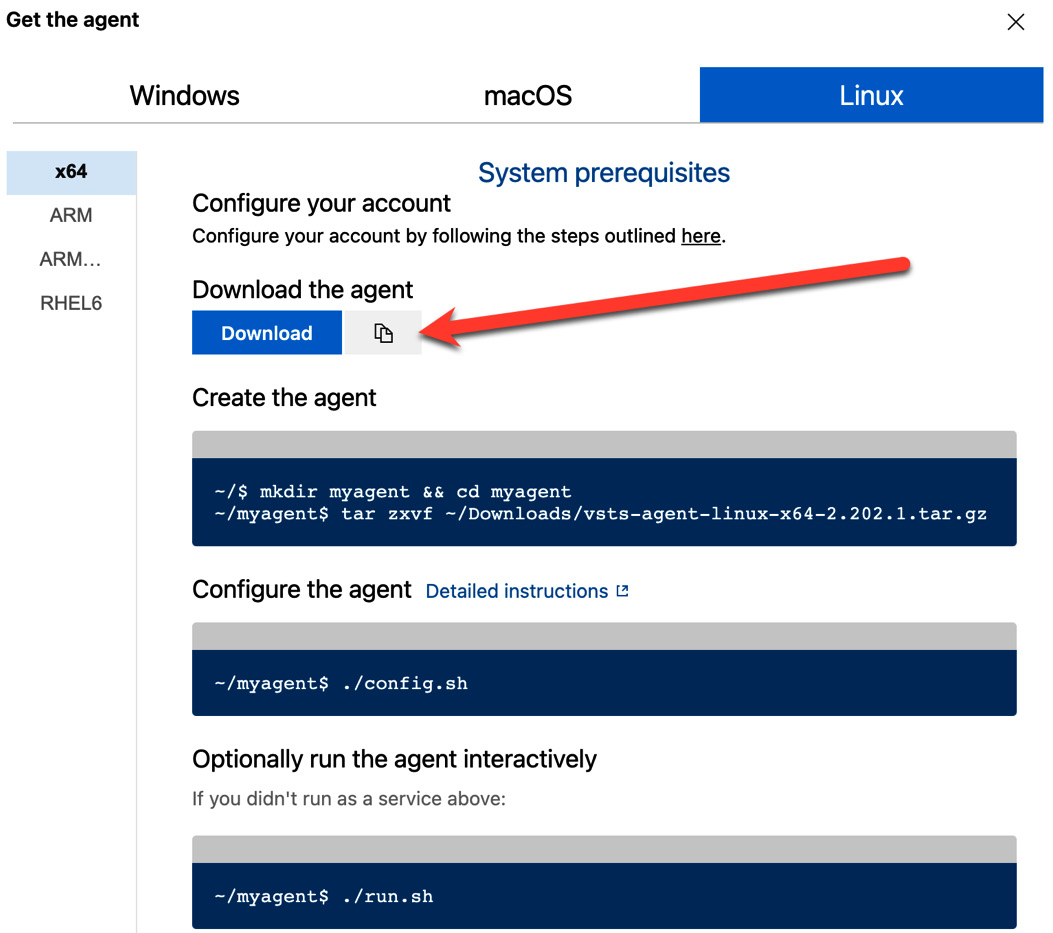
Figure 1.21 – Linux agent
- You don’t need to use a
rootuser for installation to set up a Linux agent.
- After configuring the agent in each operating system, you must enter the following information:
Enter (Y/N) Accept the Team Explorer Everywhere license agreement now? (press enter for N) > Y
Enter server URL > https://dev.azure.com/yourOrganization
Enter authentication type (press enter for PAT) > [ENTER]
Enter personal access token > [Personal Access Token]
Enter agent pool (press enter for default) > General
Enter agent name (press enter for [computer name]) > agent01
Enter work folder (press enter for _work) > [ENTER]
- Once you start the service, you will see that
agent01is active:

Figure 1.22 – The agent status dashboard
- You can see the Online status of the build agent that has already been created:

Figure 1.23 – The action menu of the agent
- You can delete the agent and update to a new version of the agent by clicking on the button with the ellipses or three dots.
You are now ready to create the build and deployment on the agent01 build agent. However, you need to set up the deployment group so that you can deploy your application on a local web server such as Microsoft Internet and Information Services (IIS). We’ll do this in the next section.


