Search icon CANCEL
Subscription
0
Cart icon
Your Cart (0 item)
Close icon
You have no products in your basket yet
Save more on your purchases! discount-offer-chevron-icon
Savings automatically calculated. No voucher code required.
Arrow left icon
Explore Products
Best Sellers
New Releases
Books
Videos
Audiobooks
Learning Hub
Newsletter Hub
Free Learning
Arrow right icon
timer SALE ENDS IN
0 Days
:
00 Hours
:
00 Minutes
:
00 Seconds
Arrow up icon
GO TO TOP
Hands-On Data Warehousing with Azure Data Factory

You're reading from   Hands-On Data Warehousing with Azure Data Factory ETL techniques to load and transform data from various sources, both on-premises and on cloud

Arrow left icon
Product type Paperback
Published in May 2018
Publisher Packt
ISBN-13 9781789137620
Length 284 pages
Edition 1st Edition
Languages
Tools
Concepts
Arrow right icon
Authors (3):
Arrow left icon
Christian Cote Christian Cote
Author Profile Icon Christian Cote
Christian Cote
Giuseppe Ciaburro Giuseppe Ciaburro
Author Profile Icon Giuseppe Ciaburro
Giuseppe Ciaburro
Michelle Gutzait Michelle Gutzait
Author Profile Icon Michelle Gutzait
Michelle Gutzait
Arrow right icon
View More author details
Toc

Creating our Power BI reports


Now that we have explained what Power BI is, it is time to create our first reports with it. The Power BI development life cycle starts with Power BI for desktop. We create our reports with it and then publish them on the cloud or on-premise on our local Power BI Report Servers.

This chapter will focus on two paradigms of BI as explained in the previous sections: personal and team BI.

Reporting with on-premise data sources

Our first Power BI report will use the on-premise World Wide Importers we talked about earlier in this book. We will first connect to the World Wide Importers relational database using Power BI for desktop.

If you haven't created an account yet, create one now; it's free. If you already have a Power BI account, select the link as highlighted in the following screenshot:
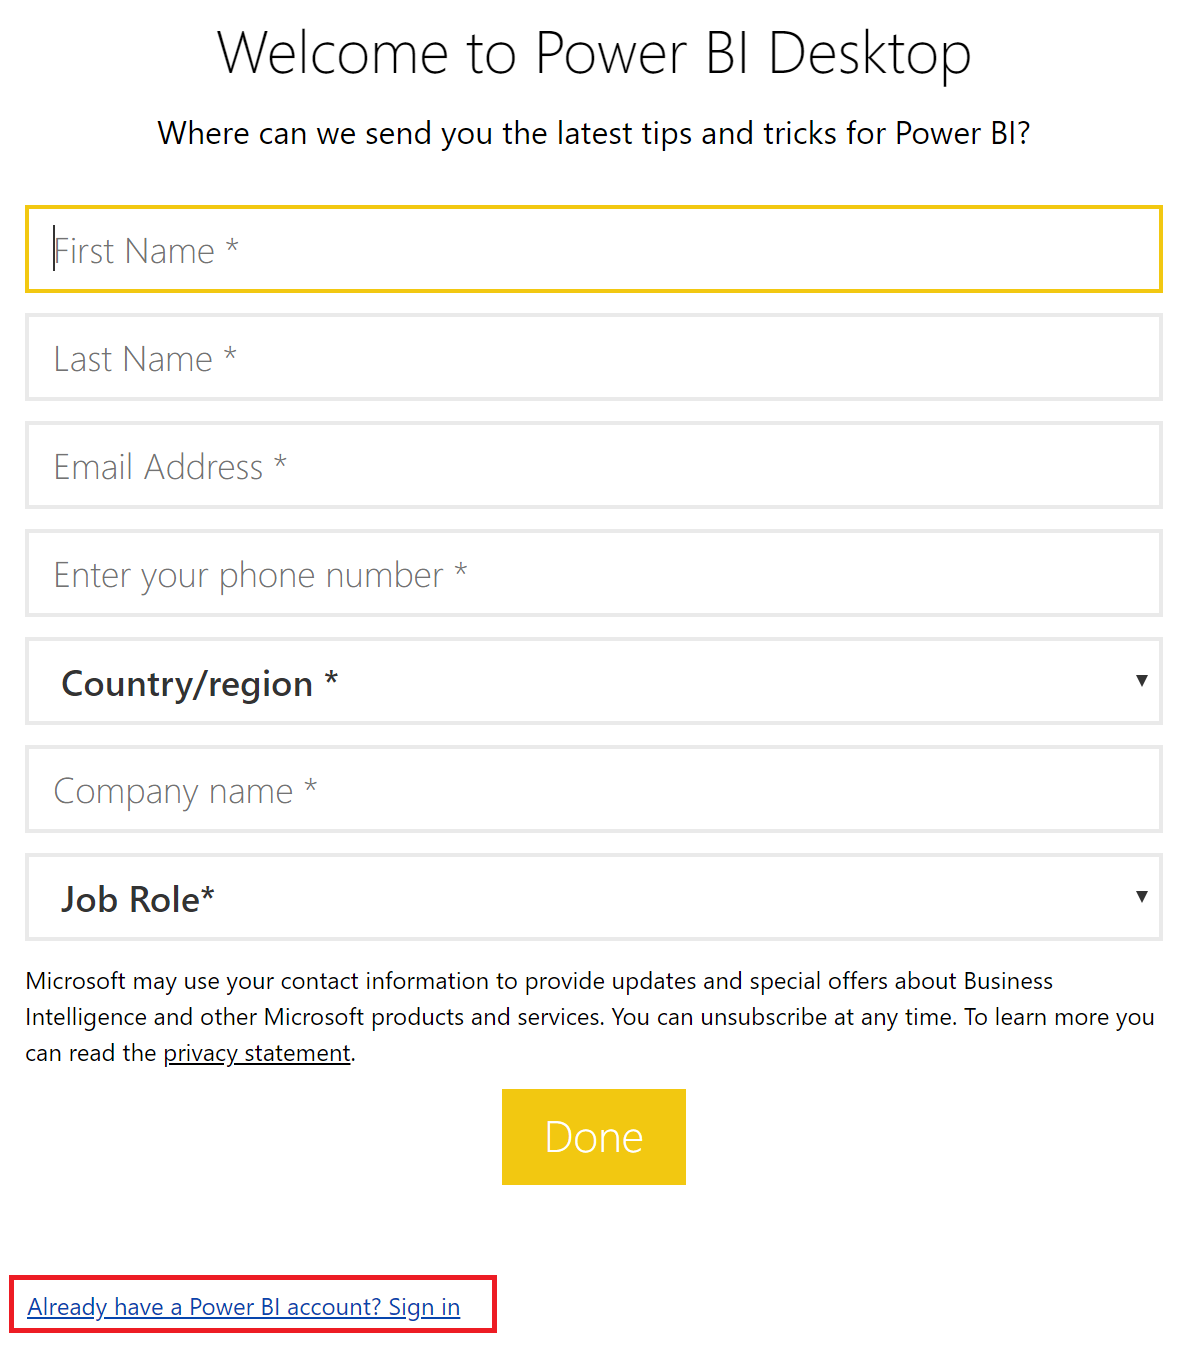
Once connected, uncheck Show this screen on startup and click on the Get data.

In the Get Data window, select SQL Server database and click on Connect:
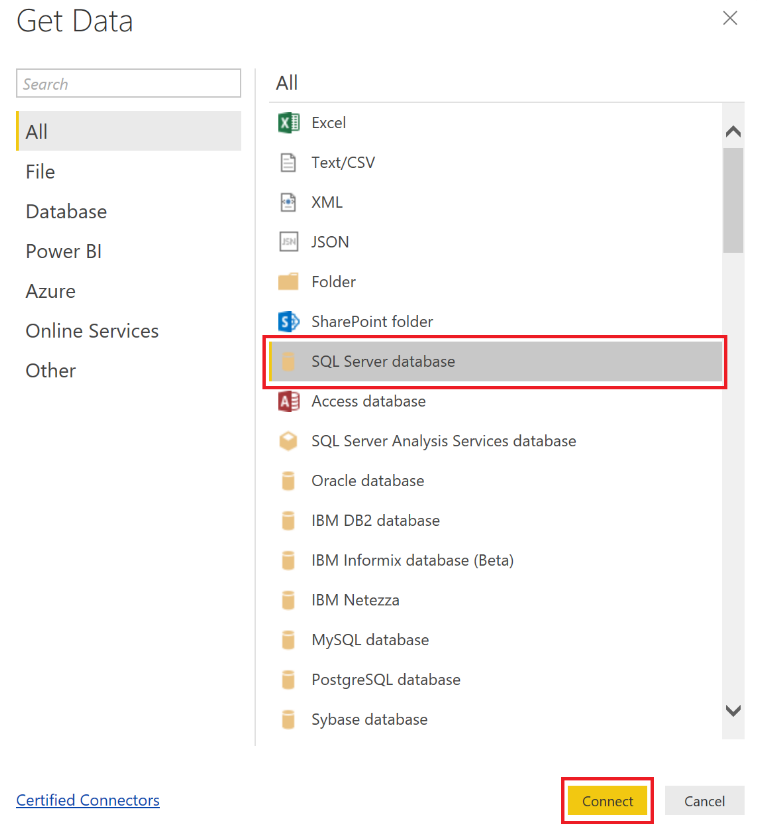
As shown in the following screenshot...

lock icon The rest of the chapter is locked
arrow left Previous Section
Register for a free Packt account to unlock a world of extra content!
A free Packt account unlocks extra newsletters, articles, discounted offers, and much more. Start advancing your knowledge today.
Unlock this book and the full library FREE for 7 days
Get unlimited access to 7000+ expert-authored eBooks and videos courses covering every tech area you can think of
Renews at $19.99/month. Cancel anytime
Banner background image