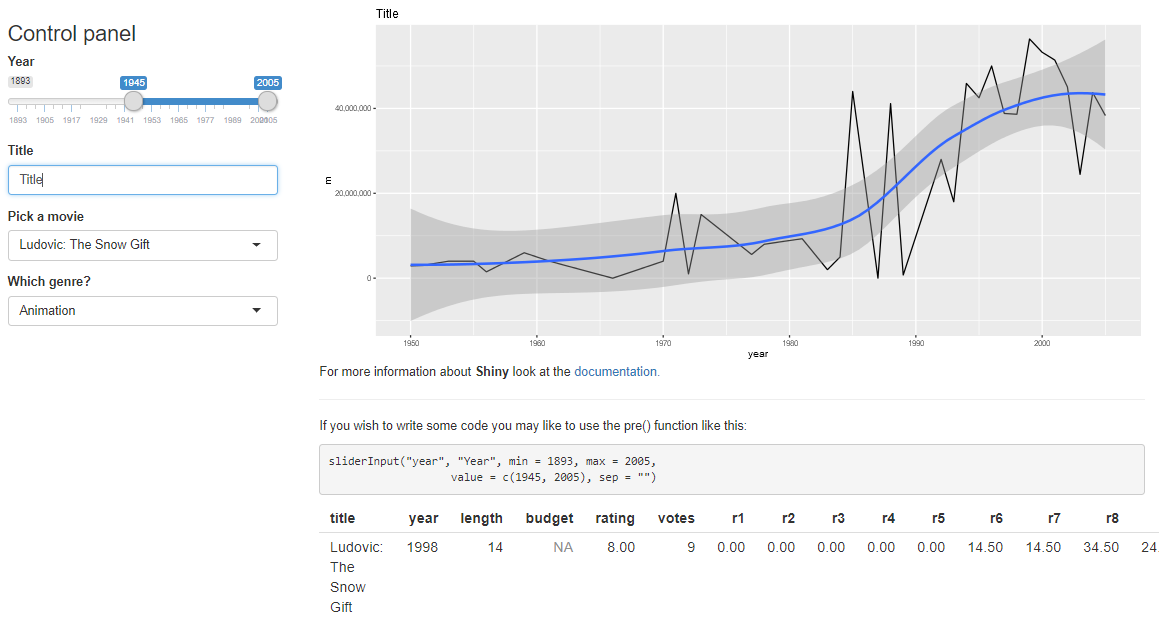
We have covered some of the basics of HTML tags in the previous section. Here, we will be using the same tags to create an entire application using HTML. Let's review the previous sample application, which was created using pure Shiny:

As you can see in the preceding screenshot, there are two drop-down boxes—one to select a movie title and one to select its genre. There is also a textbox, which is used to give a name to the graph. We will not be creating a range slider since producing a range slider using Shiny is much easier than using raw HTML. Here, our final output will be a graph, bold text, some links, and a table with some formatted code. Let's get started with the code part.
We will be adding the following three links in the head section; these are required to run the page correctly. You can add extra JavaScript and CSS links if you wish to use them in the application:
<script src="shared/jquery.js" type="text/javascript"></script>
<script src="shared/shiny.js" type="text/javascript"></script>
<link rel="stylesheet" type="text/css" href="shared/shiny.css"/>
The following link is a reference to the Bootstrap CSS, which is required to make columns and row div classes work correctly:
<link href="shared/bootstrap/css/bootstrap.min.css" rel="stylesheet">
We will be using more CSS later in this chapter.
Once the links are added, we will move on to the main body of the HTML. Add the following code block inside the body tag:
<h1>Minimal HTML UI</h1>

<div class="container-fluid">
<div class="row">

<div class="col-sm-4">
<h3>Control panel</h3>

<div id="listMovies" class="shiny-html-output"></div>

Title:<input type="text" name="title"><br>

<select name = "genre" class = "form-control">
    <option value="Action">Action</option>
    <option value="Animation">Animation</option>
    <option value="Comedy">Comedy</option>
    <option value="Drama">Drama</option>
    <option value="Documentary">Documentary</option>
    <option value="Romance">Romance</option>
    <option value="Short">Short</option>
</select>

</div>
Firstly, we mentioned the heading for the page in the h1 tag. Moving forward, we will be creating our first input, which is the list of movies in the application. It is unusual input, as the output is dynamically rendered. This input is assigned to the shiny-html-output class, which refers to the function that renders the UI dynamically. To help you out here, the UI definition can be wrapped in the rendered UI on the server side and then rendered on the UI side, allowing the user interface element to change in response to the user input. The following code block shows the function used in the server.r file:
output$listMovies = renderUI({

selectInput("pickMovie", "Pick a movie",
choices = moviesSubset() %>%
sample_n(10) %>%
select(title)
    )
})
Next, we will be creating the text control that is given the name title:
Title:<input type="text" name="title"><br>
This name is then referred to input$title on the server side. Next, we will be creating the combo box and giving it the name genre, which is also referred to input$genre on the server side:
<select name = "genre" class = "form-control">
    <option value="Action">Action</option>
    <option value="Animation">Animation</option>
    <option value="Comedy">Comedy</option>
    <option value="Drama">Drama</option>
    <option value="Documentary">Documentary</option>
    <option value="Romance">Romance</option>
    <option value="Short">Short</option>
</select>
We can use standard HTML input in Shiny as well. The output is handled using the div tag, which is assigned an ID and is referred to as a function in the server.r file. For example, we have assigned budgetYear as an ID to the div tag and class as shiny-plot-output, along with information about the width and height, which tells Shiny it is a plot and what its size is:
<div id="budgetYear" class="shiny-plot-output" style="width: 100%; height: 400px"></div>
The next few HTML lines show equivalents of the links, text formatting, and code block tag examples that we defined previously using Shiny commands:
<p>For more information about <strong>Shiny</strong> look at the
<a href="http://shiny.rstudio.com/articles/">documentation.</a>
</p>
<hr>
<p>If you wish to write some code you may like to use the pre() function like this:</p>
<pre>sliderInput("year", "Year", min = 1893, max = 2005, value = c(1945, 2005), sep = "")</pre>
Next, we will have Shiny HTML output. It is similar to the previous Shiny output we created earlier, but this time we use this output to render a table:
<div id = "moviePicker" class = "shiny-html-output"></div>
This creates the output we required at the start of the section. Isn't it easy to create an application using HTML?


