Let's get you started. There is a lot of software we need to set up. Running Spark on Windows involves a lot of moving pieces, so make sure you follow along carefully, or else you'll have some trouble. I'll try to walk you through it as easily as I can. Now, this chapter is written for Windows users. This doesn't mean that you're out of luck if you're on Mac or Linux though. If you open up the download package for the book or go to this URL, http://media.sundog-soft.com/spark-python-install.pdf, you will find written instructions on getting everything set up on Windows, macOS, and Linux. So, again, you can read through the chapter here for Windows users, and I will call out things that are specific to Windows, so you'll find it useful in other platforms as well; however, either refer to that spark-python-install.pdf file or just follow the instructions here on Windows and let's dive in and get it done.
Getting set up - installing Python, a JDK, and Spark and its dependencies
Installing Enthought Canopy
This book uses Python as its programming language, so the first thing you need is a Python development environment installed on your PC. If you don't have one already, just open up a web browser and head on to https://www.enthought.com/, and we'll install Enthought Canopy:

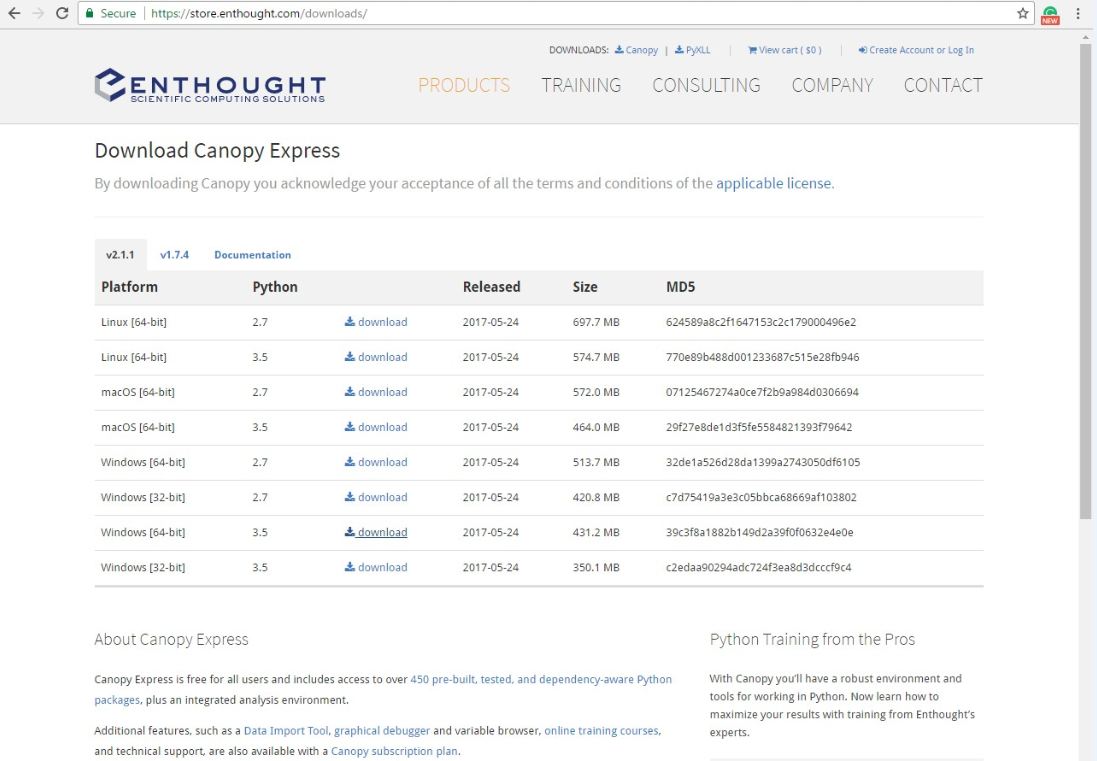
Enthought Canopy is just my development environment of choice; if you have a different one already that's probably okay. As long as it's Python 3 or a newer environment, you should be covered, but if you need to install a new Python environment or you just want to minimize confusion, I'd recommend that you install Canopy. So, head up to the big friendly download Canopy button here and select your operating system and architecture:

For me, the operating system is going to be Windows (64-bit). Make sure you choose Python 3.5 or a newer version of the package. I can't guarantee the scripts in this book will work with Python 2.7; they are built for Python 3, so select Python 3.5 for your OS and download the installer:
There's nothing special about it; it's just your standard Windows Installer, or whatever platform you're on. We'll just accept the defaults, go through it, and allow it to become our default Python environment. Then, when we launch it for the first time, it will spend a couple of minutes setting itself up and all the Python packages that we need. You might want to read the license agreement before you accept it; that's up to you. We'll go ahead, start the installation, and let it run.
Once Canopy installer has finished installing, we should have a nice little Enthought Canopy icon sitting on our desktop. Now, if you're on Windows, I want you to right-click on the Enthought Canopy icon, go to Properties and then to Compatibility (this is on Windows 10), and make sure Run this program as an administrator is checked:
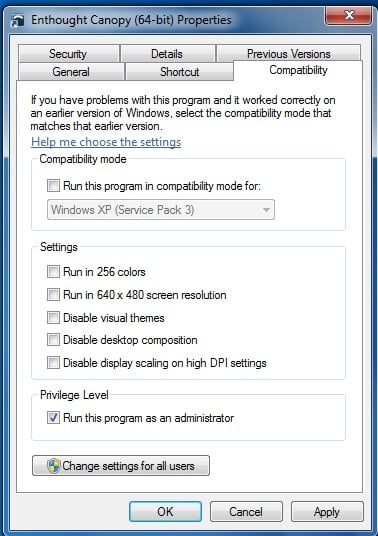
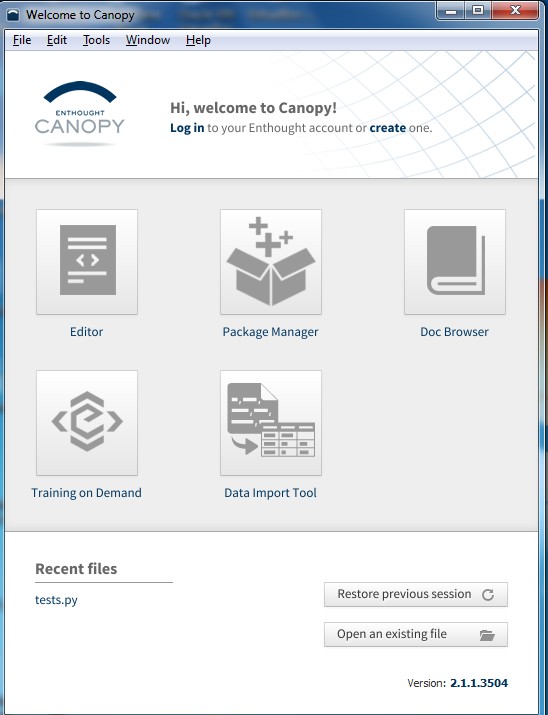
This will make sure that we have all the permissions we need to run our scripts successfully. You can now double-click on the file to open it up:
The next thing we need is a Java Development Kit because Spark runs on top of Scala and Scala runs on top of the Java Runtime environment.
Installing the Java Development Kit
For installing the Java Development Kit, go back to the browser, open a new tab, and just search for jdk (short for Java Development Kit). This will bring you to the Oracle site, from where you can download Java:
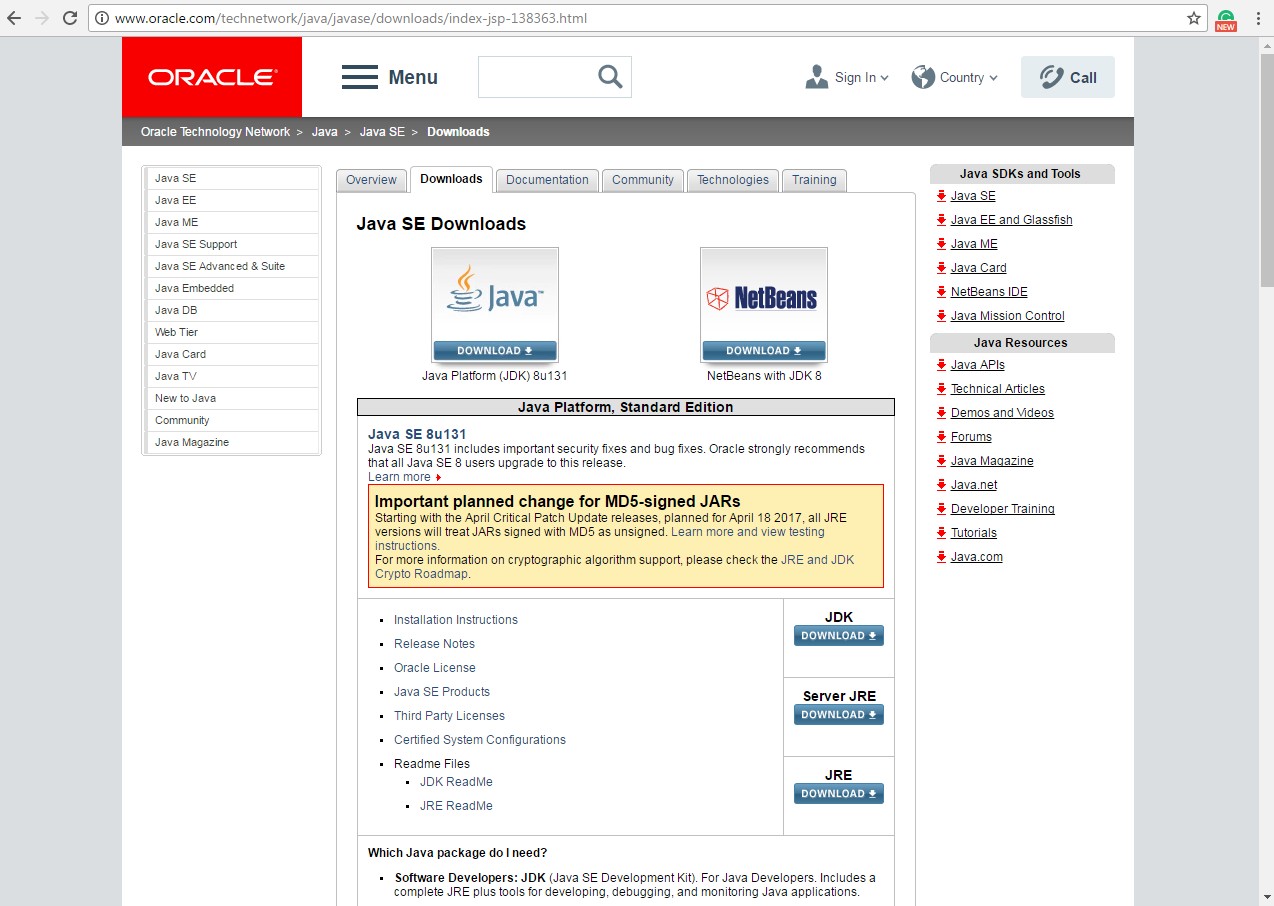
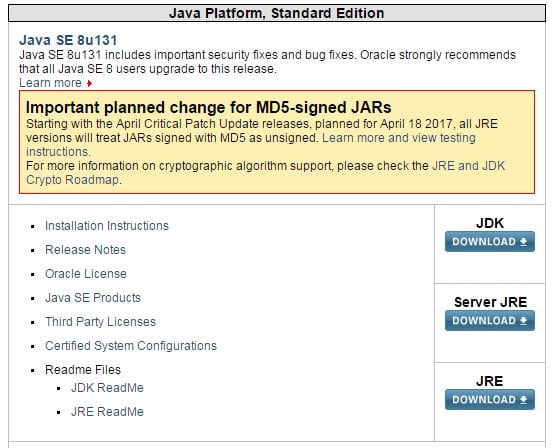
On the Oracle website, click on JDK DOWNLOAD. Now, click on Accept License Agreement and then you can select the download option for your operating system:
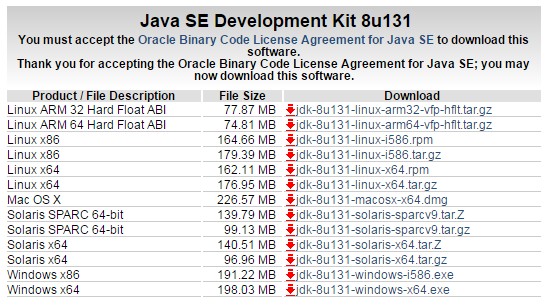
For me, that's going to be Windows 64-bit and a wait for 198 MB of goodness to download:
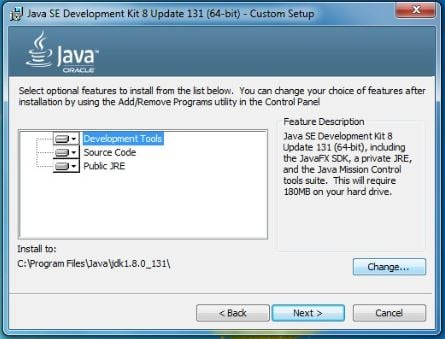
Once the download is finished, we can't just accept the default settings in the installer on Windows here. So, this is a Windows-specific workaround, but as of the writing of this book, the current version of Spark is 2.1.1. It turns out there's an issue with Spark 2.1.1 with Java on Windows. The issue is that if you've installed Java to a path that has a space in it, it doesn't work, so we need to make sure that Java is installed to a path that does not have a space in it. This means that you can't skip this step even if you have Java installed already, so let me show you how to do that. On the installer, click on Next, and you will see, as in the following screen, that it wants to install by default to the C:\Program Files\Java\jdk path, whatever the version is:
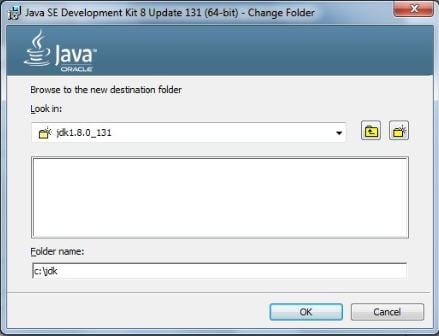
The space in the Program Files path is going to cause trouble, so let's click on the Change... button and install to c:\jdk, a nice simple path, easy to remember, and with no spaces in it:
Now, it also wants to install the Java Runtime environment; so, just to be safe, I'm also going to install that to a path with no spaces.
At the second step of the JDK installation, we should have this showing on our screen:
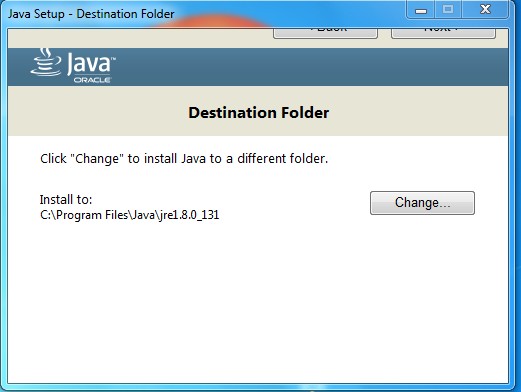
I will change that destination folder as well, and we will make a new folder called C:\jre for that:
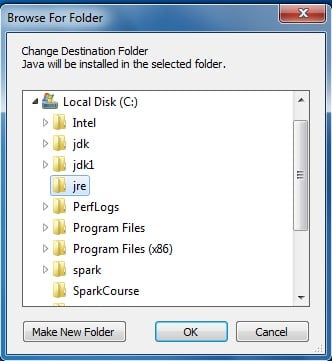
Alright; successfully installed. Woohoo!
Now, you'll need to remember the path that we installed the JDK into, which, in our case was C:\jdk. We still have a few more steps to go here. So far, we've installed Python and Java, and next we need to install Spark itself.
Installing Spark
Let's us get back to a new browser tab here; head to spark.apache.org, and click on the Download Spark button:
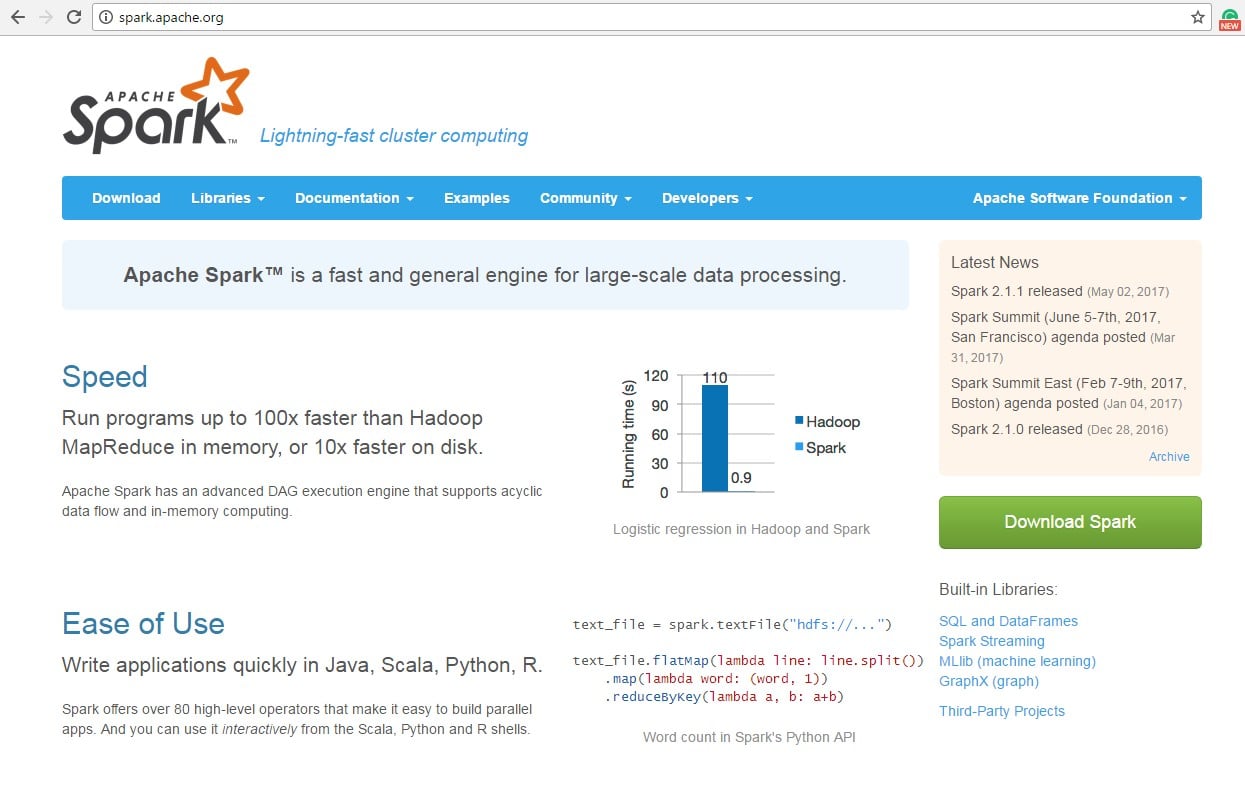
Now, we have used Spark 2.1.1 in this book. So, you know, if given the choice, anything beyond 2.0 should work just fine, but that's where we are today.

Make sure you get a pre-built version, and select a Direct Download option so all these defaults are perfectly fine. Go ahead and click on the link next to instruction number 4 to download that package.
Now, it downloads a TGZ (Tar in GZip) file, so, again, Windows is kind of an afterthought with Spark quite honestly because on Windows, you're not going to have a built-in utility for actually decompressing TGZ files. This means that you might need to install one, if you don't have one already. The one I use is called WinRAR, and you can pick that up from www.rarlab.com. Go to the Downloads page if you need it, and download the installer for WinRAR 32-bit or 64-bit, depending on your operating system. Install WinRAR as normal, and that will allow you to actually decompress TGZ files on Windows:
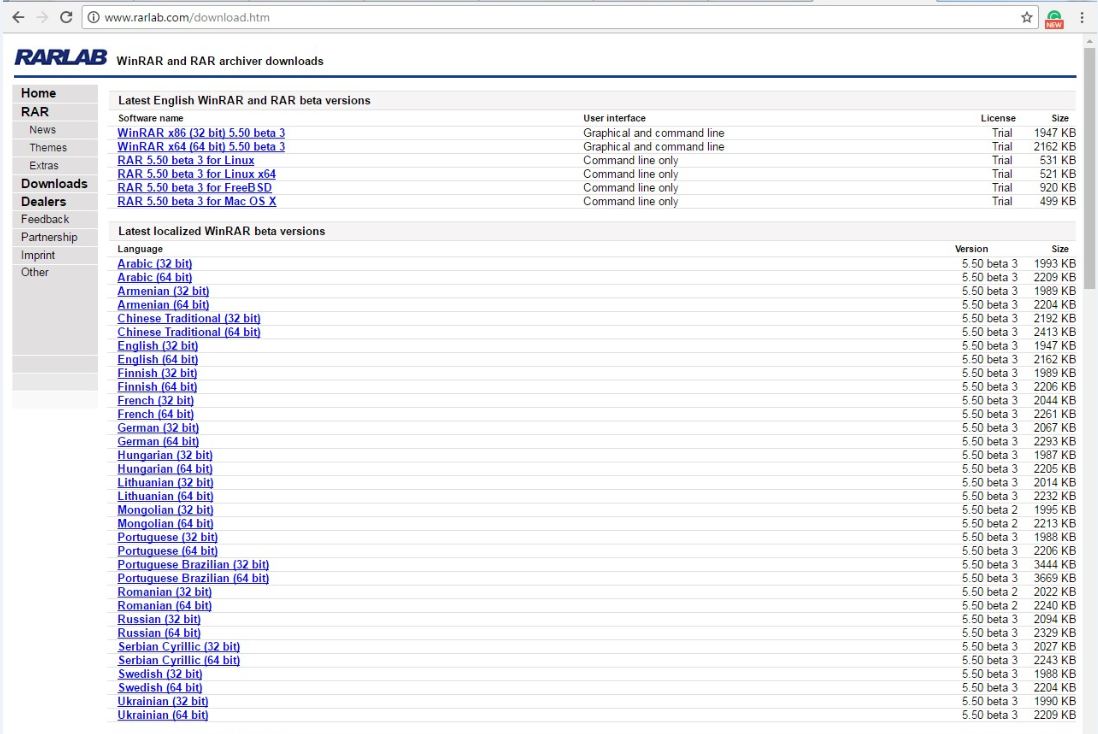
So, let's go ahead and decompress the TGZ files. I'm going to open up my Downloads folder to find the Spark archive that we downloaded, and let's go ahead and right-click on that archive and extract it to a folder of my choosing; just going to put it in my Downloads folder for now. Again, WinRAR is doing this for me at this point:
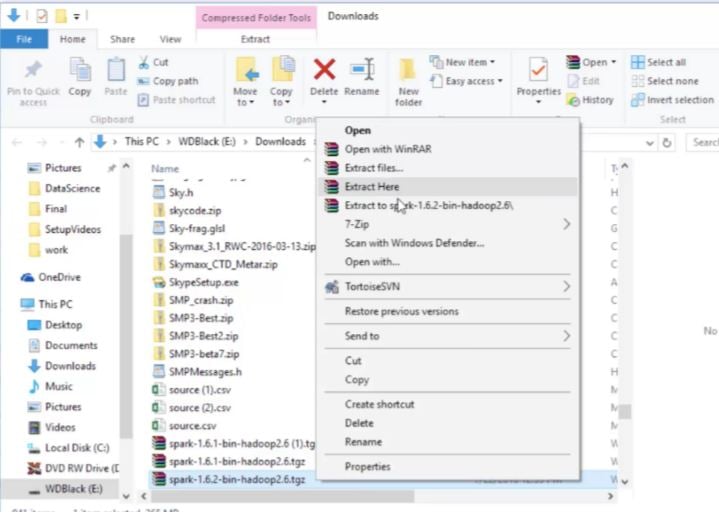
So I should now have a folder in my Downloads folder associated with that package. Let's open that up and there is Spark itself. So, you need to install that in some place where you will remember it:
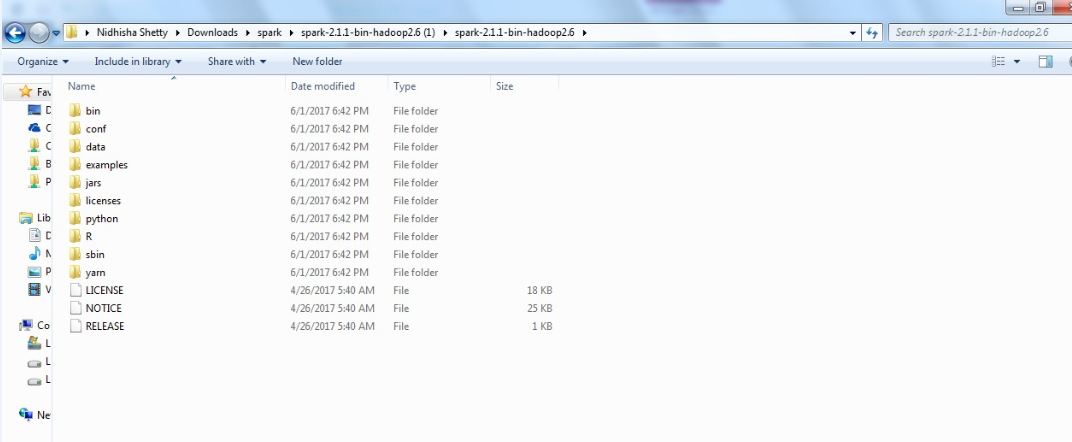
You don't want to leave it in your Downloads folder obviously, so let's go ahead and open up a new file explorer window here. I go to my C drive and create a new folder, and let's just call it spark. So, my Spark installation is going to live in C:\spark. Again, nice and easy to remember. Open that folder. Now, I go back to my downloaded spark folder and use Ctrl + A to select everything in the Spark distribution, Ctrl + C to copy it, and then go back to C:\spark, where I want to put it, and Ctrl + V to paste it in:
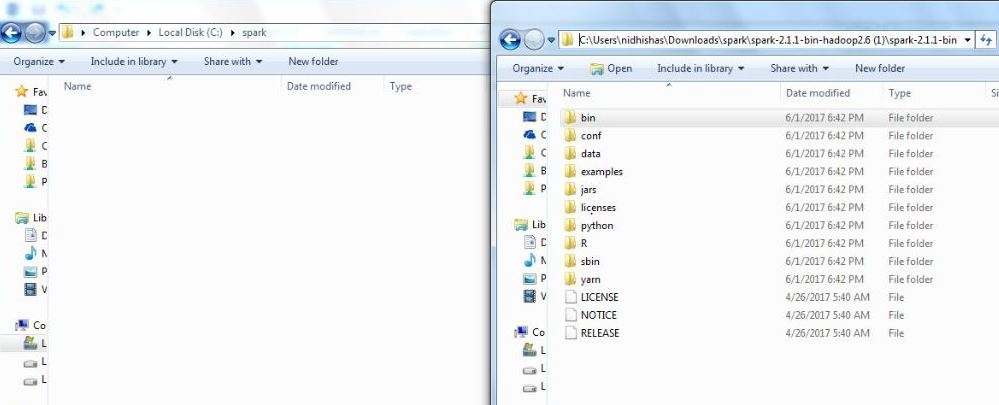
Remembering to paste the contents of the spark folder, not the spark folder itself is very important. So what I should have now is my C drive with a spark folder that contains all of the files and folders from the Spark distribution.
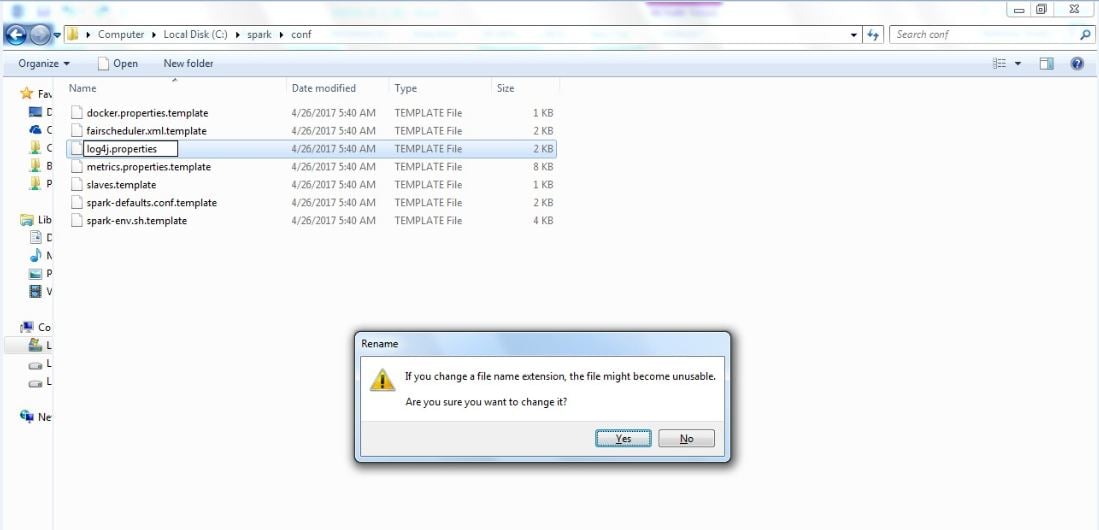
Well, there are yet a few things we need to configure. So while we're in C:\spark let's open up the conf folder, and in order to make sure that we don't get spammed to death by log messages, we're going to change the logging level setting here. So to do that, right-click on the log4j.properties.template file and select Rename:
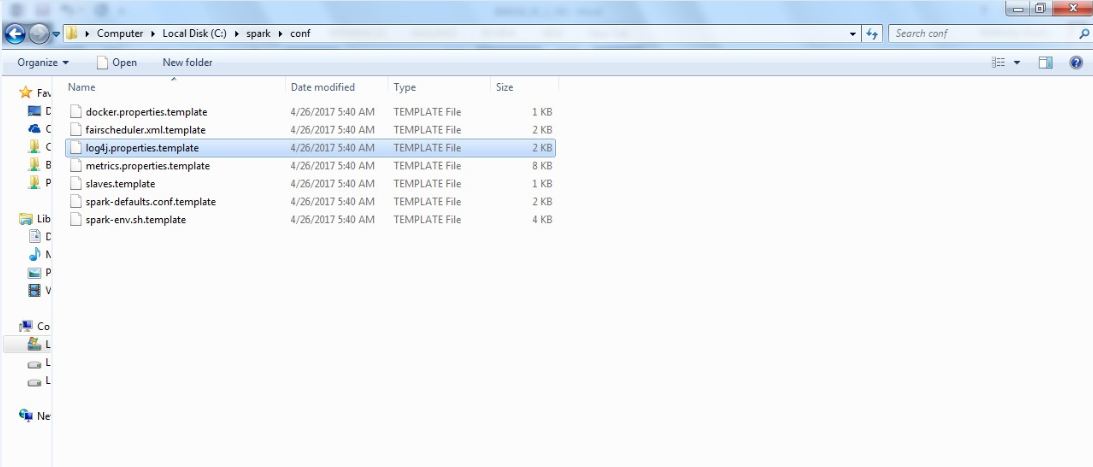
Delete the .template part of the filename to make it an actual log4j.properties file. Spark will use this to configure its logging:
Now, open this file in a text editor of some sort. On Windows, you might need to right-click there and select Open with and then WordPad:

In the file, locate log4j.rootCategory=INFO. Let's change this to log4j.rootCategory=ERROR and this will just remove the clutter of all the log spam that gets printed out when we run stuff. Save the file, and exit your editor.
So far, we installed Python, Java, and Spark. Now the next thing we need to do is to install something that will trick your PC into thinking that Hadoop exists, and again this step is only necessary on Windows. So, you can skip this step if you're on Mac or Linux.
Let's go to http://media.sundog-soft.com/winutils.exe. Downloading winutils.exe will give you a copy of a little snippet of an executable, which can be used to trick Spark into thinking that you actually have Hadoop:

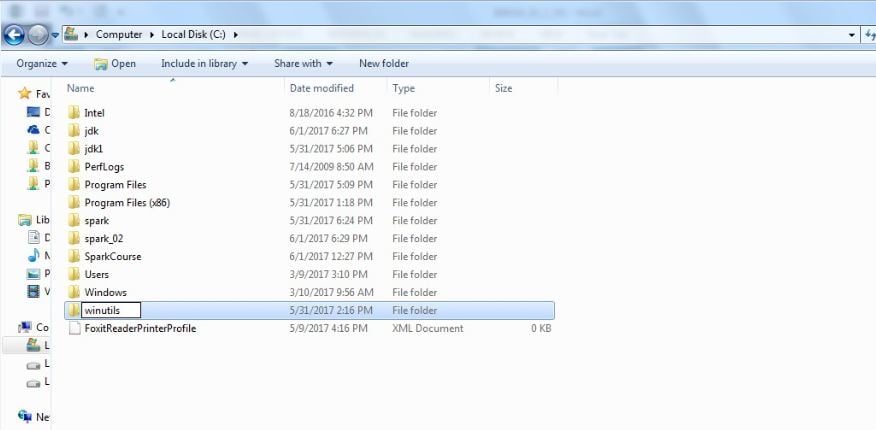
Now, since we're going to be running our scripts locally on our desktop, it's not a big deal, and we don't need to have Hadoop installed for real. This just gets around another quirk of running Spark on Windows. So, now that we have that, let's find it in the Downloads folder, click Ctrl + C to copy it, and let's go to our C drive and create a place for it to live:

So, I create a new folder again, and we will call it winutils:
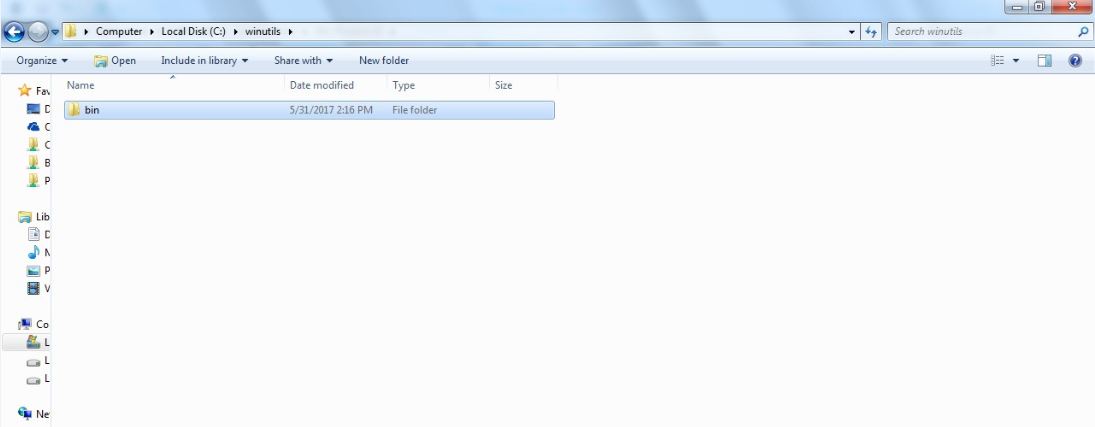
Now let's open this winutils folder and create a bin folder in it:
Now in this bin folder, I want you to paste the winutils.exe file we downloaded. So you should have C:\winutils\bin and then winutils.exe:
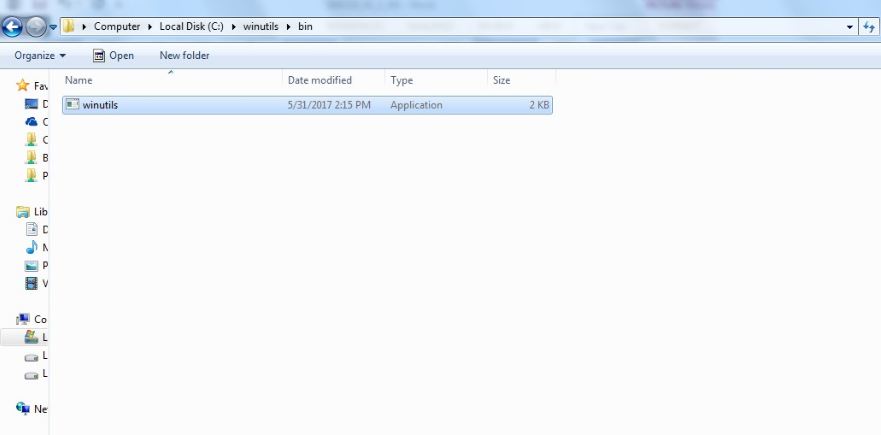
This next step is only required on some systems, but just to be safe, open Command Prompt on Windows. You can do that by going to your Start menu and going down to Windows System, and then clicking on Command Prompt. Here, I want you to type cd c:\winutils\bin, which is where we stuck our winutils.exe file. Now if you type dir, you should see that file there. Now type winutils.exe chmod 777 \tmp\hive. This just makes sure that all the file permissions you need to actually run Spark successfully are in place without any errors. You can close Command Prompt now that you're done with that step. Wow, we're almost done, believe it or not.
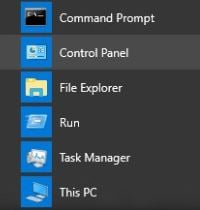
Now we need to set some environment variables for things to work. I'll show you how to do that on Windows. On Windows 10, you'll need to open up the Start menu and go to Windows System | Control Panel to open up Control Panel:
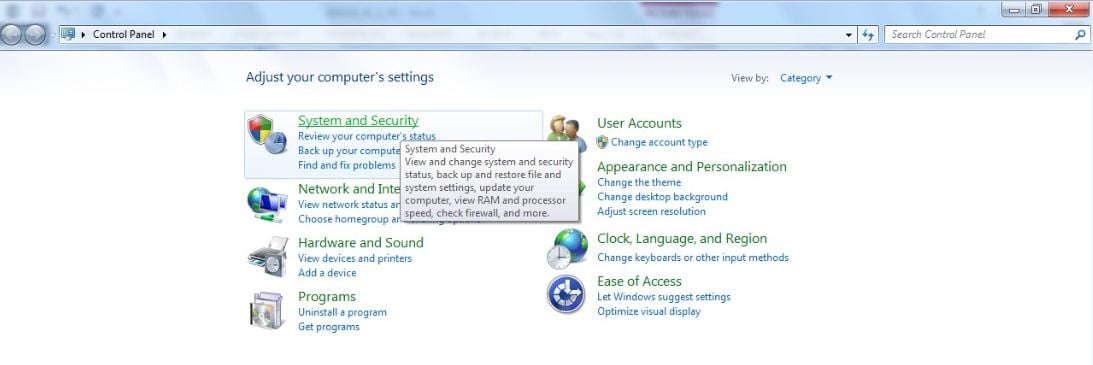
In Control Panel, click on System and Security:
Then, click on System:
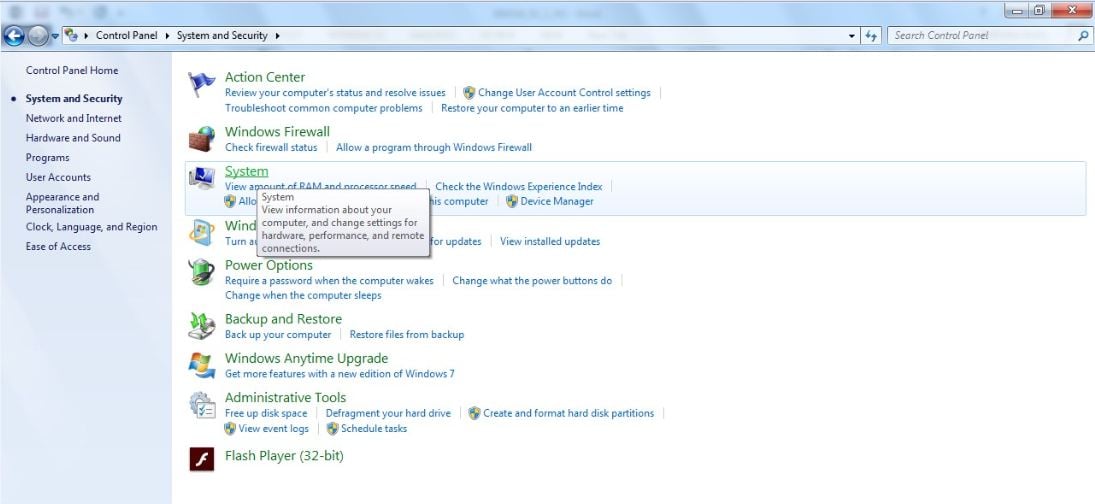
Then click on Advanced system settings from the list on the left-hand side:

From here, click on Environment Variables...:
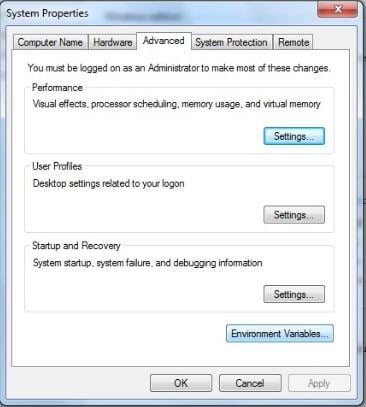
We will get these options:
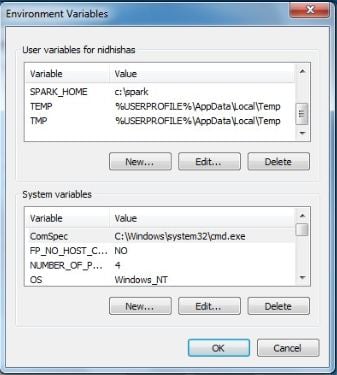
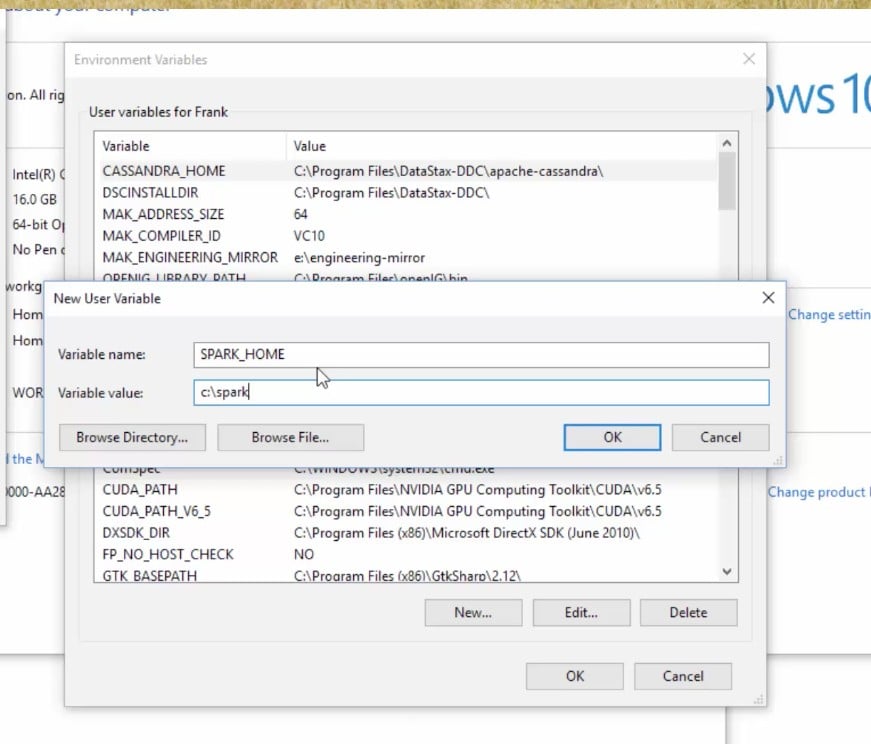
Now, this is a very Windows-specific way of setting environment variables. On other operating systems, you'll use different processes, so you'll have to look at how to install Spark on them. Here, we're going to set up some new user variables. Click on the New... button for a new user variable and call it SPARK_HOME, as shown as follows, all uppercase. This is going to point to where we installed Spark, which for us is c:\spark, so type that in as the Variable value and click on OK:
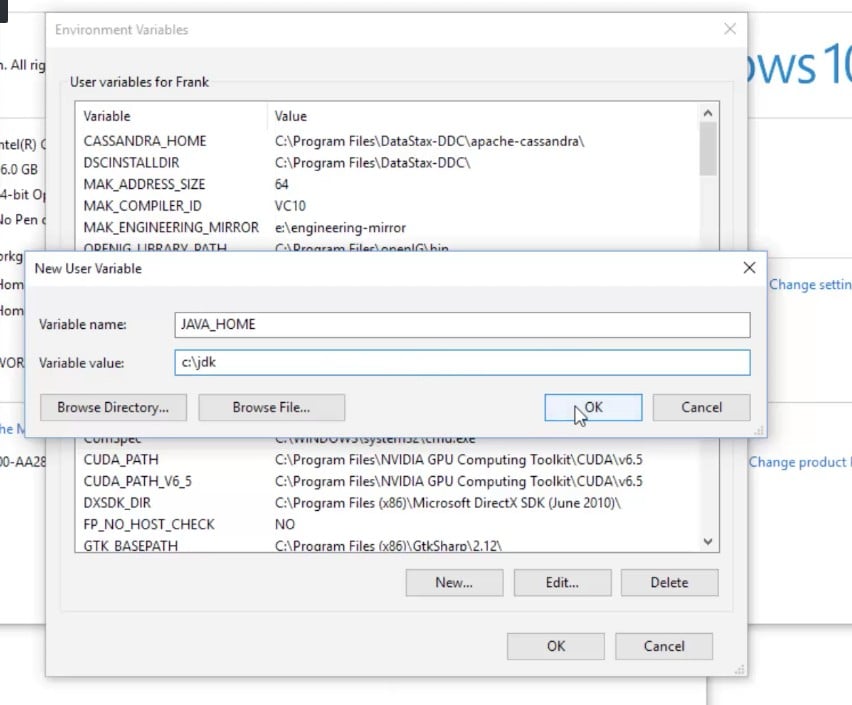
We also need to set up JAVA_HOME, so click on New... again and type in JAVA_HOME as Variable name. We need to point that to where we installed Java, which for us is c:\jdk:
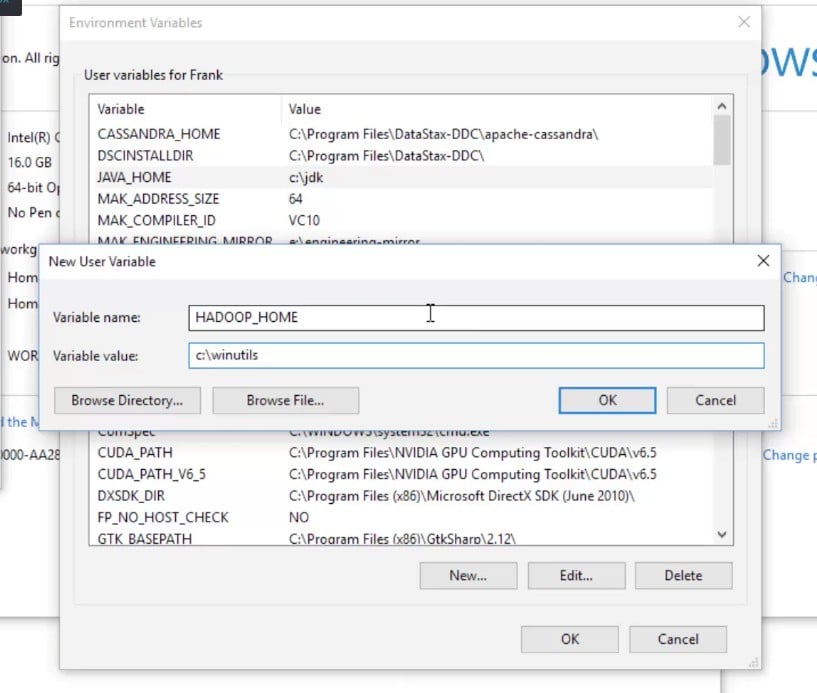
We also need to set up HADOOP_HOME, and that's where we installed the winutils package, so we'll point that to c:\winutils:
So far, so good. The last thing we need to do is to modify our path. You should have a PATH environment variable here:
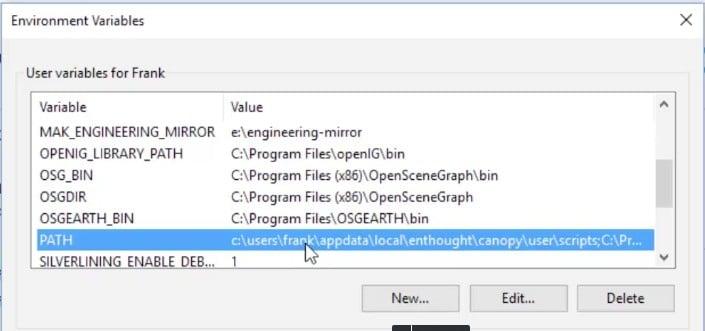
Click on the PATH environment variable, then on Edit..., and add a new path. This is going to be %SPARK_HOME%\bin, and I'm going to add another one, %JAVA_HOME%\bin:
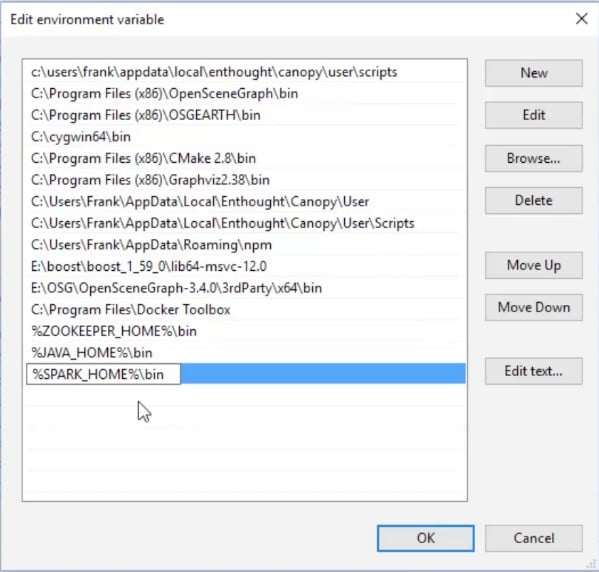
Basically, this makes all the binary executables of Spark available to Windows, wherever you're running it from. Click on OK on this menu and on the previous two menus. We finally have everything set up. So, let's go ahead and try it all out in our next step.
Running Spark code
Let's go ahead and start up Enthought Canopy. Once you get to the Welcome screen, go to the Tools menu and then to Canopy Command Prompt. This will give you a little Command Prompt you can use; it has all the right permissions and environment variables you need to actually run Python.
So type in cd c:\spark, as shown here, which is where we installed Spark in our previous steps:

We'll make sure that we have Spark in there, so you should see all the contents of the Spark distribution pre-built. Let's look at what's in here by typing dir and hitting Enter:

Now, depending on the distribution that you downloaded, there might be a README.md file or a CHANGES.txt file, so pick one or the other; whatever you see there, that's what we're going to use.
We will set up a little simple Spark program here that just counts the number of lines in that file, so let's type in pyspark to kick off the Python version of the Spark interpreter:

If everything is set up properly, you should see something like this:

If you're not seeing this and you're seeing some weird Windows error about not being able to find pyspark, go back and double-check all those environment variables. The odds are that there's something wrong with your path or with your SPARK_HOME environment variables. Sometimes you need to log out of Windows and log back in, in order to get environment variable changes to get picked up by the system; so, if all else fails, try this. Also, if you got cute and installed things to a different path than I recommended in the setup sections, make sure that your environment variables reflect those changes. If you put it in a folder that has spaces in the name, that can cause problems as well. You might run into trouble if your path is too long or if you have too much stuff in your path, so have a look at that if you're encountering problems at this stage. Another possibility is that you're running on a managed PC that doesn't actually allow you to change environment variables, so you might have thought you did it, but there might be some administrative policy preventing you from doing so. If so, try running the set up steps again under a new account that's an administrator if possible. However, assuming you've gotten this far, let's have some fun.
Let's write some Spark code, shall we? We should get some payoff for all this work that we have done, so follow along with me here. I'm going to type in rdd = sc.textFile("README.md"), with a capital F in textFile – case does matter. Again, if your version of Spark has a changes.txt instead, just use changes.txt there:

Make sure you get that exactly right; remember those are parentheses, not brackets. What this is doing is creating something called a Resilient Distributed Data store (rdd), which is constructed by each line of input text in that README.md file. We're going to talk about rdds a lot more shortly. Spark can actually distribute the processing of this object through an entire cluster. Now let's just find out how many lines are in it and how many lines did we import into that rdd. So type in rdd.count() as shown in the following screenshot, and we'll get our answer. It actually ran a full-blown Spark job just for that. The answer is 104 lines in that file:

Now your answer might be different depending on what version of Spark you installed, but the important thing is that you got a number there, and you actually ran a Spark program that could do that in a distributed manner if it was running on a real cluster, so congratulations! Everything's set up properly; you have run your first Spark program already on Windows, and now we can get into how it's all working and doing some more interesting stuff with Spark. So, to get out of this Command Prompt, just type in quit(), and once that's done, you can close this window and move on. So, congratulations, you got everything set up; it was a lot of work but I think it's worth it. You're now set up to learn Spark using Python, so let's do it.


