Creating a project
We have mentioned several times that you must first open a project before you are able to access the functionality included in ArcGIS Pro. You have begun to experience this in the previous recipes where you opened and worked with existing projects. These were already configured, and contained several project items including maps and database connections. How were these projects created?
In this recipe, you will create a new project using one of the four project templates included with ArcGIS Pro. You will see the structure created by ArcGIS Pro when a new project is created.
Getting ready
To complete this recipe, all you need to do is ensure that you have ArcGIS Pro installed, access to a license, and the data for the book downloaded and installed. This recipe does not even require you to have completed the previous recipes, though it might help provide a better understanding of what you are doing.
How to do it...
- Start ArcGIS Pro.
- When the
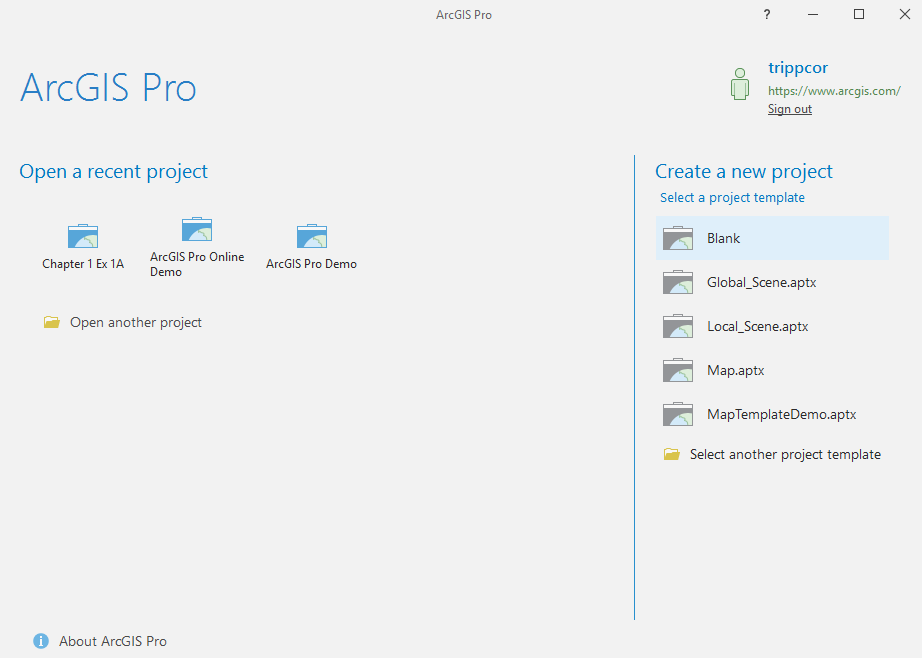
ArcGIS Prostart window appears, select theBlanktemplate fromCreate a new projecton the right side:

- In the
Namecell, name your new project%your name%Chapter1NewProject(for exampleTrippChapter1Newproject). - Click the
Browsebutton located next to theLocationcell. It looks like a small file folder with a blue arrow. - Under
Computer, click theC:\drive. - Scroll down and double-click the
Studentfolder. - Double-click the
ArcGISProCookbookfolder. - Select the
MyProjectsfolder and clickOK. Do not double-click it.
- Verify that your
Create a New Projectdialog window looks like this, except for the name which will include your name:

- Once you have verified that you have entered everything properly, click
OK.
You have just created your first new project in ArcGIS Pro using the Blank template. This created a new bare bones project. This project contains the minimum number of items you will find in a project. You can now begin to explore your new project.
- Expand the
Toolboxesfolder in theCatalogpane.
Note
Question: What do you see in this folder?
Answer:
- Expand the
Databasesfolder in theCatalogpane.
Note
Question: What do you see in this folder?
Answer:
- Expand the other folders within the project.
Note
Question: What do you notice is missing from your new project?
Answer:
You should have noticed that your new project contains a single custom toolbox and file geodatabase that has the same name as your project. These were automatically created by ArcGIS Pro when you created the new project. You should have also noticed that several styles and locators were also automatically connected by default.
There are three basic types of geodatabase: personal, file, and SDE. ArcGIS Pro only supports file and SDE geodatabases. It does not support the personal geodatabase. To learn more about geodatabases, go to http://pro.arcgis.com/en/pro-app/help/data/geodatabases/overview/what-is-a-geodatabase-.htm.
This new project is missing several key elements that you will need to perform any GIS work. First, it is missing a map. Second, if you expand the geodatabase that is connected to the project, you will notice it is empty. So, you also need data. Now you will connect to an existing geodatabase and then add a map.
- Right-click the
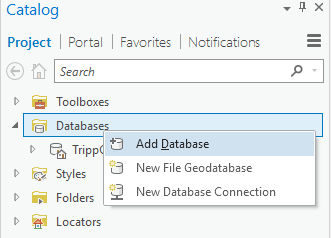
Databasesfolder in theCatalogpane and selectAdd Database:

- Click
C:\underComputerin the area located on the left of theSelect Existing Geodatabasewindow that appears. - Scroll down and double-click the
Studentfolder. - Then double-click
ArcGISProCookbookandDatabases. - Select the
Trippville_GIS.gdband clickOK. Do not double-click theTrippville_GISgeodatabase.
- Right click the
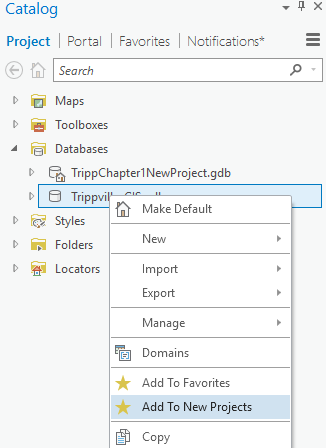
Trippville_GIS.gdbyou just added to your project and selectAdd to New Projects, as shown in the following image:

You just added a connection to the Trippville GIS geodatabase you have been using in the other recipes. In those, the database connection had already been established. Now you know how it was done. Once you added the connection, you then added it to your favorites and set it so it will automatically be added to any new projects you create.
You still need to add a map. You could do this the same way you did in the previous recipe. However, in this one you will import the Map File you created in the last recipe.
- Click the
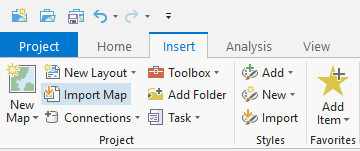
Inserttab in the ribbon:
- Click the
Import Maptool in theProjectgroup on theInserttab in the ribbon:

- Using the same process you did to add the database connection, navigate to the
C:\Student\ArcGISProCookbook\MyProjectsfolder. - Select the
TrippvilleBuildingTypeMap.mapxfile and clickOK.
Note
If you did not complete the previous recipe, you can instead navigate to C:\Student\ArcGISProCookbook\Chapter1 and select the Chapter1Ex1AResults.mapx file.
A familiar-looking map should now be added to your project. It contains all the layers that you created in the last recipe along with the symbology and properties you configured.
- Save your project by using the Ctrl+S shortcut keys.
How it works...
In this recipe, you created your first new project. You used the Blank template, which creates a very basic project for ArcGIS Pro. Projects created with the Blank template include connections to a custom toolbox and geodatabase that have the same name as the project, along with several styles and locators. The toolbox and geodatabase are automatically created by ArcGIS Pro when you create the new project. They are both empty and are intended for you to save project-specific items to them. However, in most cases, your organization will already have an established GIS database.
Once you created your project, you added a connection to an existing geodatabase, Trippville_GIS. This database contains the GIS data for the City of Trippville that you used in other recipes. This is actually the primary database that you will use in the remainder of this book. So, you added it to your favorites and set it to automatically be added to all new projects you create.
After you established a connection to the primary geodatabase, you imported a new map. This new map was based on a Map file you created in a previous recipe. The new map was added with layers already added and their properties configured, saving you a lot of effort.
There's more...
In the last recipe, you created a new project using the Blank template. As you saw, this template automatically created the project structure including a project geodatabase, custom toolbox, and more. The blank template is not the only one included with ArcGIS Pro. There are several others you can use when creating a new project. Let's take a quick look at them.
ArcGIS Pro stock project templates
As you may have noticed when you created your new project, ArcGIS Pro includes three other project templates: Global Scene, Local Scene, and Map. Each of these will create slightly different projects:
Name | Description | Project items that are created |
Map | Creates a new project that automatically includes a new 2D Map |
|
Local Scene | Creates a new project that automatically includes a new local 3D Map |
|
Global Scene | Creates a new project that automatically includes a new global 3D Map, similar to what you experience with Google Earth the first time you open it |
|
In addition, connections to standard styles, locators, and any favorites that are set to add to new projects are also added to the items created, based on the selected new project template.
Using the skills that you have learned in the previous recipes, try creating a new project using a template other than Blank. See how they differ from one another.


