This article by Daniel Langenhan, the author of VMware vRealize Orchestrator Essentials, discusses the deployment of Orchestrator Appliance, and then goes on to explaining how to access it using the Orchestrator home page.
In the following sections, we will discuss how to deploy Orchestrator in vCenter and with VMware Workstation.
(For more resources related to this topic, see here.)
Deploying the Appliance with vCenter
To make the best use of Orchestrator, its best to deploy it into your vSphere infrastructure. For this, we deploy it with vCenter.
- Open your vSphere Web Client and log in.
- Select a host or cluster that should host the Orchestrator Appliance.
- Right-click the Host or Cluster and select Deploy OVF Template.
- The deploy wizard will start and ask you the typical OVF questions:
- Accept the EULA
- Choose the VM name and the VM folder where it will be stored
- Select the storage and network it should connect to. Make sure that you select a static IP
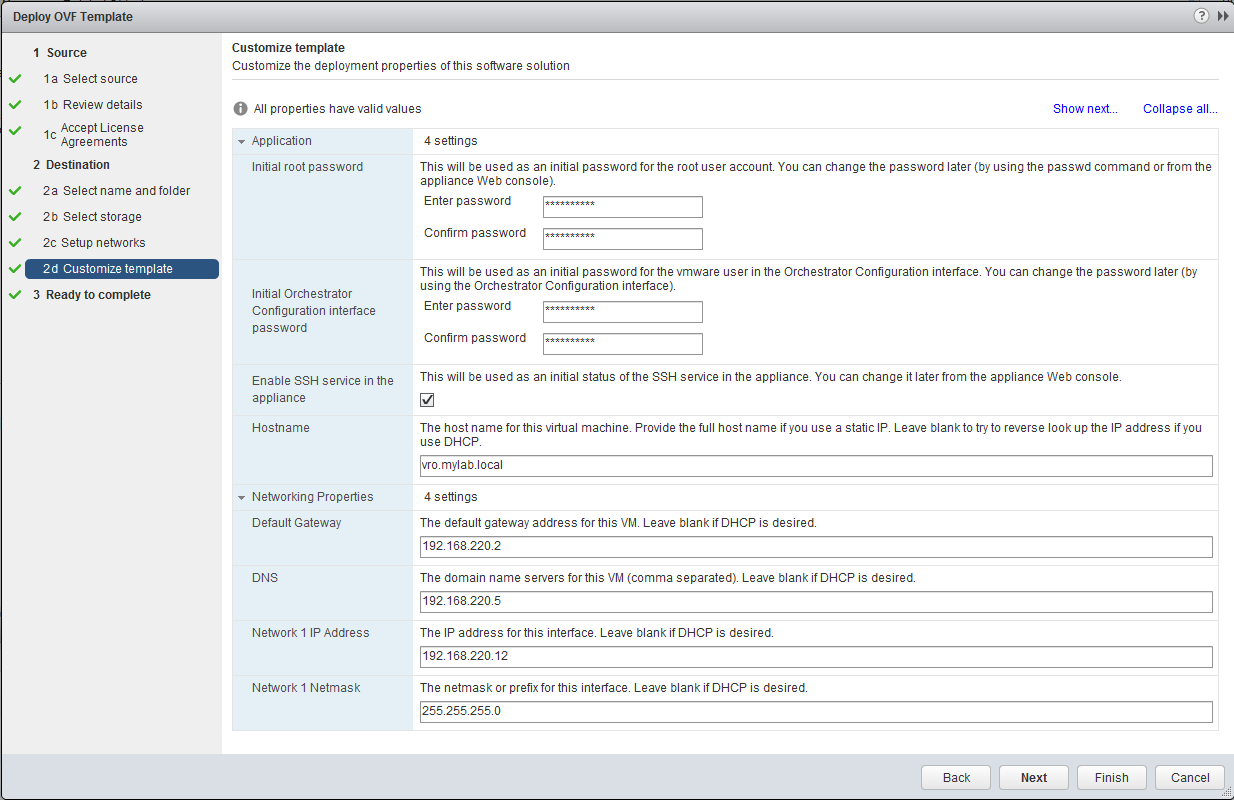
- The Customize template step will now ask you about some more Orchestrator-specific details. You will be asked to provide a new password for the root user. The root user is used to connect to the vRO appliance operating system or the web console.
- The other password that is needed is for the vRO Configurator interface.
- The last piece of information needed is the network information for the new VM. The following screenshot shows an example of the Customize template step:
- The last step summarizes all the settings and lets you power on the VM after creation. Click on Finish and wait until the VM is deployed and powered on.
Deploying the appliance into VMware Workstation
For learning how to use Orchestrator, or for testing purposes, you can deploy Orchestrator using VMware Workstation (Fusion for MAC users). The process is pretty simple:
- Download the Orchestrator Appliance on to your desktop.
- Double-click on the OVA file.
- The import wizard now asks you for a name and location of your local file structure for this VM. Chose a location and click on Import.
- Accept the EULA.
- Wait until the import has finished.
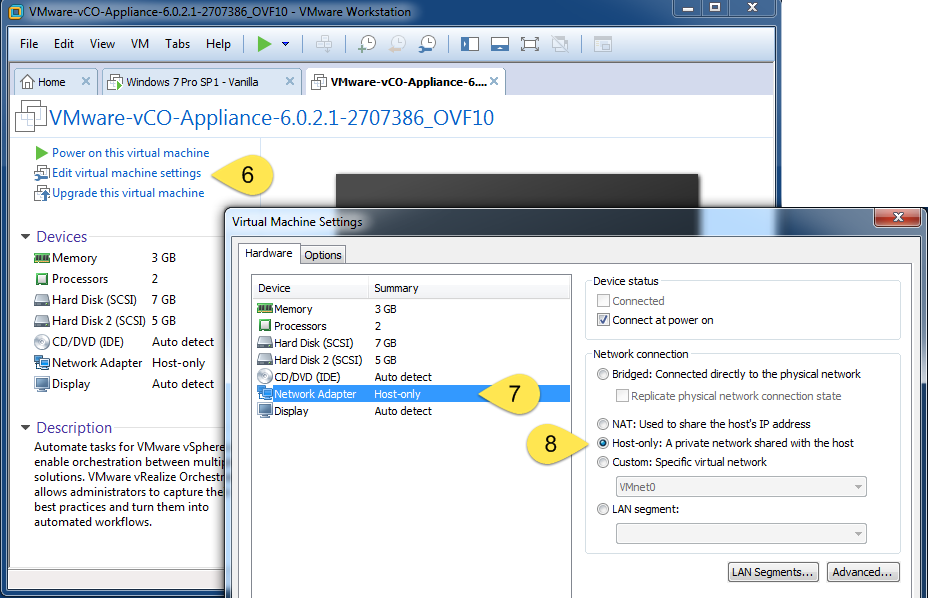
- Click on Edit virtual machine settings.
- Select Network Adapter.
- Chose the correct network (Bridged, NAT, or Host only) for this VM. I typically use Host Only.
- Click on OK to exit the settings.
- Power on the VM.
- Watch the boot screen. At some stage, the boot will stop and you will be prompted for the root password. Enter a new password and confirm it.
- After a moment, you will be asked for the password for the Orchestrator Configurator. Enter a new password and confirm it.
- After this, the boot process should finish, and you should see the Orchestrator Appliance DHCP IP.
If you would like to configure the VM with a fixed IP, access the appliance configuration, as shown on the console screen (see the next section).
After the deployment
If the deployment is successful, the console of the VM should show a screen that looks like the following screenshot:
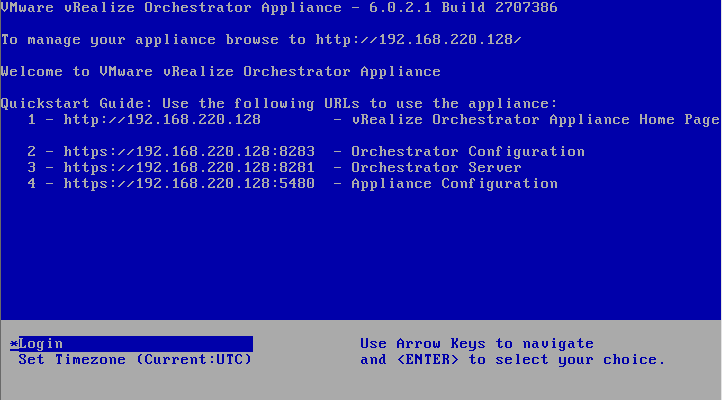
You can now access the Orchestrator Appliance, as shown in the next section.
Accessing Orchestrator
Orchestrator has its own little webserver that can be accessed by any web browser.
Accessing the Orchestrator home page
We will now access the Orchestrator home page:
- Open a web browser such as Mozilla Firefox, IE, or Google Chrome.
- Enter the IP or FQDN of the Orchestrator Appliance.
- The Orchestrator home page will open. It looks like the following screenshot:
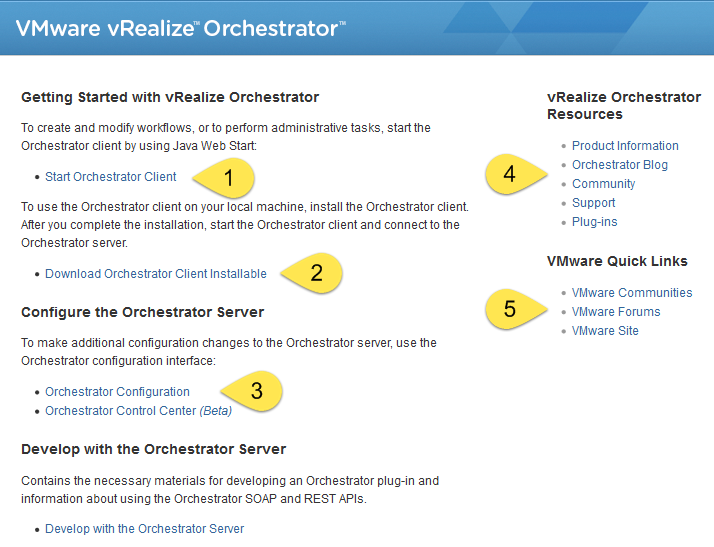
The home page contains some very useful links, as shown in the preceding screenshot. Here is an explanation of each number:
|
Number
|
Description
Unlock access to the largest independent learning library in Tech for FREE!
Get unlimited access to 7500+ expert-authored eBooks and video courses covering every tech area you can think of.
Renews at ₹800/month. Cancel anytime
|
|
1
|
Click here to start the Orchestrator Java Client. You can also access the Client directly by visiting https://[IP or FQDN]:8281/vco/client/client.jnlp.
|
|
2
|
Click here to download and install the Orchestrator Java Client locally.
|
|
3
|
Click here to access the Orchestrator Configurator, which is scheduled to disappear soon, whereupon we won't use it any more. The way forward will be Orchestrator Control Center.
|
|
4
|
This is a selection of links that can be used to find helpful information and download plugins.
|
|
5
|
These are some additional links to VMware sites.
|
Starting the Orchestrator Client
Let's open the Orchestrator Client. We will use an internal user to log in until we have hooked up Orchestrator to SSO. For the Orchestrator Client, you need at least Java 7.
- From the Orchestrator home page, click on Start Orchestrator Client.
- Your Java environment will start. You may be required to acknowledge that you really want to start this application.
- You will now be greeted with the login screen to Orchestrator:
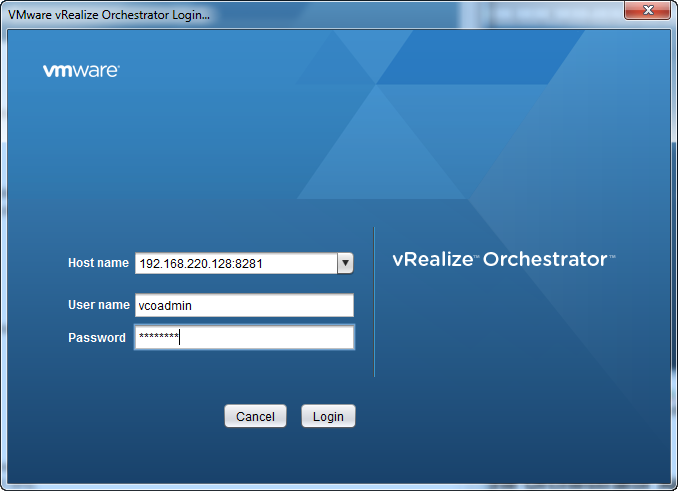
- Enter vcoadmin as the username and vcoadmin as the password. This is a preconfigured user that allows you to log in and use Orchestrator directly. Click on Login.
- Now, the Orchestrator Client will load. After a moment, you will see something that looks like the following screenshot:
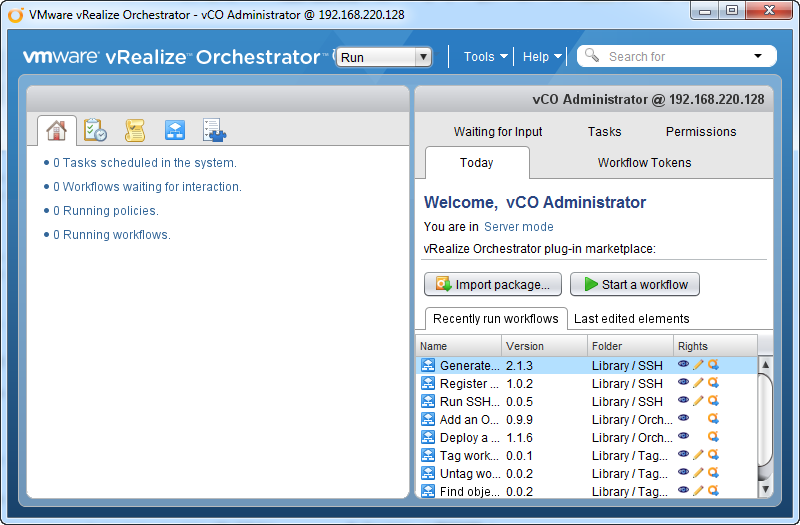
You are now logged in to the Orchestrator Client.
Summary
This article guided you through the process of deploying and accessing an Orchestrator Appliance with vCenter and VMware workstation.
Resources for Article:
Further resources on this subject:
 Germany
 Slovakia
 Canada
 Brazil
 Singapore
 Hungary
 Philippines
 Mexico
 Thailand
 Ukraine
 Luxembourg
 Estonia
 Lithuania
 Norway
 Chile
Chile
 United States
 Great Britain
 India
India
 Spain
Spain
 South Korea
 Ecuador
 Colombia
 Taiwan
 Switzerland
 Indonesia
 Cyprus
 Denmark
 Finland
 Poland
 Malta
Malta
 Czechia
 New Zealand
 Austria
 Turkey
 France
 Sweden
 Italy
Italy
 Egypt
Egypt
 Belgium
 Portugal
 Slovenia
 Ireland
 Romania
 Greece
 Argentina
 Malaysia
 South Africa
 Netherlands
 Bulgaria
 Latvia
 Australia
 Japan
Japan
 Russia


