Upgrading the virtual machine hardware
Once VMware Tools have been upgraded, you can then upgrade the virtual hardware for the virtual machines. The virtual hardware will determine the BIOS/EFI used, CPU and memory maximums for the virtual machine, and other features. The virtual hardware version released with ESX 5.1 is 9. In this recipe, I will discuss the steps required to upgrade the virtual machine hardware. Once you upgrade the virtual hardware version to the current, you cannot downgrade it. If you have a multi-version ESX cluster, then make sure that the VM version (virtual hardware version) is at a level supported by all the participating hosts in the cluster. Also, for the upgrade to complete, the virtual machine requires a downtime.
How to do it...
The virtual hardware upgrade can be either done using vSphere Web Client or the vSphere Client. I will show you how to perform the task using the vSphere Web Client:
Connect to the vCenter Server using the Web Client.
Navigate to the VMs and Templates Inventory view.
Locate the VM and power off if you intend to perform the upgrade now.
Right-click on the VM and navigate to All vCenter Actions | Compatibility | Upgrade VM Compatibility.

Click on Yes in the conformation prompt.

On the Configure VM Compatibility dialog box, select the ESX version you had upgraded the server to and click on OK to finish reconfiguring the VM.

How it works...
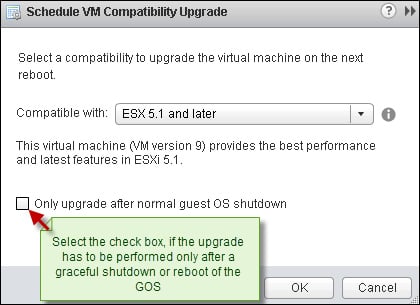
We cannot finish the virtual hardware upgrade while the virtual machine is powered on. Hence, we need to power off the virtual machine for an immediate upgrade. If you have a large number of virtual machines, then you can schedule the virtual hardware upgrade to happen during the next reboot of the virtual machine.

Click on Yes to confirm scheduling an upgrade and then select an appropriate version. Click on OK to schedule the upgrade.


