Creating some simple glass with the translucent blend mode
In the previous section, we had the opportunity to create a basic material that followed the physically based approach that Unreal Engine uses to render elements into our screens. By using nodes and expressions that affected the roughness or the metallic attributes of a material, we saw how we could potentially create endless combinations—going from plastics to concrete, metal, or wood.
Those previous examples can be considered simple ones—for they use the same shading model to calculate how each element needs to be rendered. Most of the materials that we experience in our daily lives fall into that category, and they can be described using the attributes we have previously tweaked. In spite of that, there are always examples that can't be exactly covered with one unique shading model. The way that light behaves when it touches glass, for example, needs to be redefined in those cases. The same applies to other elements, such as human skin or foliage, where light distribution varies from that of a wooden material.
With that in mind, we are going to create several small examples of materials that deviate from the standard shading model—starting with some simple glass. This will work as an introductory level, just so we can create more complex examples at a later stage. Buckle up and let's dive right in!
Getting ready
In order to start this recipe, you are not going to need a lot of anything. The sample Unreal project we have previously created will serve us fine, but feel free to create a new one if you are starting in this section of the book. It is completely fine to use standard assets, such as the ones included with the engine, but I've also prepared a few of them that you can download if you want to closely follow this book.
How to do it...
The first example that we are going to create is going to be some simple glass. As before, right-click in the appropriate subfolder of your Content Browser and create a new material. Here's how we go about it:
- Let's name it with a pertinent name, something like
M_SampleGlass, as that's what we'll be creating! - Open up the material editor, and focus on the D
etailspanel. That's the first area we are going to operate on. Make sure you have the main material node selected—if you haven't created anything else, that's the only element that should exist on the main editor graph:
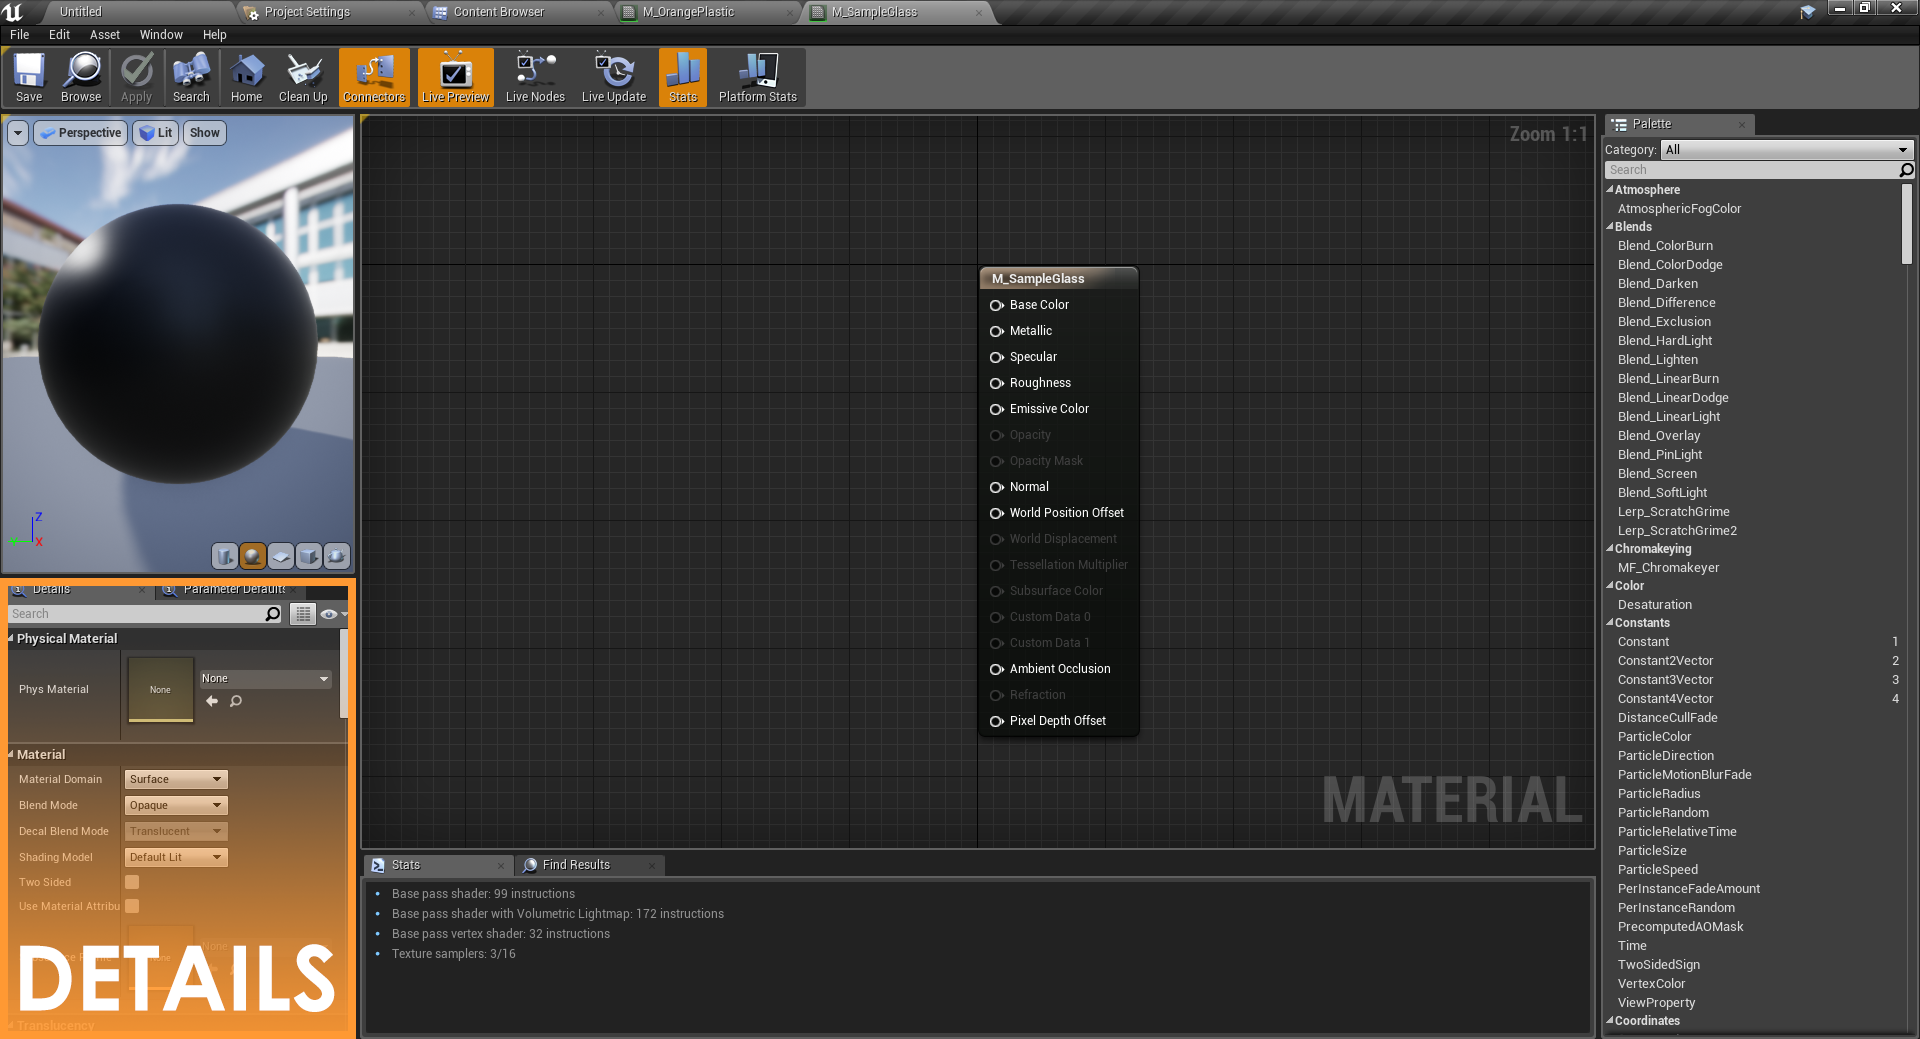
- Having the main node selected, you'll be able to see that the second editable attribute under the
Materialsection of theDetailspanel is theBlend Mode. Let's change that from the default value ofOpaqueto the more appropriateTranslucentone as follows:
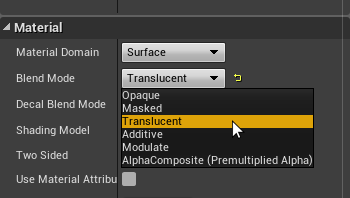
- After this change has happened, you'll note that several options have been grayed out inside of the main material node. We'll come back to this shortly.
- Without leaving the
Detailspanel, you can now scroll down to theTranslucencysection of the main material node. You should be able to find a drop-down menu namedLighting Mode, which we'll need to change from the default value ofVolumetric NonDirectionalto the one namedSurface Translucency Volume, as shown in the following screenshot:
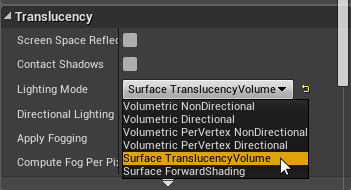
If you hover over each of the options inside of the Lighting Mode drop-down menu, you should be able to take a look at their description. You'll note that some of the options are meant to be used with particles, while others are meant for 3D models. That's the reason why some of the material attributes were previously grayed out— some options don't make sense to be used if we are going to be applying the material to a particle, for example, so these are left out.
- With that out of the way, let's now attach a
Constant4Vectorto theBase Colornode and give it an interesting value. I'm going with a bluish tone, as we'll be creating a glass and they usually have that kind of tint.
Note
Why a Constant4Vector and not a Constant3Vector, as we used last time? This new type that we are using includes a fourth parameter, which can be used as an alpha value, something very useful for glass-like materials as you'll see for yourself in a moment.
- Without leaving the Constant4Vector behind, set the alpha value to something like
0.5. Don't go all the way with this parameter! Setting it either as a0or a1would make our future material fully transparent or opaque, so choose something in between. Plug the value into theBase Colormaterial node as follows:
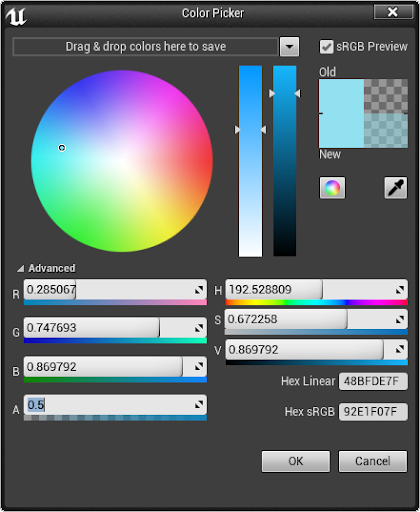
- Now it's time to plug in the alpha value of our
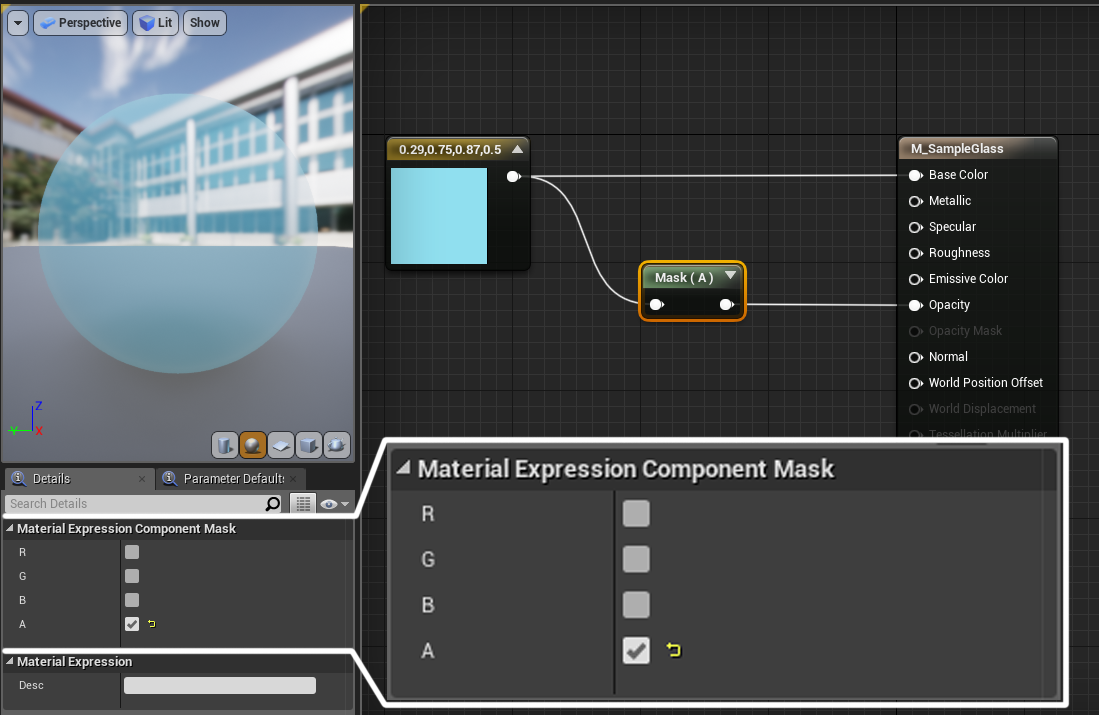
Constant4Vectorinto theOpacityslot of our material. Drag from the pin of theConstant4Vectorinto an empty space in the main graph and release the left mouse button. A contextual menu should now appear, and you want to typemask. SelectingComponentMaskis what we want to be doing now!
- With the component mask selected, let's take a look at the details panel. In there you'll be able to select which of the four components from the Constant4Vector node you want to use. For our case, as we'll be driving the opacity through the alpha, let's just tick the last option.
- Finally, connect the mask to the
Opacitypin. Click on theApplybutton and save the material. The preview window may take a moment to update itself, but once it does we should be looking at a translucent material like the following:
Now that we have our material correctly set up, let's apply it to the model in our scene. If you've opened the level that I've set up for you, 01_ 04_ TranslucentMaterials_ Intro, you'll see that we have an object called SM_ Glass. If you are creating things on your own project, just create a model in which we can apply this newly created material. In any case, the scene should look something like this after you apply the new material:
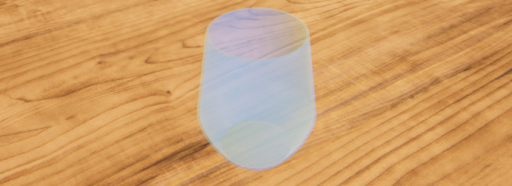
Simple but effective! In the future, we'll be taking a look at how to properly set up a more complex translucent material, with reflections, refractions, and other interesting effects. But for now, we've taken one of the most important steps in that path—actually starting to walk!
How it works...
Translucent materials are really tricky to tackle in real-time renderers—and we are starting to see why. One hint that you might have been able to spot is that we aren't using a different shading model to create glasses. Instead, we are just using a different blend mode. So what are the differences between both of these concepts, and how is driving translucent materials through the latter indicative of their render complexity?
First of all, a shading model is a combination of mathematical expressions and logic that determines how models are shaded or painted with light. One such model will describe how light behaves when it comes into contact with a material that uses said shading method. We use as many different models as we need in order to describe the different materials we see on our daily lives—for example, the way light scatters through our skin or the way it does the same on a wooden surface. We need to be able to describe that situation in a way that our computer programs can tackle that problem.
With that in mind, you could think that we should have a different shading model to describe translucent materials. However, things are a bit more complex in real-time renderers as the calculations that we would need to have to realistically simulate that model are too expensive performance-wise. Being always on the lookout for efficiency and speed, the way that Unreal has decided to tackle this issue is by creating a different blend mode. But what is that?
You can think of blend modes as the way that the renderer combines the material that we have applied to a model on the foreground over what is happening on the background. Up until now, we've seen two different types— opaque and the translucent ones.
The opaque blend mode is the easiest one to comprehend: having an object in front of another will hide the second one. This is what happens with opaque materials in real life— wood, concrete, bricks, and so on. The translucent mode, however, lets the previously hidden object to be partially visible according to the opacity value that we feed into the appropriate slot.
This is a neat way of implementing translucency, but there are some caveats that the system introduces we have to be aware of. One such issue is that this blend mode doesn't support specularity, meaning that seeing reflections across the surface is a tricky effect that we will have to overcome later on. But don't worry, we'll definitely get there!


