Creating your first Google Class
To begin, open Google Chrome and navigate to https://classroom.google.com/h.
Choosing the right internet browser
While Google Classroom is accessible in any web browser, the Google Chrome web browser is built to be compatible with all of Google's other apps. Therefore, some features may be incompatible or will not function correctly in other web browsers. Consider discussing with your school IT staff if Google Chrome is not installed on your computer.
If this is your first time opening Google Classroom using a Google Workspace for Education account, it will ask you to confirm your email account and then select whether to assign a teacher or student role to your account. Be sure to correctly select the teacher role, otherwise your account will be set up as a student account. You will not be able to create or manage Classes unless your role is a teacher in Google Classroom.
The following screenshot depicts the teacher role being selected:
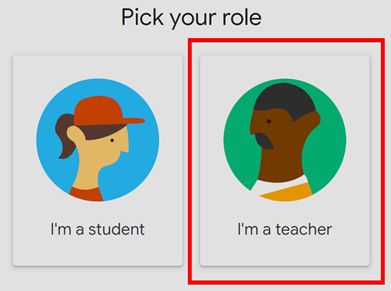
Figure 1.1 – Selecting your role
Note
If your account is set to a student account, you will need to contact your IT department so that they can change your Google Classroom role to a teacher role.
Using a personal @gmail.com account or a Google Workspace for Business account will not have the Pick your role page. Instead, all users will be able to create Classes in Google Classroom.
Another method of accessing Google Classroom is to use the app launcher. If the IT department has enabled this feature, click the waffle-shaped icon at the top-right corner of another Google app, such as Gmail, to see whether the Classroom icon is available.
This is illustrated in the following screenshot:
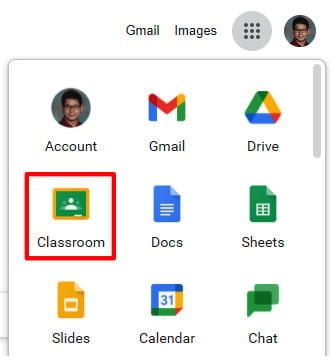
Figure 1.2 – Classroom app in App Launcher
Once you select the teacher role, the next page will point you toward a plus symbol + in the top-right corner to create your first Class, as illustrated in the following screenshot:
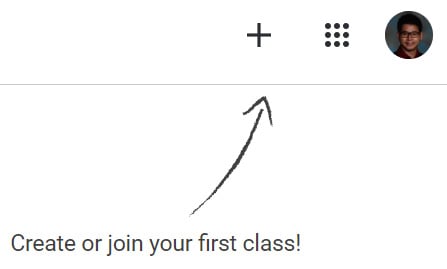
Figure 1.3 – Creating your first Class
When you click on the + symbol, a menu will appear for you to select whether to create a Class or a join a Class. Click on Create class to create your first Class.
Note
As a teacher, you can join another teacher's Class as a student by clicking on Join class and filling in the Class code. These instructions are covered in detail in Chapter 2, Inviting Students to Their Virtual Classroom.
A dialog box will appear, for you to name the Class and provide a section number. While the Class name field is mandatory, the Section number, Subject, and Room fields are optional. Depending on your school policies, specific Classes may already have section numbers that you can add here.
In Canada, many middle and high schools use section numbers for the timetable schedule, which is another option to fill in for this field. Since students will also see the section number, using the Timetable section number will be more applicable to them. While the Subject and Room fields can be helpful, these are not visible in Google Classroom by default.
The following screenshot provides an overview of the Class information:
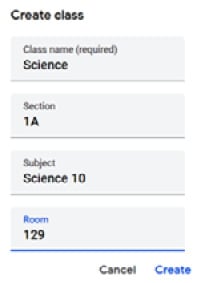
Figure 1.4 – Information for the Class in Google Classroom
Once these fields are filled in and the Create button is clicked, you will be taken to your new Class in Google Classroom, as illustrated in the following screenshot:
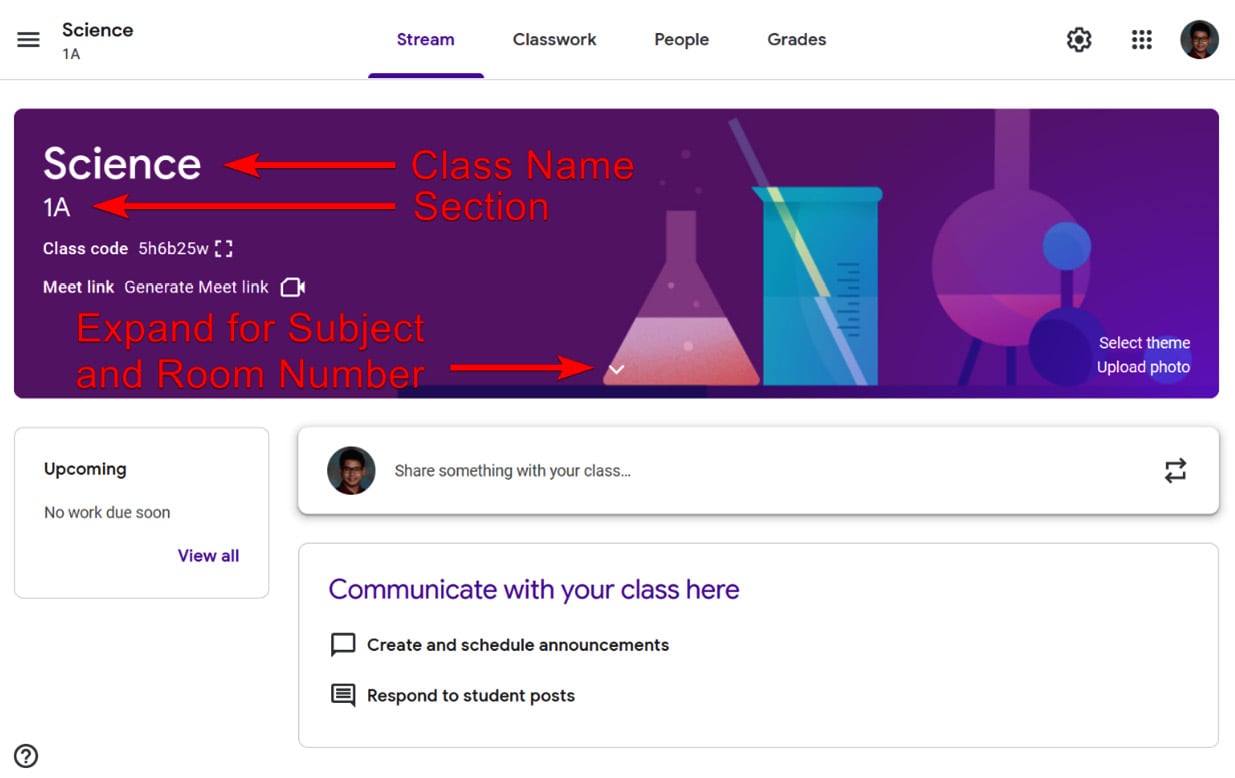
Figure 1.5 – Class information
Now that the Class is created, in the next section you will explore the different features of this online Class.


