Image rotation
In this section, we will see how to rotate a given image by a certain angle. We can do it using the following piece of code:
import cv2
import numpy as np
img = cv2.imread('images/input.jpg')num_rows, num_cols = img.shape[:2]
rotation_matrix = cv2.getRotationMatrix2D((num_cols/2, num_rows/2), 30, 0.7)
img_rotation = cv2.warpAffine(img, rotation_matrix, (num_cols, num_rows))
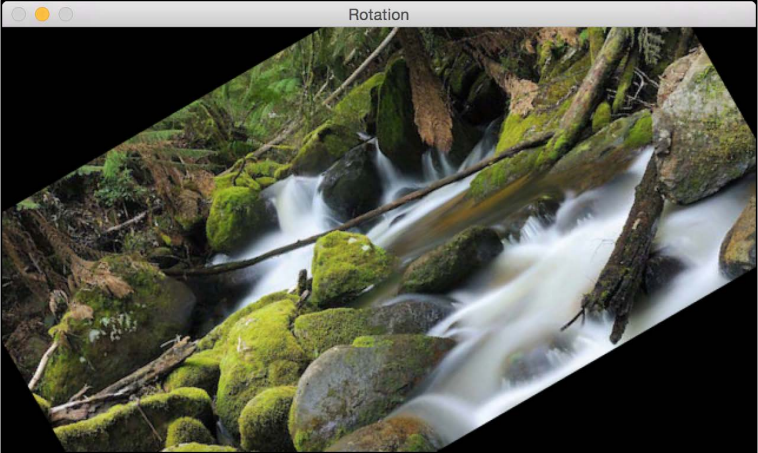
cv2.imshow('Rotation', img_rotation)
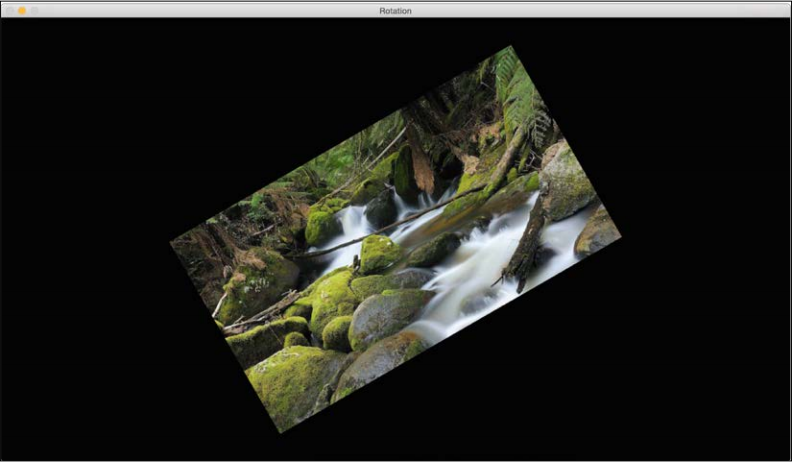
cv2.waitKey()If you run the preceding code, you will see an image like this:
What just happened?
Using getRotationMatrix2D, we can specify the center point around which the image would be rotated as the first argument, then the angle of rotation in degrees, and a scaling factor for the image at the end. We use 0.7 to shrink the image by 30% so it fits in the frame.
In order to understand this, let's see how we handle rotation mathematically. Rotation is also a form of transformation, and we can achieve it by using the following transformation matrix:
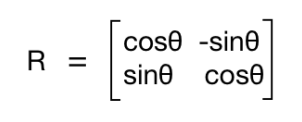
Here, θ is the angle of rotation in the counterclockwise direction. OpenCV provides finer control over the creation of this matrix through the getRotationMatrix2D function. We can specify the point around which the image would be rotated, the angle of rotation in degrees, and a scaling factor for the image. Once we have the transformation matrix, we can use the warpAffine function to apply this matrix to any image.
As we can see from the previous figure, the image content goes out of bounds and gets cropped. In order to prevent this, we need to provide enough space in the output image.
Let's go ahead and do that using the translation functionality we discussed earlier:
import cv2
import numpy as np

img = cv2.imread('images/input.jpg')
num_rows, num_cols = img.shape[:2]

translation_matrix = np.float32([ [1,0,int(0.5*num_cols)], [0,1,int(0.5*num_rows)] ])
rotation_matrix = cv2.getRotationMatrix2D((num_cols, num_rows), 30, 1)

img_translation = cv2.warpAffine(img, translation_matrix, (2*num_cols, 2*num_rows))
img_rotation = cv2.warpAffine(img_translation, rotation_matrix, (num_cols*2, num_rows*2))

cv2.imshow('Rotation', img_rotation)
cv2.waitKey()
If we run the preceding code, we will see something like this: