How to install VirtualBox and Ubuntu
VirtualBox is a general-purpose full virtualizer for x86 hardware, targeted at server, desktop, and embedded use. VirtualBox is free and supports all the major operating systems and pretty much every Linux flavor out there.
If you don't want to change the operating system of your computer to Ubuntu, tools such as VirtualBox help us virtualize a new operating system in our computers without making any changes.
In the following section, we are going to show you how to install VirtualBox and a new installation of Ubuntu. After this virtual installation, you should have a clean installation to restart your development machine if you have any problems, or to save all the setups necessary for your robot in the machine.
Downloading VirtualBox
The first step is to download the VirtualBox installation file. The latest version at the time of writing this book is 4.3.12; you can download it from http://download.virtualbox.org/virtualbox/4.3.12/. If you're using Windows, you can download it from http://download.virtualbox.org/virtualbox/4.3.12/VirtualBox-4.3.12-93733-Win.exe.
Once installed, you need to download the image of Ubuntu; for this tutorial we will use a copy of Ubuntu with ROS Hydro installed. You can download it from http://nootrix.com/2014/04/virtualized-ros-hydro/.
For this version, the Nootrix team are using torrent to download the virtual machine; I tried this way to download the file and it works perfectly.
You can find different virtual machines with Ubuntu and ROS preinstalled, but we are going to use this version because it is referred to in the official pages of ROS.
Creating the virtual machine
Creating a new virtual machine with the downloaded file is very easy; just proceed with the following steps. Open VirtualBox and click on File | Import Appliance. Then click on Open appliance and select the ROSHydro.ova file downloaded earlier:

In the windows that follow, you can configure the parameters of the new virtual machine. Keep the default configuration and change only the name for the virtual system. This name is how you distinguish this virtual machine from others. Our recommendation is to put a descriptive name, in our case the name of this book:

Click on the Import button, and accept the software license agreement in the next window. You will see a progress bar. It means that VirtualBox is copying the file with the virtual image, and it is creating a new copy with the new name.
Notice that this process doesn't modify the original file ROS.ova, and you could create more virtual machines with different copies from the original file.
The process will take a few minutes depending on your computer. When it finishes, you can start your virtual machine by clicking on the Start button. Remember to select the right machine before you start it. In our case, we only have one but you could have more:

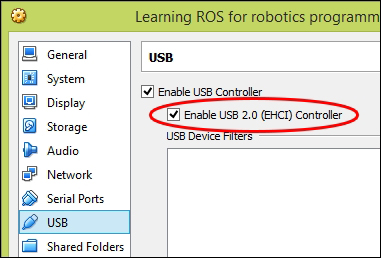
Sometimes, you will get an error as shown in the following screenshot. It is because your computer doesn't have the correct drivers to use the USB 2.0 controller. You can fix this by installing the Oracle VM VirtualBox Extension Pack, but you can also choose to disable the USB support to start using the virtual machine:

To disable the USB support, right-click over the virtual machine and select Settings. In the General tab, click on Ports | USB and uncheck the Enable USB 2.0 (EHCI) Controller, as shown in the following screenshot. Now you can restart the virtual machine and it should start without any problems.

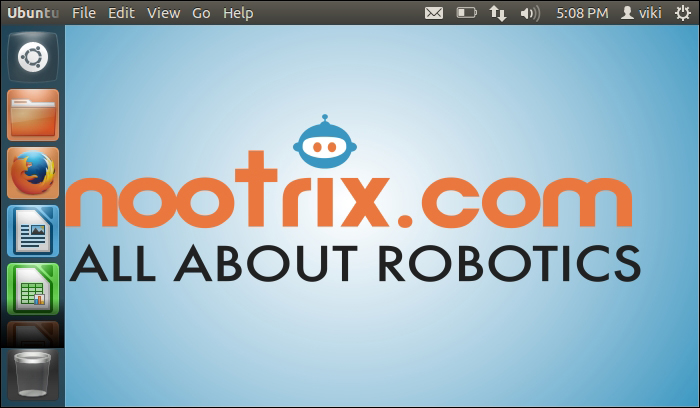
Once the virtual machine starts, you should see the next window as seen in the following screenshot. It is the Ubuntu 12.04 OS with ROS installed:

When you finish these steps, you will have a full copy of ROS Hydro that can be used along with this book. You can run all the examples and stacks that we are going to work with. Unfortunately, VirtualBox has problems when working with real hardware, and it's possible that you may not be able to use this copy of ROS Hydro with the examples given in Chapter 4, Using Sensors and Actuators with ROS.


