Navigating the IBM Quantum Experience
As mentioned earlier, the dashboard is your high-level view of what you will normally see once you log in to IQX. It aggregates multiple views that you can see, and this helps you to get an idea as to what machines you have access to and what experiments you have pending, running, or completed.
In this section, we will go through the steps to get registered on IQX. Let's do that in the next section.
Registering to the IBM Quantum Experience
In this section, we will get registered and explain what happens in the background once you sign up to IQX for the first time. This will help you understand what features and configurations are prepared and available to you upon registration.
To register to the IBM Quantum Experience, follow these steps:
- The first step is to head over to the IBM Quantum Experience site at the following link: https://quantum-computing.ibm.com/
- Sign-in to your account from the login screen, as shown in Figure 1.1. Your individual situation will determine how to proceed from there.
If you already have an account or are already signed in, you can skip this section and move on to the next one.
If you have not registered, then you can select the login method of your choice from the sign-in screen. As you can see, you can register using various methods, such as with your IBM ID, Google, GitHub, Twitter, LinkedIn, or by email.
If you do not have any of the account types listed, then you can simply register for an IBMid account and use that to sign in:

Figure 1.1 – The IBM Quantum Experience sign-in page
- Once you select the login method of your choice, you will see the login screen for that method. Simply fill out the information, if it's not already there, and select login.
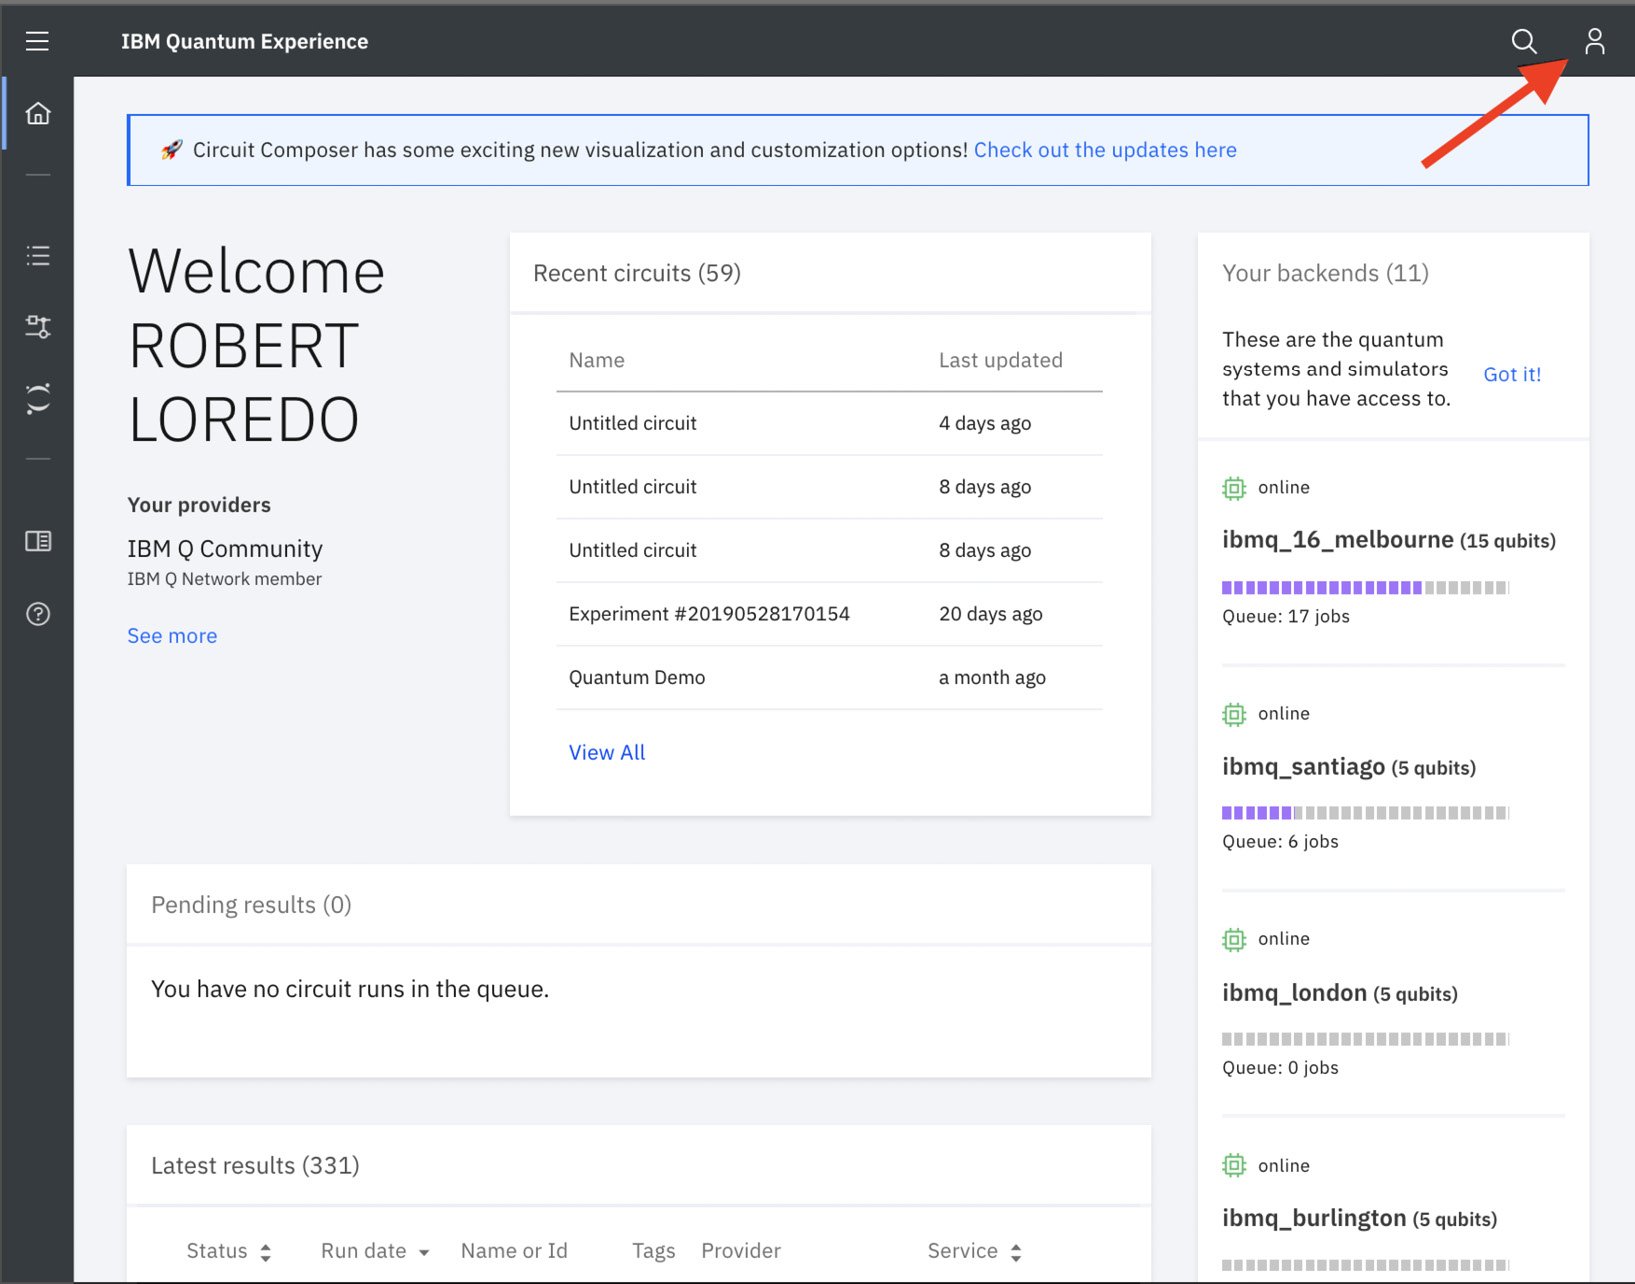
- Once signed in, you will land on the Home page. This is the first page you will see each time you log in to the IBM Quantum Experience site:

Figure 1.2 – The IBM Quantum Experience home page
Now that you have registered to the IBM Quantum Experience, let's take a quick tour and delve into some features that make up the IQX home page. Let's start by reviewing the home page, specifically the Personal profile tab. You can access your personal profile via your avatar, located at the top right of the page (as pointed out in Figure 1.2).
Understanding the Personal profile tab
This section explains the profile of the logged-in user. This is helpful if you have multiple accounts and you wish to keep track of them. The provider limits the number of jobs that can be executed or queued on a given device at any one time to a maximum, as specified in the documentation. There are many ways to access all the various quantum devices; those listed in the open group will see all freely available quantum devices, as illustrated along the right side of Figure 1.2. For those who are members of the IBM Q Network, you will have access to the open devices, as well as premium quantum devices such as the 65 qubit quantum computer.
Now that you have completed the sign-up process and successfully logged in, we can start off by taking a tour of the IBM Quantum Experience application. This will be where most of the work within this book will take place, so it will benefit you in understanding where everything is so that you can easily make your way around it while developing your quantum programs.


