Establishing a code-signing environment
In some environments, it can be important to know that a program or PowerShell script has not been modified since it was released. You can achieve this with PowerShell scripts by digitally signing the script and by enforcing an execution policy of AllSigned or RemoteSigned.
After you digitally sign your script, you can detect whether any changes were made in the script since it was signed. Using PowerShell's execution policy, you can force PowerShell to test the script to ensure the digital signature is still valid and to only run scripts that succeed. You can set PowerShell to do this either for all scripts (you set the execution policy to AllSigned) or only for scripts you downloaded from a remote site (you set the execution policy to RemoteSigned).
One thing to remember—even if you have the execution policy set to AllSigned, it's trivial to run any non-signed script. Simply bring the script into PowerShell's ISE, select all the text in the script, then run that selected script. And using the Unblock-File cmdlet allows you to, in effect, turn a remote script into a local one.
Signing a script is simple once you have a digital certificate issued by a Certificate Authority. You have three options for getting an appropriate certificate:
Use a well-known public Certificate Authority such as Digicert (see https://www.digicert.com/code-signing) for details of their code-signing certificates).
Use an internal CA and obtain the certificate from your organization's CA.
Use a self-signed certificate.
Public certificates are useful but are generally not free. You can easily set up your own CA, or used self-signed certificates. Self-signed certificates are great for testing out signing scripts and then using them. All three of these methods can give you a certificate that you can use to sign PowerShell scripts.
Getting ready
Run this recipe on the Windows 10 client (CL1) you used in the earlier Installing RSAT Tools on Windows 10 and Server 2019 recipe.
How to do it...
Create a code-signing, self-signed certificate:
$CHT = @{
  Subject           = 'Reskit Code Signing'
  Type              = 'CodeSigning'
  CertStoreLocation = 'Cert:\CurrentUser\My'
}
$Cert = New-SelfSignedCertificate @CHT
View the newly created certificate:
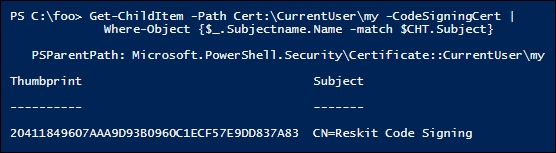
Get-ChildItem -Path Cert:\CurrentUser\my -CodeSigningCert |
  Where-Object {$_.Subjectname.Name -match $CHT.Subject}
Create a simple script:
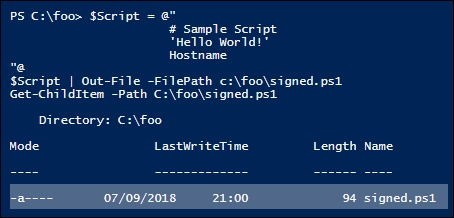
$Script = @"
  # Sample Script
  'Hello World!'
  Hostname
"@
$Script | Out-File -FilePath C:\Foo\signed.ps1
Get-ChildItem -Path C:\Foo\signed.ps1
Sign the script:
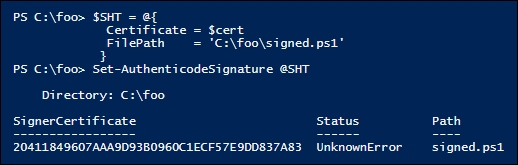
$SHT = @{
  Certificate = $Cert
  FilePath    = 'C:\Foo\signed.ps1'
}
Set-AuthenticodeSignature @SHT -Verbose
Look at the script after signing:
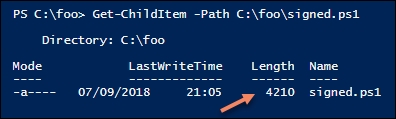
Get-ChildItem -Path C:\Foo\signed.ps1
Test the signature:
Get-AuthenticodeSignature -FilePath C:\Foo\signed.ps1 |
  Format-List
Ensure the certificate is trusted:
$DestStoreName  = 'Root'
$DestStoreScope = 'CurrentUser'
$Type = 'System.Security.Cryptography.X509Certificates.X509Store'
$MHT = @{
  TypeName = $Type
  ArgumentList  = ($DestStoreName, $DestStoreScope)
}
$DestStore = New-Object  @MHT
$DestStore.Open(
  [System.Security.Cryptography.X509Certificates.OpenFlags]::
    ReadWrite)
$DestStore.Add($cert)
$DestStore.Close()
Re-sign with a trusted certificate:
Set-AuthenticodeSignature @SHT | Out-Null
Check the script's signature:
Get-AuthenticodeSignature -FilePath C:\Foo\signed.ps1 |
  Format-List
How it works...
In step 1, you create a self-signed code-signing certificate which you store in the current user's personal certificate store (also known as Cert:\CurrentUser\My). Since you store the certificate in $Cert, there is no output from this step. In step 2, you examine the code-signing certificates in the current user's personal certificate store, like this:
In step 3, you create a very simple PowerShell script, which you store in C:\Foo\Signed.ps1. Then you display the file's details, like this:
Now that you have a script, in step 4 you sign it. Note that this generates a status error of UnknownError (which means the signing certificate is not trusted). The output of this step looks like this:
In step 5, you view the script file and note the file is considerably larger (due to the length of the digital signature), which looks like this:
In step 6, you test the script to validate the signature, like this:
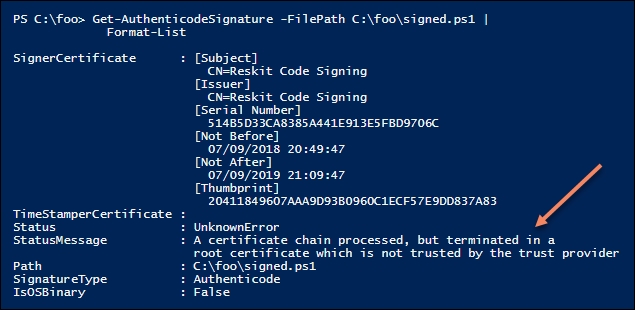
As you can see, the underlying reason for the UnknownError status is that the signing certificate is not trusted. You can configure Windows to trust your signed certificate by copying your self-signed certificate into the Root CA store (either for the current user or for the computer).
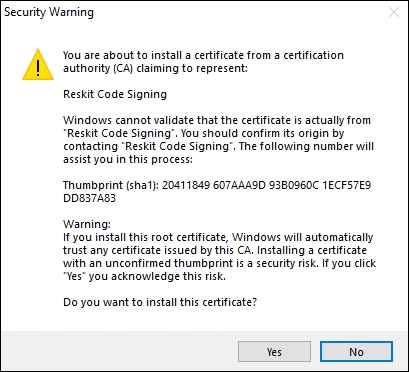
In step 7, you copy your self-signed certificate into the current user's Root CA store, using the .NET Framework. Copying a certificate into the root store produces no console output, but does generate a pop-up message, which looks like this:
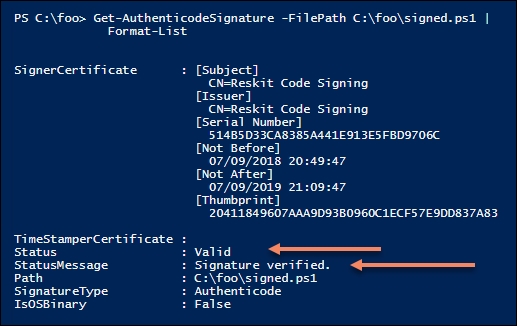
Now that the signing certificate is trusted, in step 8 you re-sign the script, which produces no output. In step 9, you test the re-signed script, as shown here:
There's more...
PowerShell's certificate provider does not support copying a certificate into the root CA store. You can overcome this limitation by dipping down into the .NET framework as shown in step 7, although this does generate a pop-up dialog box as shown previously.
Once you complete the steps in this recipe, you can experiment with an execution policy and make changes and observe the results. After signing the script, for example, as you did in step 8, try updating the script and running it with an execution policy set to AllSigned.
Establishing a secure code-signing environment can be a lot of work. Once you have the code-signing certificate, you need to keep it secure (for example on a smart card that is locked in a safe with highly limited access). Then you need procedures to enable the organization's scripts to be signed. Creating the infrastructure to manage the whole process, including dealing with the smart cards and the safe, is possibly overkill for many.
If you release PowerShell scripts commercially or publicly (for example via GitHub or PSGallery), signing what you publish is probably a good thing to do, preferably with a public CA-issued certificate.
See https://www.globalsign.com/en/blog/the-importance-of-code-signing-redux for some thoughts on the importance of code signing in general.
Whether or not you deploy code signing, it's useful to know how to do it.