UDF libraries
MySQL comes with a small utility called mysql_config, which aids the supply of some of the required options to your compiler. In most cases you need:
shell$ mysql_config --cflags
This will print something such as the following:
-I/opt/mysql-5.1/include/mysql -g -Wreturn-type -Wtrigraphs -W -Wformat -Wsign-compare -Wunused-function -Wunused-value -Wunused-parameter -m64 -DUNIV_LINUX
Both MySQL plugins and UDFs need to be compiled as shared libraries. How this is done depends on the platform.
Linux
Under Linux, UDFs should be compiled as follows:
gcc -o udf_library.so udf_library.c `mysql_config --cflags` -shared -fPIC
The mysql_config in backticks will apply the results for the command as switches to gcc, so the include directories as well as other required build options are automatically inserted. The -shared option tells the compiler that we are creating a shared library and ‑fPIC enables Position Independent Code, which is required for dynamic linking of this shared library.
Mac OS X
Compiling on Mac OS X is very much like compiling on Linux, but the way shared libraries are defined is slightly different:
gcc -o udf_library.so udf_library.c `mysql_config --cflags` -bundle
A bundle is the Mac OS X equivalent of a shared library. If the UDF needs to call functions in the server binary (for example, if it uses the DBUG debugging facility) the command line will need to be:
gcc -o udf_library.so udf_library.c `mysql_config --cflags` -bundle -Wl,-undefined -Wl,dynamic_lookup
Windows
Setting up for compiling UDFs in Windows is generally more involved than in other operating systems.
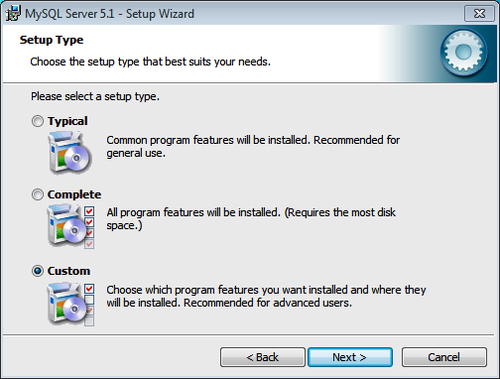
As everywhere, we need to have the required libraries and include files installed. To do this we run the MySQL installer. If you already have MySQL installed, you can use this tool to modify your installation. The following screenshot shows that we have selected Custom to do this, but a complete install will also give the required files:
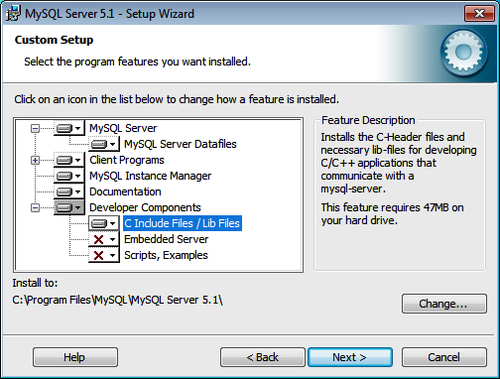
Now we need to select Developer Components and then C Include Files / Lib Files to have them included in the installation. Once this is done the installer should look similar to this:
Also, you need to have Microsoft Visual Studio installed. There are free express editions available from the Microsoft website, which we can use.
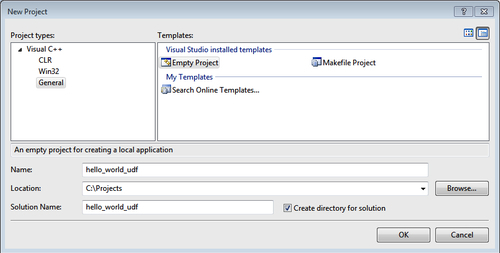
In Visual Studio we need to create a new empty project to put our source code into and set up the build environment:
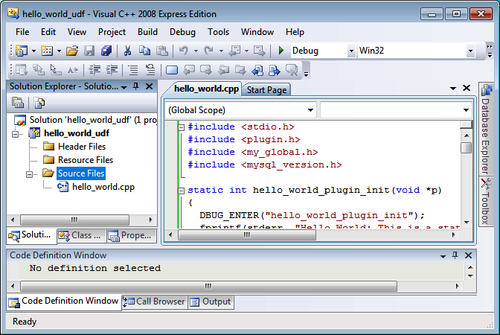
Then we need to add a source file to this project. We can either create a new .cpp file or add an existing one to a project:
Now we need to modify the project properties to set up everything required to compile the UDF. To start with, inside the General configuration section, we need to set the Configuration Type to a .dll file (a Windows dynamic link library):
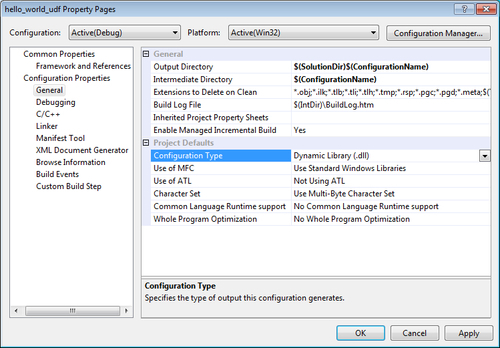
Then in the C/C++ section we need to add the MySQL include path to Additional Include Directories:
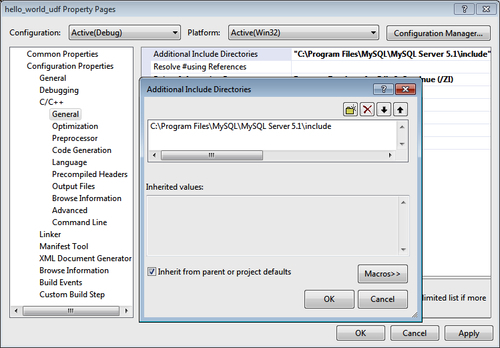
Finally, we need to create a definitions file that lists the functions from this library which we wish to export for MySQL to use. It may look as follows:
EXPORTS
udf_hello_world
udf_hello_world_init
udf_hello_world_deinit
This is then added to the Linker configuration in the Input section under Module Definition File. This gives a hand-typed dialog, so we need to type in the full path to the definitions file we just created:
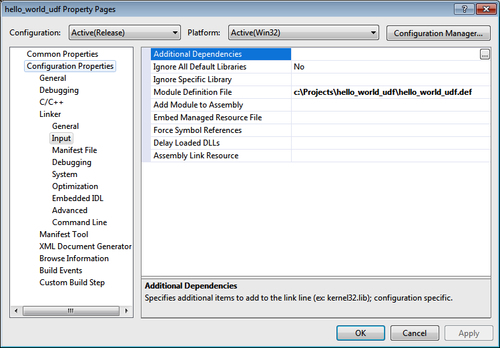
We can then compile our UDF and, if successful, we will have a brand new .dll file:
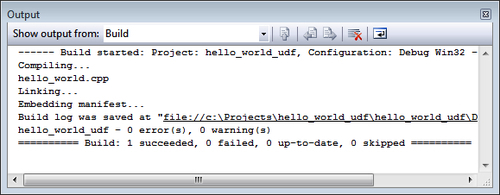
Installing a UDF
Now that we have our UDF, we need to install it in the MySQL server. For security reasons MySQL will only load plugins and UDFs from the location defined in the plugin_dir system variable. This variable can only be set during the startup of the MySQL server. By default it is in the lib/mysql/plugin subdirectory inside the directory where MySQL is installed. So we need to put our UDF library there.
We can then tell MySQL to load the library using:
CREATE FUNCTION my_udf_function RETURNS STRING SONAME 'my_udf_function.so'
More details on how to use this syntax and how to solve UDF loading errors are in the UDF chapter of this book.


