To configure private and public DNS zones from the Azure portal, you have to take the following steps:
- Navigate to the Azure portal by opening https://portal.azure.com.
- Click Create a resource in the left menu and type DNS Zone in the search bar. Create a new DNS zone.
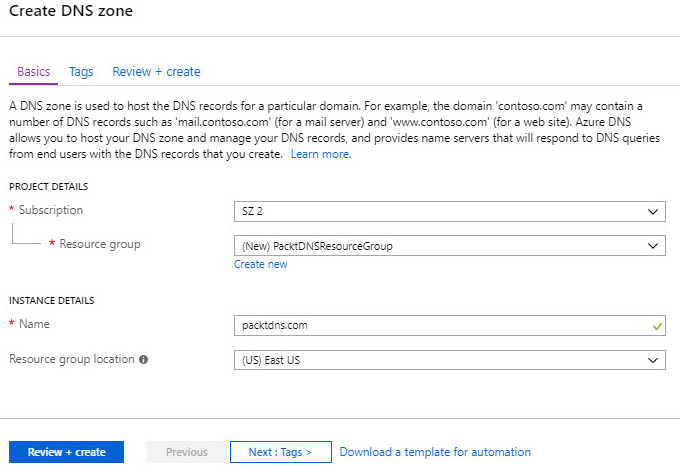
- Add the following values to create a new DNS zone:
- Subscription: Select a subscription.
- Resource group: Create a new one, and call it PacktDNSResourceGroup.
- Name: packtdns.com.
- Resource group location: (US) East US:

Creating a new DNS zone
- Click Review + create.
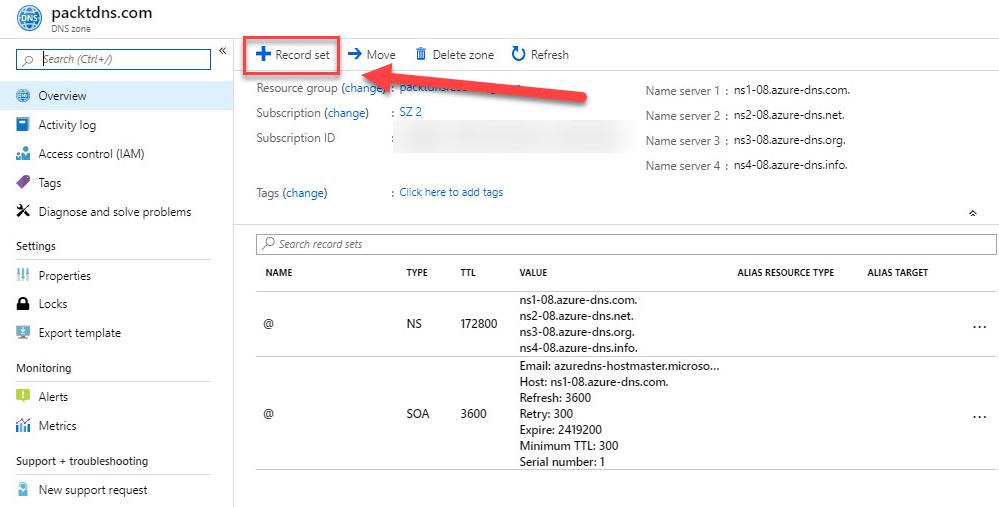
- When the resource is deployed, you can add DNS records to it. From the overview page, in the top menu, select + Record set:

Adding a new record
- To create an A record, add the following values:
- Name: www.
- Type: Select A.
- TTL: Type 1. The Time-to-live (TTL) parameter of the DNS request specifies for how long DNS servers...


