Navigating the 3D Viewport
The 3D Viewport is where you interact with 3D. You’ll need to see your 3D models from all sides as you work, so it’s important to learn how to navigate in 3D. You’ll learn how to pan, orbit, and zoom your way around.
This basic navigation is easy to master, and won’t take you very long. You’ll become very good at this the more you use Blender, since you have to navigate in 3D to accomplish anything in 3D.
Moving around
Navigating in the 3D Viewport is extremely intuitive. It’s a bit different depending on whether you’re using a mouse or a trackpad.
With a trackpad, you simply scroll with two fingers (in any direction) to orbit in the 3D Viewport, and to pan, move two fingers around while holding down the Shift key.
That’s orbiting and panning. To zoom in and out, you have two options: spread two fingers closer together or further apart on your trackpad (like zooming in and out on a smartphone), or hold down the Ctrl key and scroll up and down with two fingers.
Simple, right?
Now, if you’re using a real mouse (fun fact: I’m not), you can click and drag with the middle mouse button to orbit, scroll to zoom, and press Shift + middle mouse button to pan.
These controls will seem difficult at first, but as you do more Blender work, they’ll become natural.
Numpad controls
Sometimes, you’ll want to view a 3D model exactly from the side, the top, or the front. In Blender, there are two ways to do this.
Do you see the little 3D cross in the upper-right corner of the viewport, as shown in Figure 1.8? That’s called the Gizmo, which is like a little 3D compass:
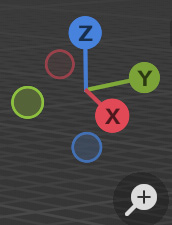
Figure 1.8 – The Gizmo
It’s labeled with letters: X (red), Y (green), and Z (blue). In 3D, just like in reality, there are three spatial dimensions (think about the width, depth, and height of a cube). In Blender, these are called X, Y, and Z:
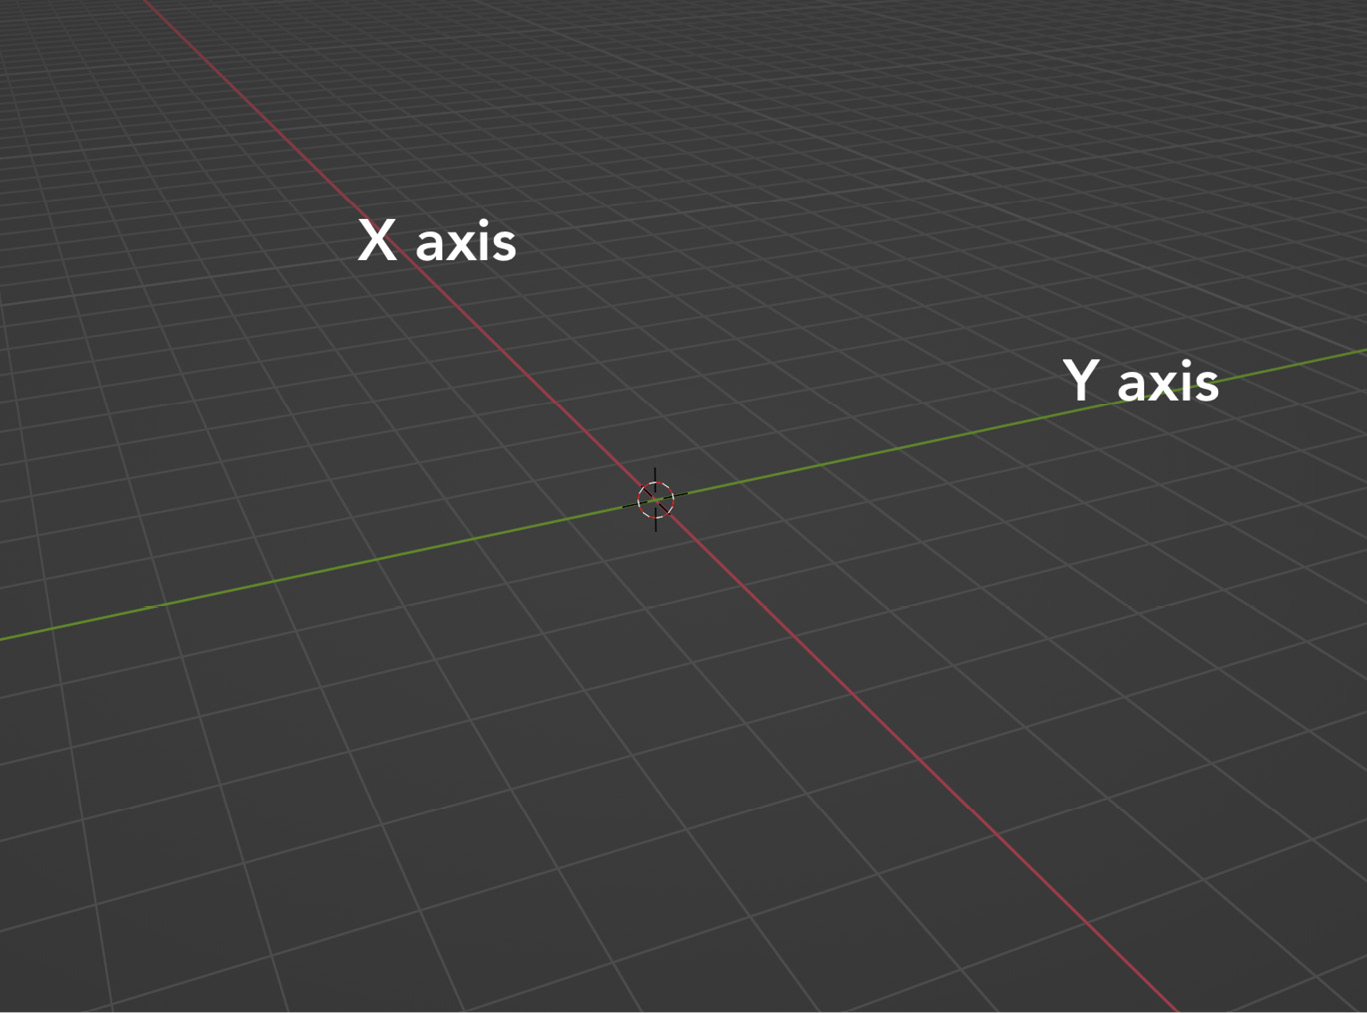
Figure 1.9 – The X and Y axes
As shown in Figure 1.9, X axis is displayed as red. The green line represents Y axis. The color blue is used to represent the Z axis, which runs in the vertical, up-and-down direction. You’ll notice there’s no blue line representing the Z axis . That’s to avoid cluttering the viewport more than is needed.
If you ever need a reminder of any of this, simply look at the little Gizmo in the corner.
Now it’s time to learn your first keyboard shortcuts. But before that, you’ll need to turn on something called Emulate Numpad (if you have an actual numpad on your keyboard, you won’t need to do this):
- Go to Edit | Preferences:
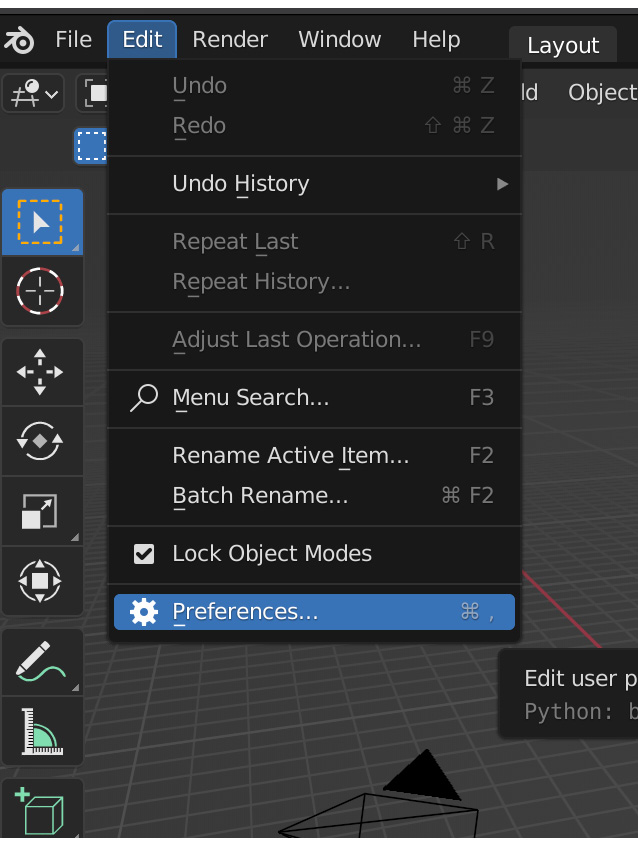
Figure 1.10 – The Preferences menu
- Find the Input tab:
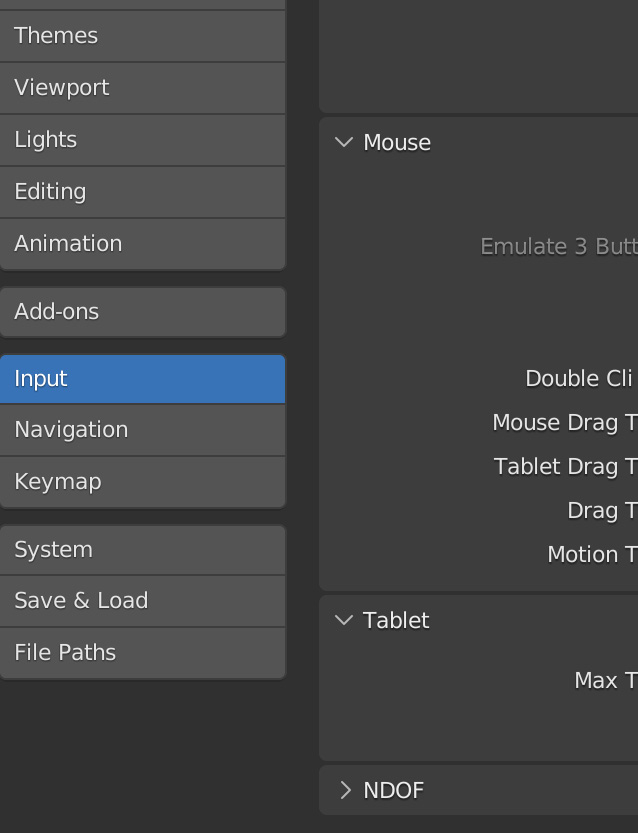
Figure 1.11 – The Input tab
- Turn on Emulate Numpad:

Figure 1.12 – Emulate Numpad
This makes Blender treat your regular number keys as if they were a numpad, which lets you use the viewport shortcuts.
- Close Preferences.
In the viewport, press 1 to get a perfect front view, press 3 to get a perfect right view, and press 7 to get a top view. To see the reverse of these views (back, left, and bottom) press Ctrl + 1, Ctrl + 3, and Ctrl + 7.
There’s another way to do this, too: you can click the little red, green, and blue circles on the Gizmo.
Next, you’ll learn about the Orthographic view mode.
Viewing in Orthographic mode
There are two ways to look at things in 3D. The way you’re looking at your 3D Viewport right now is called Perspective. Perspective is how we view the real world. The farther away something is, the smaller it appears. It’s a very realistic way of viewing things in 3D.
A railroad track is a good example; the further away the rails are, the closer together they appear to be. Take a look at Figure 1.13:
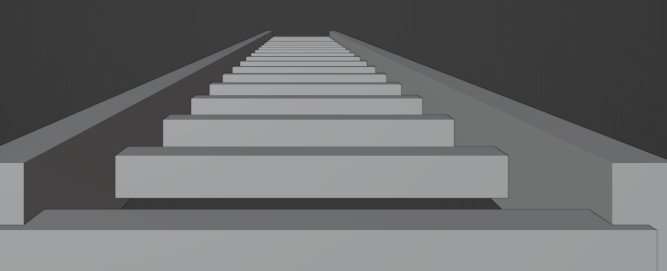
Figure 1.13 – A railroad, viewed in Perspective mode (same as real life)
There’s another, different way to view the world in 3D, called Orthographic. When you view your Scene in Orthographic mode, everything is consistent in size, no matter how far away it is.
To enable Orthographic mode, press 5 on your numpad. Here’s the same railroad track in Orthographic mode:
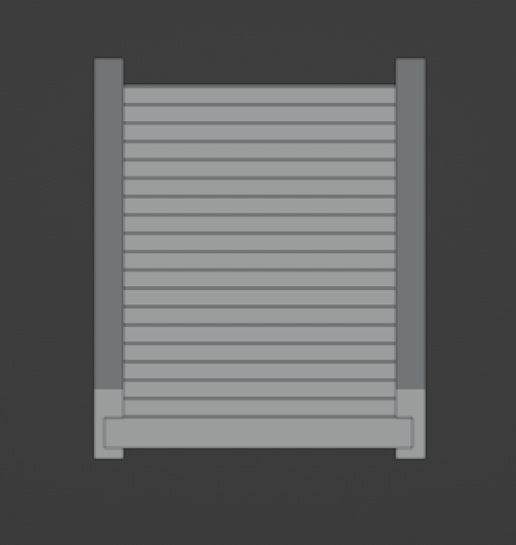
Figure 1.14 – The same railroad in Orthographic mode
This can sometimes be useful when you need to get a better look at something (for example, to get a good look at the overall shape of a model). You probably won’t use it much—but it’s an option.
Now you know the most important keyboard shortcuts for navigating the 3D Viewport. You’ll find these extremely helpful for working quickly and efficiently as we progress.
In the next section, you’ll learn some more helpful shortcuts.


