Now that you've installed PDI, you're ready to start working with the data. That will be possible only inside a graphical environment. PDI has a desktop designer tool named Spoon. Let's launch Spoon and see what it looks like.
Launching the PDI Graphical Designer - Spoon
Starting and customizing Spoon
Spoon is PDI's desktop design tool. With Spoon, you design, preview, and test all your work, that is, transformations and jobs. When you see PDI screenshots, what you are really seeing are Spoon screenshots. The other PDI components, which you will learn about in the following chapters, are executed from Terminal windows.
Here is how you launch the tool:
- Start Spoon. If your system is Windows, run Spoon.bat from within the PDI install directory. In other platforms, such as Unix, Linux, and so on, open a Terminal window and type spoon.sh.
- The main window shows up. The Welcome! window appears with some useful links for you to see:
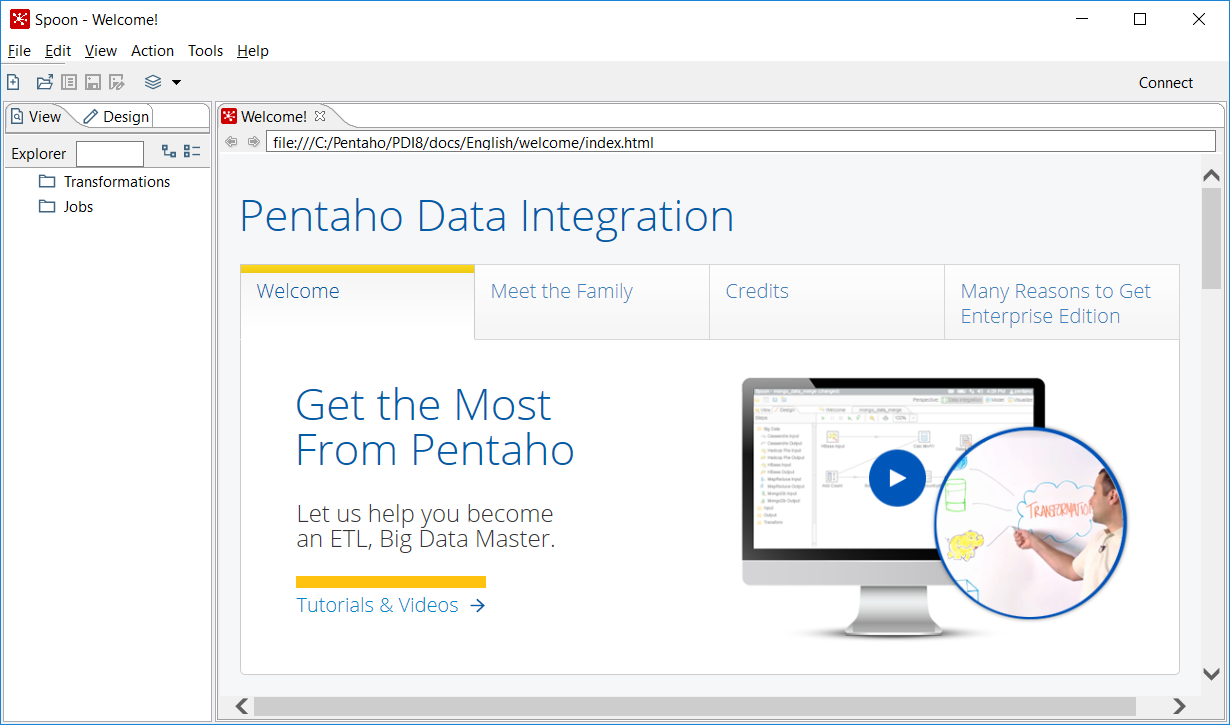
These simple steps would be enough to start working, but before that, it's advisable to customize Spoon to your needs. For doing that:
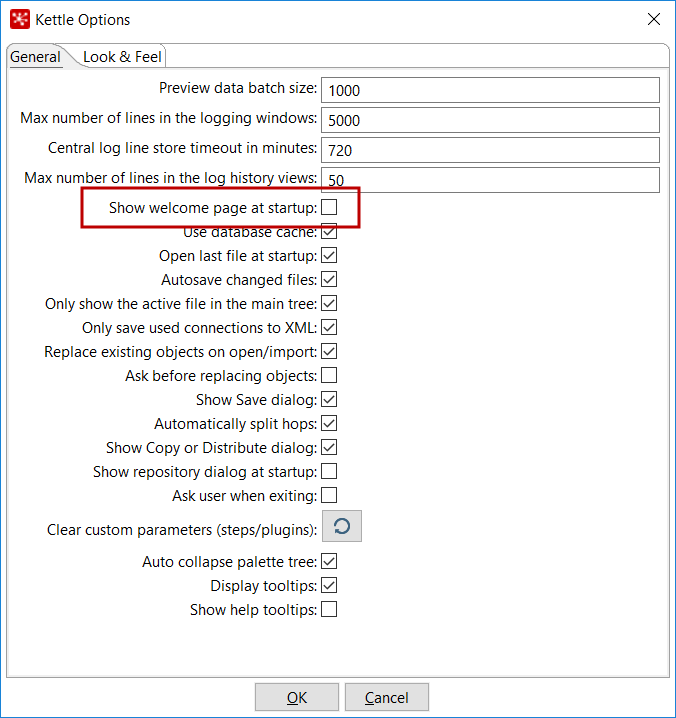
- Click on Options... from the Tools menu. A window appears where you can change various general and visual characteristics. Uncheck the highlighted checkbox, as shown in the following screenshot:
- Select the tab window Look & Feel.
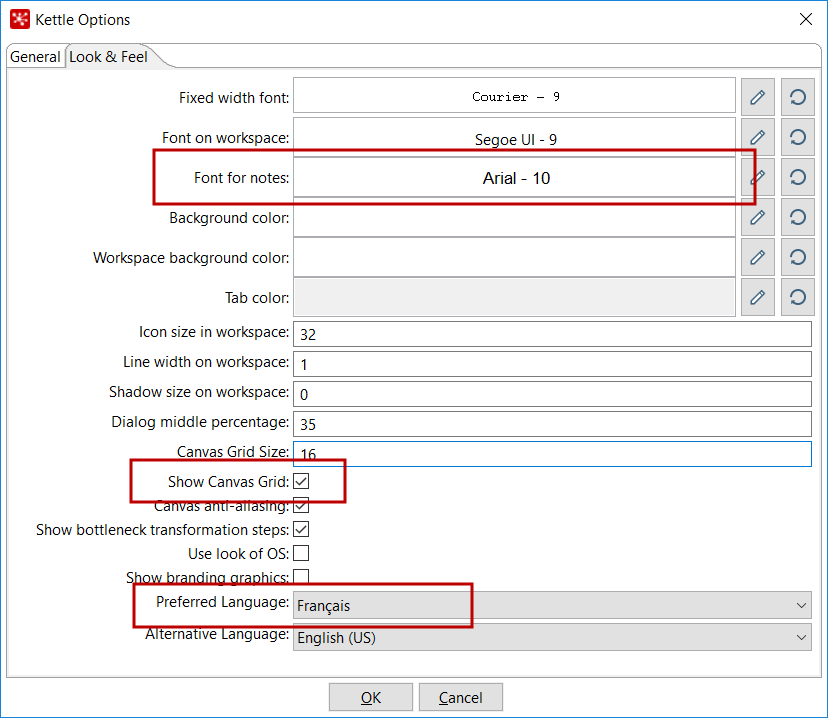
- Change the Font for notes, Show Canvas Grid, and Preferred Language settings as shown in the following screenshot:
- Click on the OK button.
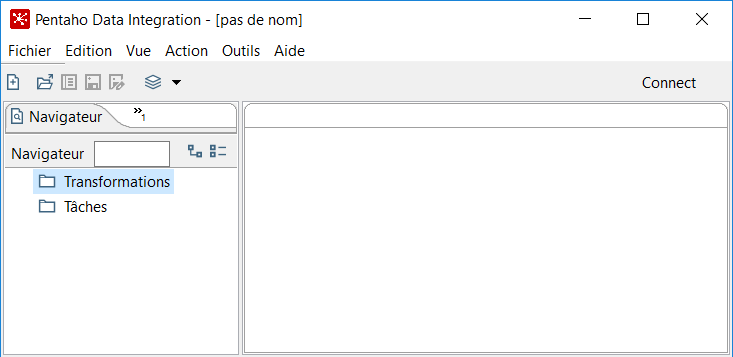
- Restart Spoon in order to apply the changes. You should not see the Welcome! window. You should see the following screenshot full of French words instead:
As you can see, the Options window has a lot of settings. We changed only a few, just to show the feature. Feel free to change the settings according to your needs or preferences.
In particular, take note of the following tip about the selected language.
One of the settings that you changed was the appearance of the Welcome! window at startup. The Welcome! page is full of links to web resources, blogs, forums, books on PDI, and more. Following those links, you will be able to learn more and become active in the Pentaho community. You can reach that window anytime by navigating to the Help | Welcome Screen option.
Exploring the Spoon interface
As explained earlier, Spoon is the tool with which you create, preview, and run transformations. The following screenshot shows you the basic work areas: Main Menu, Main Toolbar, Steps Tree, Transformation Toolbar, and Canvas (Work Area). Note that there is a sample Transformation opened; it allows you to see how the tool looks when you are working with it:
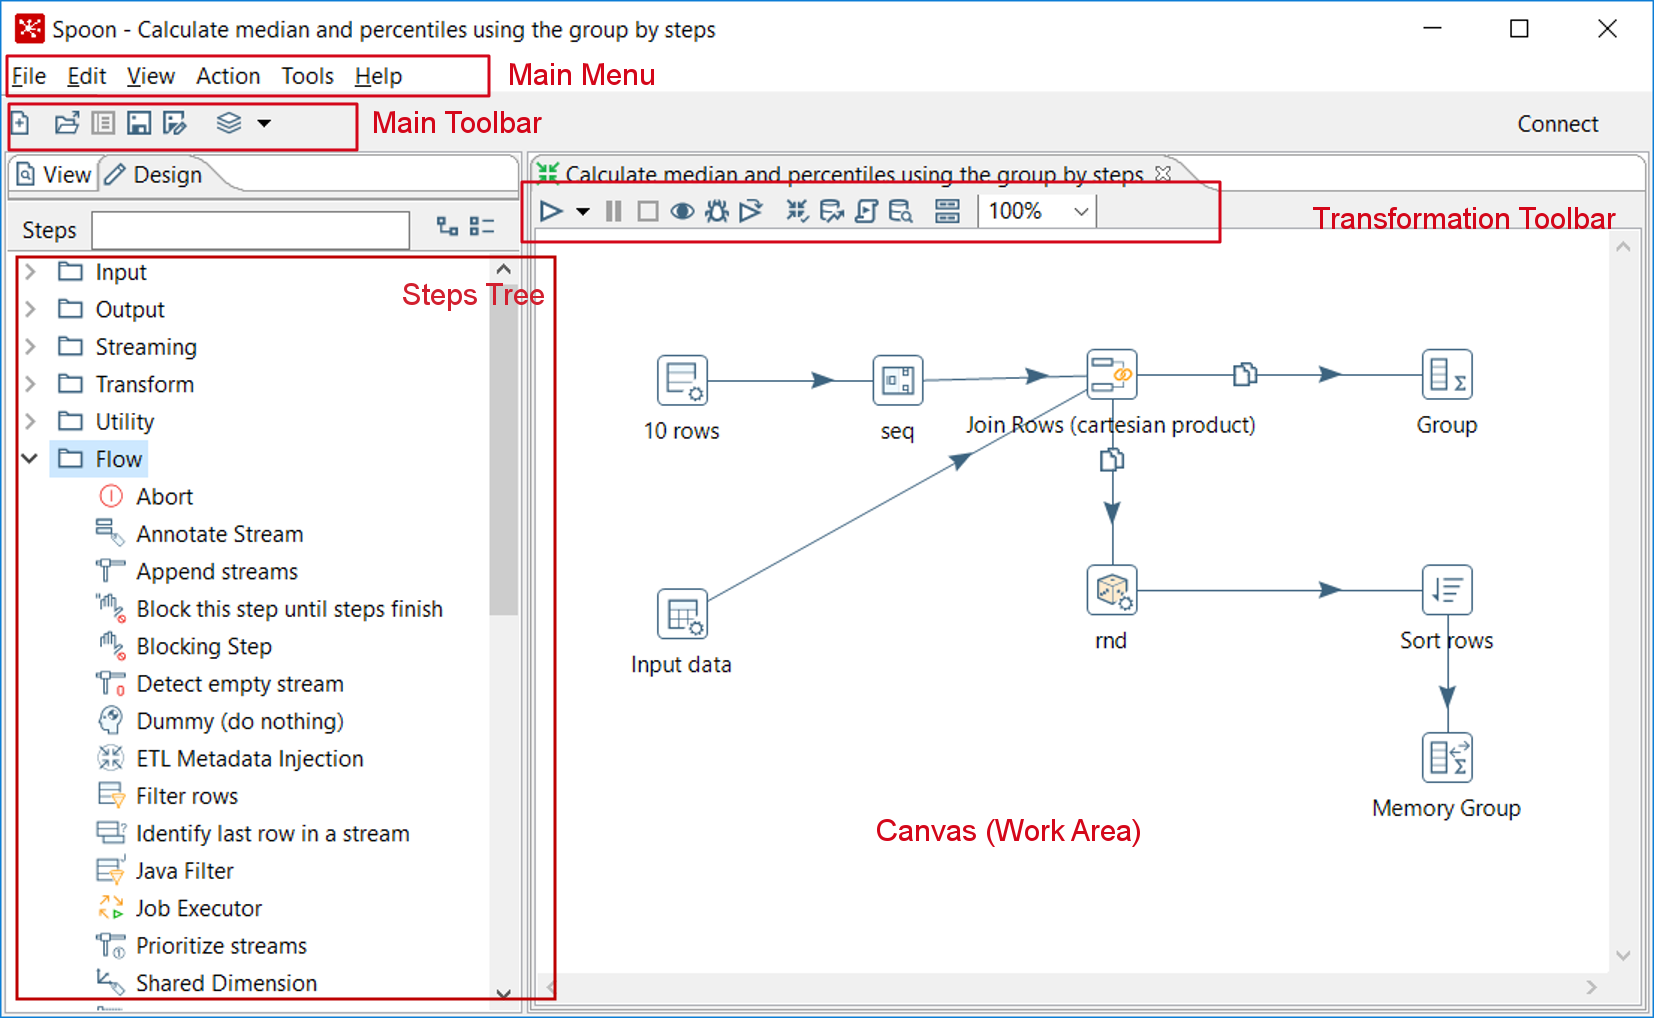
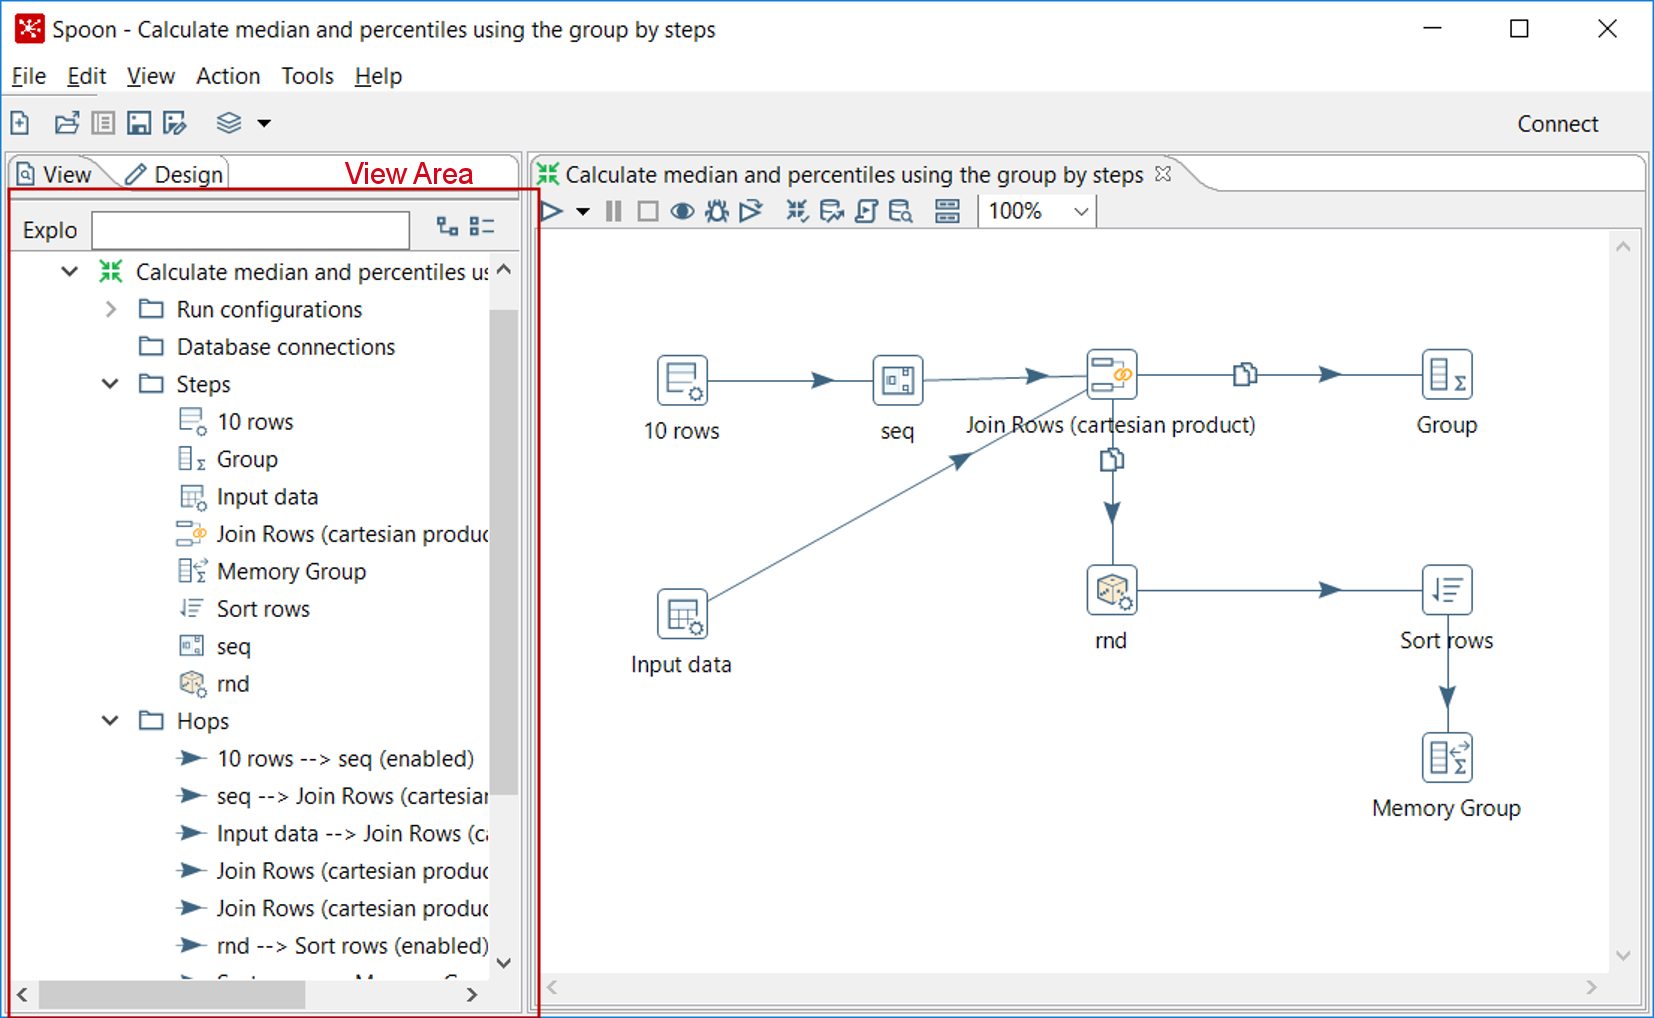
The Steps Tree option is only available in Design view. There is also an area named View that shows the structure of the Transformation currently being edited. You can see that area by clicking on the View tab at the upper-left corner of the screen:
Extending the PDI functionality through the Marketplace
Pentaho Data Integration is built on a pluggable architecture. This means that it can be extended to fulfill needs not included out of the box. The Marketplace—a plugin itself—emerged as a straightforward way for browsing and installing available plugins, developed by the community or even by Pentaho.
In PDI, you will find plugins for connecting to a particular database engine, for executing scripts, for transforming data in new ways, and more. According to the purpose, the plugins are classified into several types: big data, connectivity, and statistics, among others. In particular, there is a type named Experimental, which you will not use except for playing around. There is another type named Deprecated, which we don't recommend you use unless you need it for back compatibility.
An important point to highlight about plugins is the maturity stage. The maturity classification model consists of two parallel lanes:
- Community Lane: For Community and customer-sponsored projects.
- Customer Lane: For projects which are part of the official Pentaho offering. Projects in the Customer Lane can start as projects developed in the Community Lane that create value for Pentaho subscription customers.
There are four stages in each lane. To put it simply, stage 1 means that the plugin is under development (it is usually a lab experiment), while stage 4 indicates a mature state; a plugin in stage 4 is successfully adopted and could be used in production environments. Stages 2 and 3 are stages in between these two.
For a full explanation of the model and the maturity stages, you can refer to https://community.hds.com/docs/DOC-1009876.
That said, let's go back to Spoon. You can access the Marketplace page by clicking on Marketplace from the Tools menu. The page is quite simple, as shown in the following screenshot:
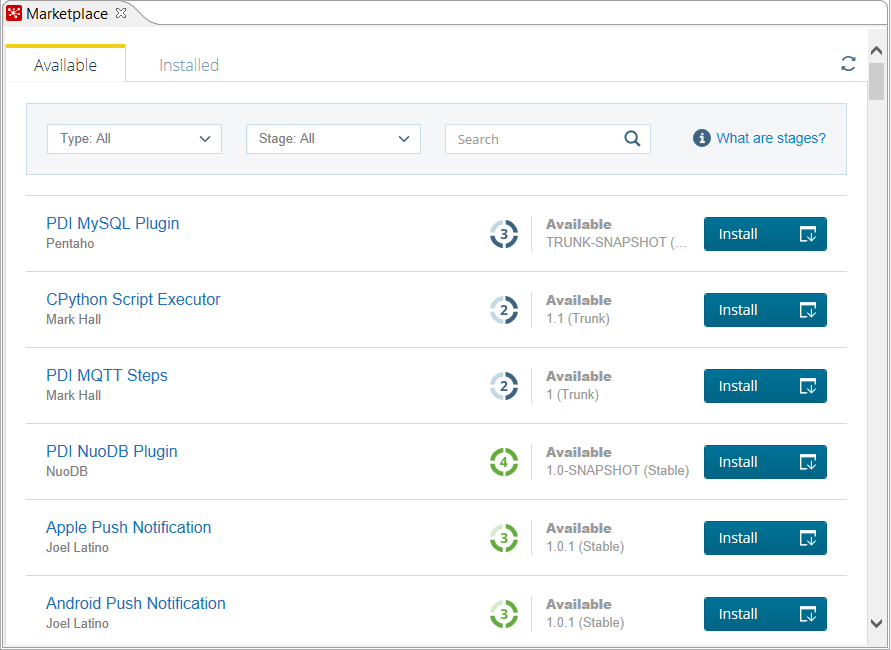
By default, you see the list of all the Available/Installed plugins. There is a secondary tab where you can filter just the installed ones.
Also, you can filter by plugin Type and by maturity Stage. And if you are looking for a particular plugin, there is also a Search textbox available.
Once in the Marketplace page, for every plugin you can see:
- The name
- The author
- The maturity stage
- The status: Available or Installed
- The branch and version
- A button for installing the plugin or a check telling that the plugin is already installed
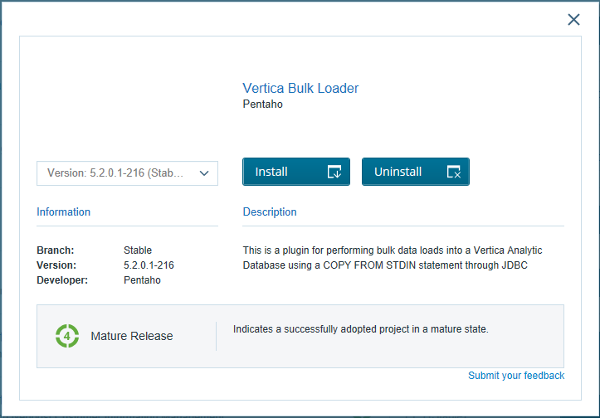
If you click on the plugin name, a pop-up window shows up displaying the full description for the selected plugin, as shown in the following example:
Besides browsing the list of plugins, you can install or uninstall them:
- In order to install a plugin, there is an Install button in the plugin list and also in the pop-up window
- If the plugin is already installed, the pop-up window will also offer the option for uninstalling it, as in the previous example
It's premature to decide if you need to install a plugin for your work. So let's put this subject aside for a while; we will get back to this feature later in the book.


