Blueprint definition assignment is similar to a policy assignment and is covered by the following steps:
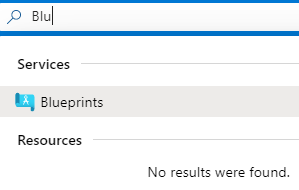
- Use the search box at the top of the portal and search for Blueprints:

Figure 1.14 - Searching for the Blueprints blade
- Then, you will see a welcome screen, where you can get started with the service:

Figure 1.15 - The Blueprints blade
- Click on the Create button under the Create a blueprint section.
- You will see a new screen where you can see various samples. For now, click on the Start with blank blueprint button:

Figure 1.16 - Starting with a blank blueprint
- Provide values for the blueprint name, description, and definition location.
- Add artifacts (roles that will be assigned to resources and resources that will be deployed—in general, side effects of a blueprint assignment) by going to the artifacts tab.
- Save the blueprint definition.
- Click on Publish blueprint, so it will become available for assignment.
- To assign a blueprint, you have to click on the Assign blueprint menu item:

Figure 1.17 - Assigning a blueprint
- Decide whether Lock Assignment should be enabled or not
- Provide all of the mandatory parameters, such as the name of a resource group a blueprint will be assigned to or the configuration of a resource (if you did not provide them when defining the blueprint).
When creating a blueprint definition, you will see a form where you can define your blueprint. The very first thing needed is to provide the following:
- Blueprint name: This field is required to give a blueprint a unique name that will help you to understand what it is about.
- Blueprint description: If you need to add extra information, you can type it here.
- Definition location: This is a place for storing your blueprint.
The form described previously can be seen in the following screenshot:

Figure 1.18 - The Create blueprint form
Under the hood, Azure Blueprints is stored with Azure Cosmos DB for resiliency, low latency, and geo-replication. This gives you the best performance, no matter where your resources are being deployed.
Once you are satisfied with the definition, you can save it. Initially, blueprint's status will be displayed as Draft—as long as it is not published, you can easily modify and adjust it to your needs. To assign it, you will have to click on Publish blueprint so it will become available for assignment:

Figure 1.19 - Publishing a blueprint
Note that publishing a blueprint requires providing a version—this is to allow the versioning of definitions so you can introduce breaking changes without breaking existing setups.
Now, we will learn how to assign an Azure blueprint.


